Showing posts with label 19th century. Show all posts

Thursday, December 17, 2015

Cutaway variation

Another body coat that I cut in Montreal.
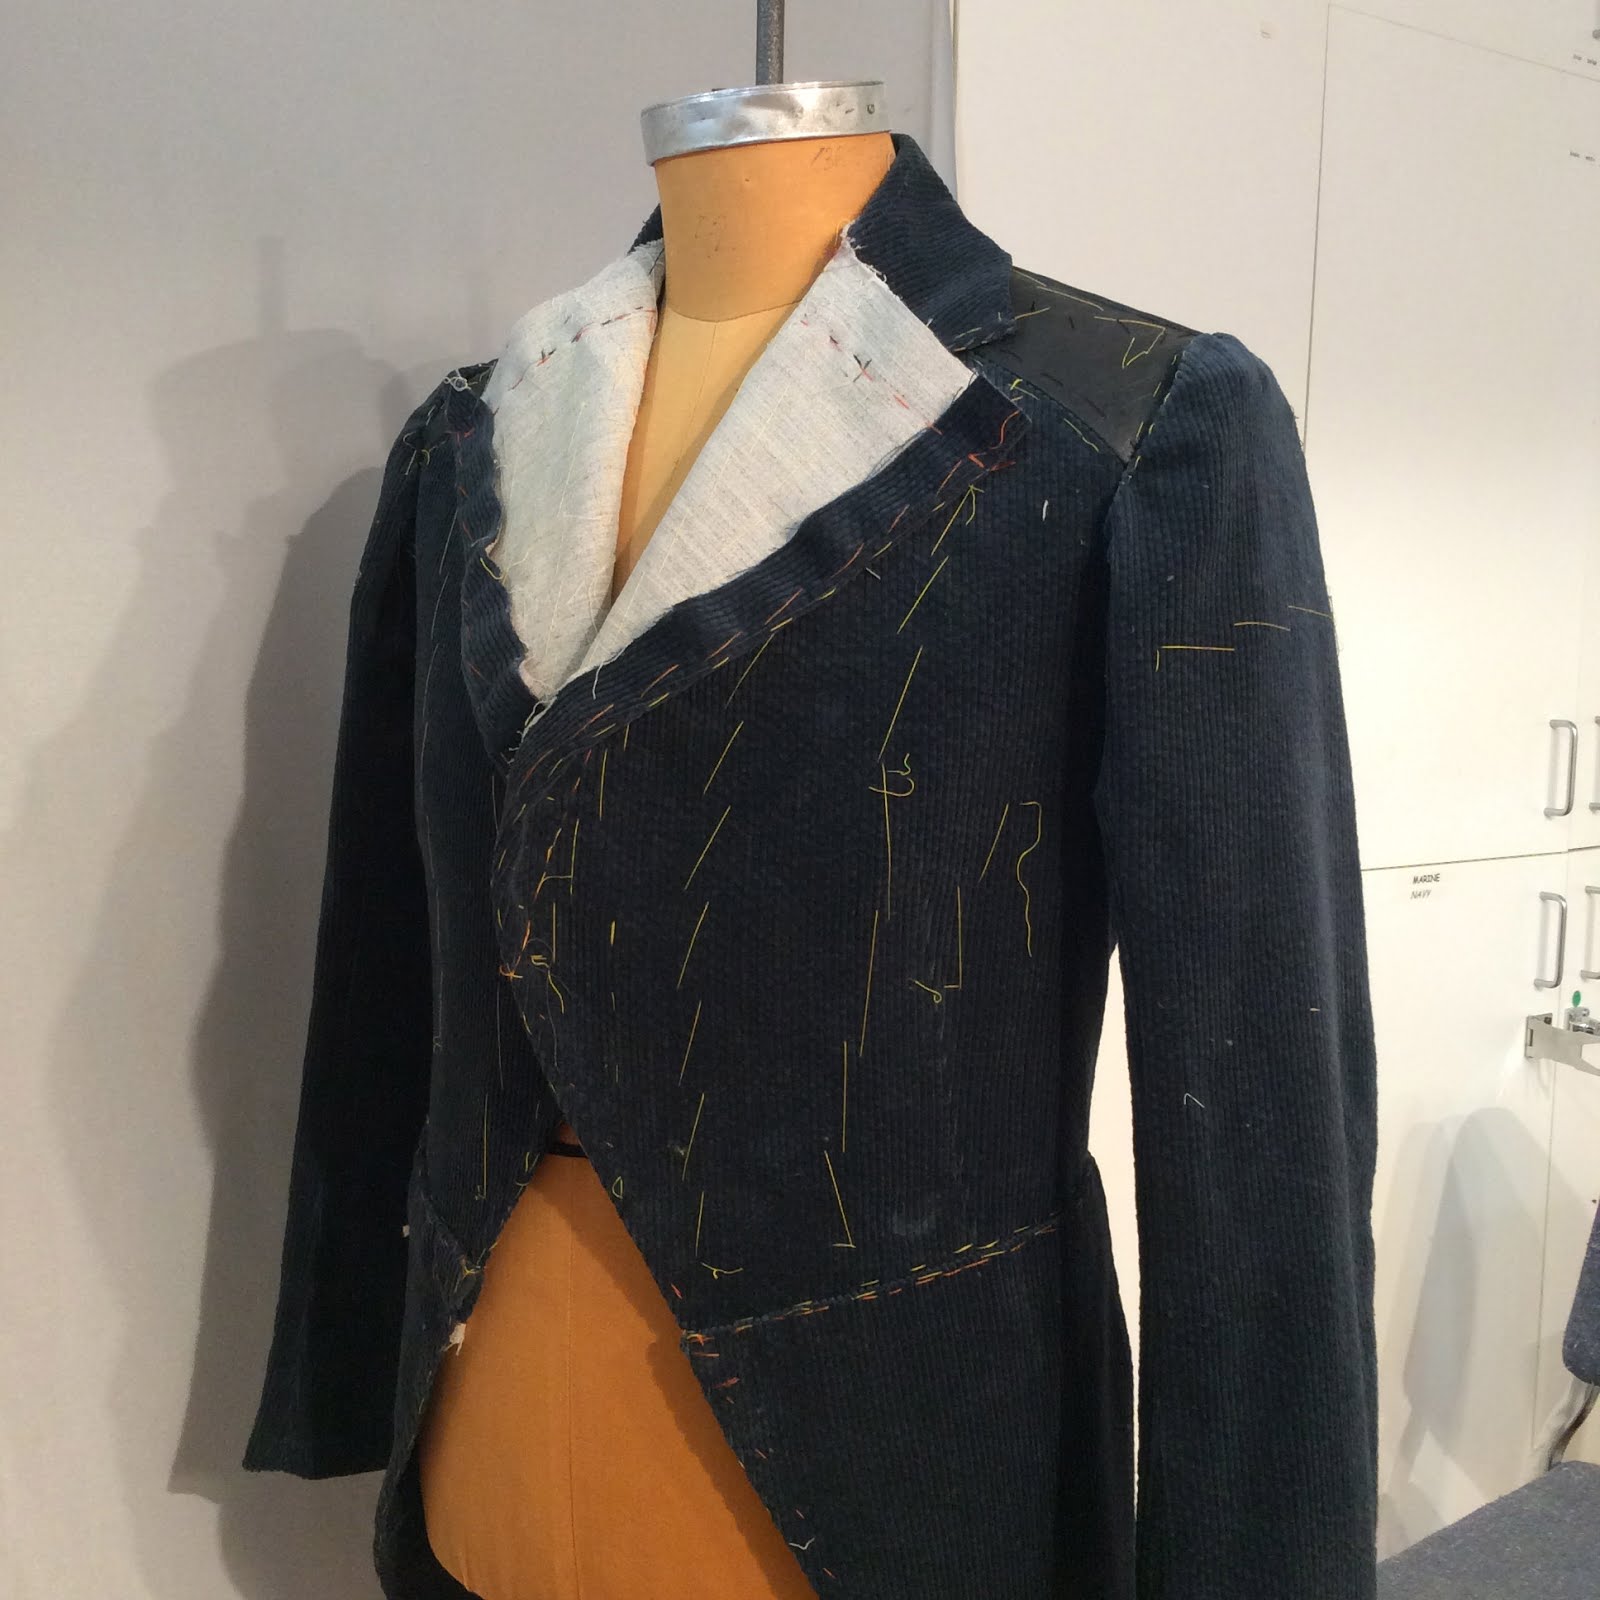
This is a variation on a cutaway that I cut and sewed while in Montreal.


The student designer chose to have a modern twist on an 1870's inspired cutaway coat with inspiration from jeans jacket and motorcycle jacket styling. One of her first ideas was to have an asymmetrical zipper opening as in the motorcycle jacket, but keep the body shaping of a traditional tailcoat. I don't know why she ditched that idea, as I think it could have been quite fun, but in the end she came back to me with the DB 1870's inspiration and the leather yoke.
The back seaming was modified from the traditional so the seams run vertically into the yoke like a jean jacket in a way.
The corduroy for the jacket was luckily (for budget reasons) found in stock and she dyed it this colour. The leather (also found in stock) was a perfect pairing.

She wanted the collar to have quite a tall stand, and a few different inspirations, one of which was a type of modern convertible collar and the other more of an 1830's style. We ended up with more of the 1830's in feel.
I think it is difficult for students and new designers who don't really know how things are constructed to parse out what they really want. They see many pictures but don't quite "get" how particular details work or don't work or whether they can be incorporated successfully.
It is also difficult for me to describe the options of the variations and how they work without making the poor student's eyes glaze over because they really don't understand half of how things work.

In a situation where you are building a show in less than a month, there isn't a lot of time for experimentation either.


Over the month, for the men's wear, I cut and we built the cream frock coat and large described earlier, this cutaway coat, a suit jacket styled vest, a wrap skirt for a man, an asymmetrical tunic in waffle cotton with a period stand collar and strap and buckle closures. There was also a cape that incorporated a pair of exaggerated 4 inch deep pointy shoulder pads with a tulip collar trimmed in feathers, a pair of 1820's style pleated trousers, a pair of drop crotch riding breeches, a pair of ethnic inspired drop crotch trousers, plus alterations to an 18th century coat, a military jacket, and a few other bits and pieces.

We were very busy indeed!


Friday, December 11, 2015

Montreal and more formal wear

Oh, It has been quite a while between posts!
I have just returned from Montreal where the formal wear trend continued.
It must be in the air, or maybe the water, who knows?

First a lovely early morning view from my window. I admit to having a bit of culture shock coming home- where have all the buildings and the people gone now that I am home?


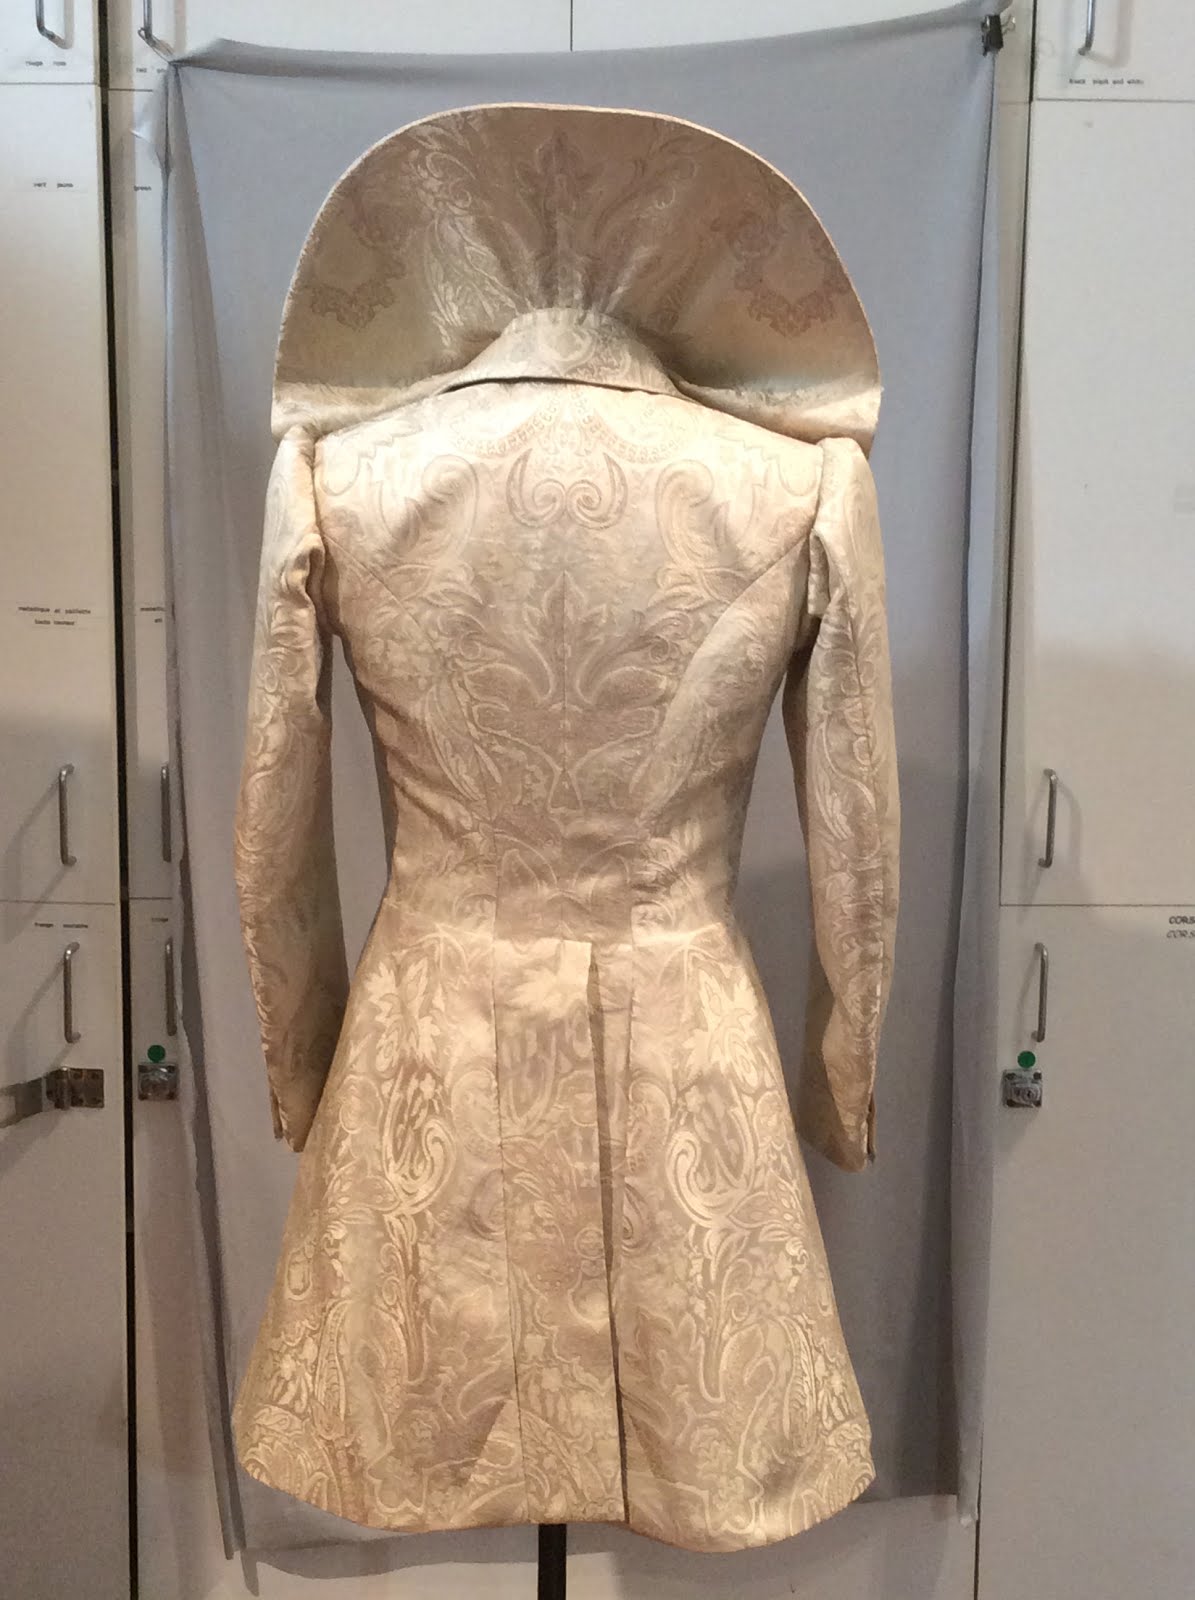
One of the costumes I made happened to cut was this frock coat in a lovely brocade.
It was a good learning experience I think, for the design student. She bought 4 metres of fabric, all that was available in fact, and then we worked it out. I did make a mock up, because I knew there would be no room for error or major changes.

It does not fit the stand quite like it fit the actor, I assure you! He has a much more erect posture hence the extra length showing in the front. The single low button doesn't give a lot of support either. He also wears a Farthingale over it as the Queen, which does complicate things a bit!


The big "collar" is used when the actor appears as "the Queen" and is removable.
It has an inner harness of sorts that stabilizes it on the body, then it snaps into the frock coat to make the two pieces act as one. I should have wired the edge but I didn't want to use hat wire as it can be too easily bent. What I would narmally use is heavy duty fishing line or whipper snipper cable zigged onto the outer edge. I hope it holds up for the run!


It all turned out well in the end, and I just squeaked it all out of 4m of fabric while keeping the patterns matched too!

Saturday, May 30, 2015

week 19 and 20, so far so good.

I think all my "get up and go",  got up and went!

Here we are at the end of week 20 and I have fallen behind in my posting.


Well the table still looks tidy in week 19. The sample modern suit is still hanging around, and I have someone working on the one I cut, getting ready for a fitting. We were just finishing up our understudy costumes, so many fittings were still happening. Sometimes another actor is just the right size to wear someone else's costume, and that saves us time and money when that happens. Occasionally the understudy is no where near the same size as the original actor, but luckily we have 60 + years of stock costumes to find something appropriate. On the rare occasion that nothing fits and nothing is found to be appropriate, we build an understudy costume.  I have been lucky so far this season and nothing has to be built from scratch for the understudy.

That being said, we were still working on the Naval uniform which is the actual costume that will be worn in the show. The actor has a stand in uniform that will do for pre-views until we can sub in the new one.
Here it is in process.


I don't think I got a final photo of this one, so I will have it sent back next week to do so. I was trying to take some pictures of the patterns as well, so in the fall I may have a bit of a pattern show and tell.

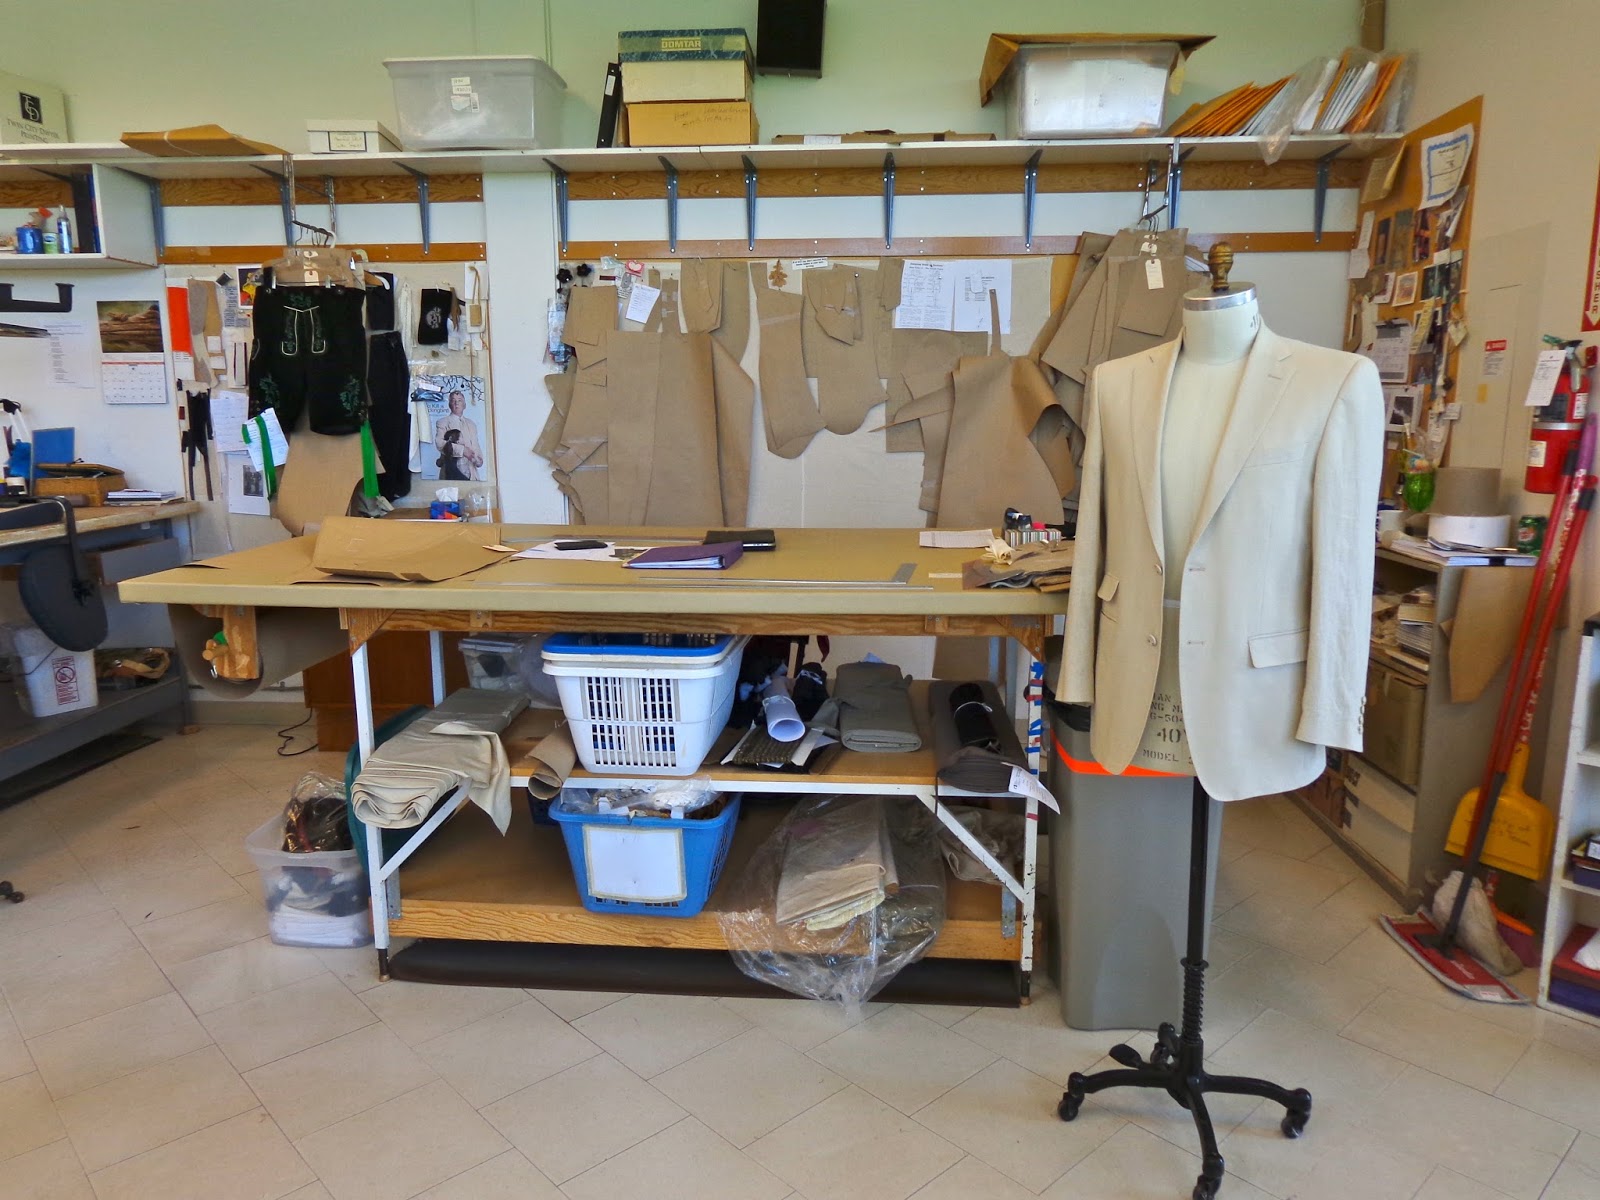
I have also started on one of my next shows which is set in the mid 1600's, and here is my table in week 20.


I confess I feel a bit battered by bouncing back and forth between the centuries sometimes. 
I had the 19 century going on with the Naval coat, still doing fittings and notes on the 18th century show, plus I have a modern mid 20th century suit to make and now the mid 17th century plus an Elizabethan show to start next week.

Enough for now, it has been an intense few months of work and a few more months are coming before I will be taking a well deserved break- of course that means I will be unemployed! 
such is the life I lead.
Take care, and  enjoy your days off when you get them.


Sunday, May 17, 2015

week 18 begin again

This is the time of the season where you find youself dazed after pushing through with that last show only to find that the pressure suddenly ceases and you wonder what happened. It can feel like racing towards a brick wall and then hitting it in full stride! Hey you made it!
This is also the time when we try to get the understudies fit and start on another show or three.
Here's what is on the table this week-
Slightly tidier! 
I haven't really sorted my patterns out completely as I needed to make a suit mock-up for a fititng this week. I rarely have to make really modern present day suits and when I look at a modern rtw suit jacket just to check out details, I am often astounded by things. Armhole size for instance. I am accustomed to cutting a small and high armhole. I don't think it is excessively small, but in comparison to modern rtw it is. Of course I am cutting one offs to fit an individual -not the masses- but the modern Brioni jacket that I got to look at after the fitting had an armhole that measured 60cm for a 40R size. That was 7cm bigger than the armscye measurement on my pattern. It was also very broad across the back maybe almost 18 inches if I recall correctly and the shoulder point to shoulder point measured 18 1/2 inches, yet the fronts measured a scant 15 inches across. Very interesting.

Most of the fabrics have been returned to the cage, the dresser bags- which consist of repair kits of fabric, buttons and trims have been made up and delivered to the heads of the maintenance crew. I also had meetings for the two other shows that I need to start right away, and while doing that I will be dealing with 7 outstanding understudy fittings and building a Naval frock coat. 


Speaking of the Naval frock coat, I cut directly into fabric for this, and the whole team took part in getting it basted together for a fitting. I have never built anything for this actor, so I was a bit apprehensive about cutting right into fabric but I did it anyway. 
Here it is after the fitting.
He is a rather portly gentleman, and the stand isn't padded out for his belly, so this photo isn't a great indication of fit. 
I had to lift the skirt at the waist where you can see the pins, (it was falling in towards the body slightly) and I took in the side back area about a full 1/2 inch on each side of the body, and 3/4 inch at the waist. It needs to fit tighter than you might imagine because he will wear a belt (and sword) and as soon as a belt goes on and is fastened tight enough, you almost always need to snug up the fit at the waist. 
I need to flare the skirt a bit more, and adjust for the CB skirt overlapping slightly at the hem. I also need to adjust the run of the waist seam slightly to hide the seam underneath the belt he will be wearing. We debated about leaving the waist seam at the bottom of the belt which is where it lay in the fitting, indeed in some references there is a visible button beneath the belt, but that was a bit later in period.
What else?....Oh I misinterpreted the lapel shape so I will change that and the sleeve flashes are a bit big, so a slight reduction there too.
Now to rip it down, mark the alterations and get it trimmed and finished.

We are all a bit tired at this point in the season, but we have a long week-end to rest and gather our wits about us as we head into the build period for the later openers.

Today, I was hoping to go to the lake and do a bit of beachcombing and wandering about, but it is raining! nevermind, sometimes that is the best weather for it, so off I go....


Sunday, May 10, 2015

week 17 = relative calm?

Well that was a crazy couple of weeks! Those coats that were lined up in front of the table have finally  gone to their place in the dressing rooms. Even the cape that was standing sentinel for weeks made it to the dress rehearsal. It had a bit of basting left in it and needs some finishing, but it was wearable. I even had time to clear up some of the mess and I have found my table top again!
Friday was particularly hectic as I had three fittings, a quick change rehearsal at another location, and a tech dress in the afternoon. After the rehearsal we went out for a well deserved beer and some food, then home where I immediately sat down and fell asleep.
I think everything went well apart from a pair of breeches in a horrible ultra/fake suede. I don't know if you have ever fought with a fabric but I sure did with that one. I think we will be making a replacement pair  this week!
in case you were wondering, this ultra/fake suede is likely upholstery quality- it has absolutely no give, it is extremely bouncy and resistant along the weft, so much that you cannot gather it- it just fights you- yet along the warp it will fold completely flat. If it is cut as you normally would, it looks like you are wearing a barrel, and cut the other way, well, lets just say that the seat of the breeches was odd looking! It also has horrible static cling, so the legs kind of clung to the actor in odd ways. Not good.
Note to self- just plead for real leather or suede!


Here was my table on Thursday- I was trying to organize some paperwork and also to draft up a pattern for that Naval frock coat you can see in the sketch.
It is a tale of woe, and a mistaken belief in Internet purchasing to solve budget crunches that leads me to be drafting again for our 19th century show.

Beware you who think that you can order quality costumes off the Internet to save money.
Give your head a shake too if you think that anyone will even look at the measurements you send even though you think you are getting a "custom-made" product.
The "thing" that arrived (on the day we were onstage) was so bizarre that I couldn't believe what I was seeing. It wasn't just the fact that it did not fit the actor, nor had any proper shaping, or proportions that related to the human body, and it was not a full skirted frock coat but a weird tailcoat like thing.  The skirt was a strange one piece apron of fabric, bagged out with coarse cotton duck as a lining with no centre back vent opening, no relation to anything that it should be.
We dubbed it the "manatee" perhaps because it reminded me somewhat of Tenniel's drawing of the walrus from Through the Looking Glass by Lewis Carroll.

Suffice to say that I am making one now.

That is for tomorrow though.

Saturday, April 4, 2015

Week 12 at the cutting table

Week 12 at the cutting table, and I am trying to get the last few pieces figured out, and hopefully into someones hands pretty soon.
I have fittings from 6 weeks ago from the third show I have to work on, that I have not had time to deal with, and the sooner I can get back to those the better work will progress.

So one of the last costumes that needs extensive figuring out is this one with the red cape.
Luckily the design assistant found a cape in stock that fit the design quite well, so all we have to do is trim it up! Well that sounds easy, but putting trim on a finished velvet garment means lots of hand sewing.
You might think that it would be faster to machine it, but if you have ever sewn velvet, especially sewn velvet to a non velvet, you might end up on the floor in tears if you tried to machine it.
By the time you unpicked the lining and made it possible to get to at the machine, then fought to keep it from looking like a dogs breakfast when finished- and the trim would have to be basted in place anyway, you might as well save the drama and stitch it on by hand.

The trim is wide and it travels around the back neck so there will be some careful manipulation and cutting of that trim to make it work.
The bijoux department will also be adding jewels to the trim, so it has to be placed symmetrically on the right and left sides.

The garment underneath is basted together so we can get an idea of the spacing of the gold trim it needs.
So I have pinned it out and send off a photo to our designer, and well, I found out that it needs to be set closer together.
I still need a black fabric for the centre front detail, and this black will go around the hem with more gold trim on the edge and more inset jewels.
There is a lot left to figure out, but it seems in hand, well on Thursday it still felt in hand, but we will see what Monday brings.


Saturday, March 28, 2015

A fall front variation

We make a lot of period clothing, so that means quite a few fall front style trousers and breeches.

For those who may be unfamiliar with the term, a fall front is an alternative to a fly closure for trousers or breeches.
The front of the trousers can open close to or right along both of the side seams in which case they  would be "broad falls"or "whole falls" or you can make a narrower front panel that would be called  split falls. There is an under lap which includes the waistband, and then the trouser front is closed by lifting up the fall and buttoning it onto the waistband.

We most often make split falls as they were very common from the mid 18th century through to the Victorian age. They were certainly still used for "court" dress into the 20th century, and used for sailor trousers into the 1970's if I recall correctly, and still used on Lederhosen for instance.

Anyway, there are many ways of cutting and making split falls, the most commonly used technique has a visible placket and the placket is quite often plain and straight.
For one pair of our 19th century breeches I cut a split fall with a variation of the usual placket shape.


These have a curved placket that is cut on the bias.
I like to inset the seam for the under lap so when the fall flap is closed it is hidden, but these also would have worked if I had cut them so the end of the placket was more like the end of a welt pocket.


Here you can see what it looks like underneath the fall front. The waistband and under lap still need buttonholes and buttons. You would close them first, then the flap will have buttonholes and it will button up and close as in the first photo.

The placket itself was a plain bias piece which was fused with bias fusible, then shaped into a curve at the iron. Once that was done, the pattern piece drawn out on it, then sewn to the fronts. I cut a separate flap facing which was then used to finish the top and the edge of the curved placket. 
The under lap is composed of the fabric layer and finished on the inside/lined with silesia. 
I didn't take a photo of that, sorry! The under lap piece is deep enough that the placket is secured from the top through all the layers and the silesia extends right across to the side seam giving support for long term wear and tear.

Variations on the theme make work interesting! 


Wednesday, March 25, 2015

weeks 10 and 11 plus waistcoat update

Week 10.
Unbeknownst to me ( I obviously need to get out and read the posted calendar updates) one of my designers was returning but only for a short period of time. So in the midst of preparing for the other designer who would only be here on three specific days this week, I had to drop things and switch over to the other show to get ready for fittings that I had though could happen a little later.

I only got one of the three fittings I had been rushing to get ready. Blah!
Week 11
I got all three of the other fittings with my other show on Monday, and this is my table after coming back from one of them.
I also had a fitting with my third show which will be on stage first, so I am still trying to juggle that one so it doesn't get left behind.
Those beige trousers on the table were not a happy fit, I need to have a good look at what I did wrong there....maybe too many things going on and I forgot to make a change from the toile...who knows but arrrggh it bothered me looking at the photos later.


I was able to fit my corrected pattern for the waistcoat I showed you earlier.  Sorry about the photo quality, but it was taken on the fly in the fitting.
I didn't put the pockets in and it was no more than a baste up in the real fabric. Much improved, although I can still see a bit of tension above/over the chest- which I made a note of -and will try to correct that when I take it apart to mark alterations. I will try to take a photo of the pattern to show you what I did, when I have more than 5 minutes to think.

We don't have a lot of time in fittings as there is so much to do and so many components beyond the clothes to be fit. That fitting included armour so the props department shared the one hour we had.

There was debate about whether we needed to make a coat for this gentleman, so finally it was Ok'd and I quickly put together a toile of a great coat seen below.

I am going to leave it here for now as I have to go and have a glass of wine and put my feet up so I can do it all again tomorrow.


Wednesday, March 11, 2015

work table weeks 8 and 9

Time is flying by.
Week 8 saw the delivery of a missing fabric.
This jacket was based a bit on this reference, below.
Menswear is interesting because there are many options to play with, but for many people the details elude them because, lets face it, they are subtle. The changes are more easily seen over the decades rather than the season or the year. If you delve into it though, you are rewarded with many interesting details, and I have fun with these details, encouraging designers to consider incorporating them into the suits they want me to make.
 Nowadays- everything looks the same, whereas say in 1938 as this catalogue page shows, there are more "sporty" or casual models available. Still a three piece suit but a different vibe than one for business wear. The one on the left offers a two button, notch lapel, patch pockets, the bottom ones with flaps, and the back view has an expansion gusset, as well as a bit of fullness pleated into a half belt at the waist. The one on the right is a 2 button, semi-peak lapel, three patch pockets with inverted pleats, lower pockets with flaps and the back pleated into a half belt. Both have top stitching detail. We are going to go with the one on the right but with the plainer pocket style of the one on the left.


I have been given a nice blue plaid flannel to work with. I had a devil of a time getting it all laid out nice and square on my cutting table, so in the end, I had to cut the yardage in sections then block it at the iron table, using my metre stick and a square to then press it properly just to get it in a better shape to cut out. It literally took me most of the day to cut that three piece suit. 
Here is the back, just ready in week 9 with a fitting yesterday. 


Yesterday, week 9 also looked like this (below). I managed to cut out the shell of a velvet coat, cut all the bits and pieces needed for a pair of breeches that I fit earlier in the week, I cut out my last 1840's waistcoat and trousers, and switched back to the eighteenth century today so I can call fittings next week when that designer is back in residence. I cut another cloak and made a coat pattern and cut it in muslin. The I will have to flip back to my 20th century things, have a few last fittings, and cut some of the final bits like top collars and mark alterations. 

Tomorrow is already Thursday! I have so much to get done and I really could use another pair of hands- not so I have four myself, but another set of sewing hands. We have a lot to get done.


Saturday, September 22, 2012

My busy week

I have had a very busy week. I am going to try to take as much time off as I can this week-end but I know I should get into the studio tomorrow to keep the ball rolling. I got back from Boston last Sunday night, went in Monday morning and started in on my week.

Boys tailsuits:

I have to finish altering my patterns for these tailsuits, so I can cut them out and get them going.
I was very happy with how they turned out. 
I basically made four sizes based on heights that I was given. 
All the body length measurements were spot on for the sizing, it is just that I made everything a bit big through the chest and waist for these guys. Well, better a bit big than too small I say.
It is so much easier to pin excess in than rip things apart to let out or worse, to guess how much more you may need. This is important because often the fittings are very short, I think I didn't have anyone longer than 25 minutes. It felt a bit crazy, but that is what we are up against sometimes.
I cut all the trousers on Monday and Tuesday and Denise has most of them together already, I have Lela on board cutting shirt dickies, then she and Denise will switch to making coats next week while I then cut the waistcoats.


For Mr. B: 
I fit his suit on Wednesday.
Here is the trouser pattern to go with the suit jacket that I was drafting here.
As you can see they do not require a lot of fabric, just a metre is enough.
This gentleman prefers to wear his trousers under the fullest part of his belly and you can see that I have cut the front waistline down to accomodate this.
He is definitely not and easy shape to fit and I have to make some more adjustments now that  we have had a fitting. I think I should make the legs a bit narrower now that I see the pattern with fresh eyes.  I still have to mark the alterations on the jacket for Silvia, who is making this. 

I also went in to Toronto on Thursday for a fitting with a 1920's suit on another project, which I was very happy with. I managed to shop there for linings for the boys tailsuits and waistcoats, buttons for the suit above and his next suit to come and dropped off fabric for covered buttons as well. I got caught in rush hour traffic on the TTC, and just barely made it to the train station for my trip home.

Friday was spent altering the tailcoat patterns, shipping fabric (which is a mound of paperwork), shopping for more supplies, and then updating and doing work on the computer.

Next week looks about the same. I think I will go and put my feet up and have a glass of wine.


Friday, September 7, 2012

Boy's tail suits are together!

Whew!
It has been quite the week around the studio.
It seems that the fabric shipment I was waiting for had a month long vacation around the USA and it finally made it to Canada Customs on August 22nd where it was kept for a week because of a paperwork issue.
I was ready to give up, by then, but lo and behold, it arrived on August 29th, where it was quickly unwrapped and organized.

Luckily I had all my patterns ready to go, so I started cutting the next morning and I recruited Denise and Lela to help put things together so we could ship them back to be fit. Four tail suits for boys, and four shirt dickies too. Pretty good for a weeks work. I saved some time by just making mock-up sleeves, as I'd rather get the body fit first and not waste fabric.

That shipment went out yesterday afternoon at 3pm and has arrived safe and sound at its destination.
A big sigh of relief when I saw that.

Next week I follow, to do the fittings and then I will be tremendously busy making pattern alterations and then cutting and stitching all the rest.

     Today I managed to get the studio tidied and worked on the pattern alterations for the suit I drafted  here in the previous post. The fitting went very well, I was really pleased with the overall fit. Still needed a bit more length through the front to the hem, needed a bit more through the waist too, and an alteration for his shoulder that is distorted from a surgery.
Updated his trouser pattern too. Then I cut the coat out. I'll have to finish that tomorrow so I can get it to Silvia on Monday. I must remember to take a picture to post.
     On Monday I should be starting onto another project for another ballet company, and this time it is suits, yay!
     As I was in the midst of the rush this week, I had one of those moments where I stood there and realized just how much I enjoy the process of what I do. I like figuring things out -like that suit pattern- and that I can work with people I like and we work in a way that pleases us. We could spend time figuring out how to do things faster or with more shortcuts, or with less handling, and in some situations we do, but mostly we work the way that makes us feel gratified with not just the final result but with the journey of getting there.

Tuesday, August 14, 2012

More pattern drafting

Well, I haven't meant to be so uncommunicative lately, but it is summer and I am busy trying to enjoy some down time as well as get a start on the next project.
I've been making patterns and more patterns as you can see here hanging on the wall, and this morning I finished the last sleeve pattern for the boys tailcoats, and then went on to other things that have been waiting to get done.
I am still waiting for my fabrics to arrive from the US, and last week I spoke to a freight forwarder in Mississauga who will handle the customs portion of the delivery. Textile shipping is very tricky! I know this from my colleagues various experiences, and the customs broker himself said it would probably be easier to import booze and cigarettes than textiles. I'm not sure of the whys of it all and maybe I don't really want to know. I just want and need the fabric to get here, so I can make up my 4 sample outfits, dickies, waistcoats, trousers and tailcoats, and get them sent back to the US for fittings.
I have to package the toiles up and freight them back so I am betting that is a week of transit and border delays. Believe me, I don't want to be flying with unfinished toiles in my luggage.
I also don't know what the fabrics are yet, so I can't even order findings and interfacing or even thread until the fabric arrives.
I am betting the fittings won't happen until mid September now, which only leaves a month of work time to get everything finished and sent back again. My other upcoming project is huge and I was hoping to get going on it as well, so that darn fabric better get here soon.

I must be delusional in thinking this was going to be a relaxed and comfy process since we started talking in May!
Breathe.......

Saturday, July 28, 2012

Boy's patterns

While I am waiting for fabric to make its way to me, I thought I had better get started on some pattern making and a toile, since my next project involves making costumes for boys.

Conveniently I have a neighbour with a seven year old who has graciously let me use him for a fit model. It has been a great help and I promised to finish the mock-ups for him for Hallowe'en- a win-win situation!

I haven't made a lot of costumes for children, the last time was for a production of Oliver! and strangely enough, earlier this year I culled a backlog of patterns and guess what I tossed? Yes, Many of the patterns I had made for that show. Why does that happen? Is there something in the air that senses the moment I get rid of something, I will have a nee of it within the next 6 months.? Does that happen to anyone else?

Anyway, I did keep a few of them but I started with going through my collected cache of measurements and trying to compare them with some standards from a variety of sources. I was looking at Metric Pattern cutting for Children, and I have some more historical measurement tables from tailoring books as well.
The costumes I make will be worn by different children over the course of the next few years and the children range in age and height between 7-13 years and 51" to 63" tall. I keep all measurement sheets and never throw them away! I am putting them on a spread sheet so hopefully I can compare them by chest size, height or age to get an idea about the average size ranges.

Having a daughter, now almost 16, I do have a sense of the strange proportions that children have at different ages, but when you start trying to make patterns, it looks so odd on the table that you start second guessing everything.

Some things I have made note of:
Children have big heads. Being a mother makes this obvious!

In adults you can safely estimate proportions by dividing the height into the ideal of eight heads. Doesn't work with kids. If I take Master H's height of 51 3/4" and compare it to his measured nape to floor, from the top of his head to the nape is 8 1/4" which is more or less proportionately the size of an adult  of 5' 6" in height.

Children have a bit of a belly even if they are slim and have great posture. The patterns need extra room in the front waist area, and front length which is evident in the photo above.

Their limbs are slim and long compared to their chest, waist and hip measures. I remember my daughter seemed to stay the same circumference for many years even though she grew taller all the time.

They tend to have larger feet than you would think they should have.

They grow. Sometimes a great deal in a short time. I think my daughter grew over 4" in height one year. Big hem allowances are needed!

Not sure about their shoulder slope. I thought most kids had squarer shoulders, but I might be wrong about that. Master H above has sloping shoulders and the children I am making for will likely have sloping shoulders as well since they are baby ballet dancers.

I'm trying to see if I can relate their nape to waist length to a percentage of their height, or nape to floor length just out of curiousity. Trying to make the process make more sense.


Friday, May 4, 2012

another uniform...

Sometimes when working in the tailoring department, you can find yourself working on a lot of dark colours, so it is almost a shock to the system to suddenly have colour to work on!

Our uniform of a different colour had some inspiration from the New Years Day mummers parade of Philadelphia.
Mummers parade? Who knew?
Mummers in Canada are associated with a Christmas tradition mostly in Newfoundland of masked or disguised neighbours showing up at your door for merrymaking. So I didn't really have a clue about the parade in Philly.
Holy Cow!
Well this is just tame by comparison, but fun anyway.
The pants are orange by the way, with the yellow and red trim centered on a wide green stripe.
Oh and theres the sash and rosette too. And a gold and red decorated sword belt with a sword too. (Didn't have it to photograph as is was in the weapons lock-up).


Now that this is up and on stage, I am onto some understudy fittings with some extra costumes being built and the next show, which will not be as bright as this.


Saturday, April 28, 2012

velvet smoking jacket

 Well, actually it is velveteen or cotton velvet. Much easier than rayon or silk velvet to work with when making a jacket.

I posted earlier about the inspiration behind this jacket here, and this is the version we are making.

I had cut right into the fabric for this, fit the basic shell, taken it apart and marked the alterations. I then cut the linings and facing, then the pockets and cuffs were made up and basted on. The sleeves are basted in and then we are ready to fit.
The binding trim that we got to work with is a knit! It is much wider than the original vintage trim, but so far it has handled well. I don't know about how you feel about velvet fabrics but they can be very tricky to sew. Not necessarily sewing two pieces of velvet together, because the naps grip each other,but sewing other fabrics to velvet. The depth of the nap can cause no end of slippage or bending as you try to machine sew linings to facings or trim to an edge.

The flat trim that is on the pockets will also bind the edges of the jacket, finishing off the lapels and hem. The cording is separate and will be zigged onto the edge of the flat binding.
On the sleeve cuffs we will probably attach the cording by hand, as it needs to go along the edge of the cuff, then form a clover leaf (which is outlined in white) on the sleeve itself then come back onto the cuff to finish off.


So we have a few alterations to make, dealing with a severely dropped right shoulder and corresponding sleeve length issue, then on towards finishing this for Thursday.  (it is sitting crookedly on the wrong stand)
I was sidelined Friday by some virus that was going around and I know that when I am back to work on Monday, there will be a line up of sewers with questions to answer and details to be finalized so I am off to get more rest.

Saturday, April 21, 2012

finished uniform

Here is our finished uniform, minus the belt, which was being worked on at the time. 
I should also correct myself regarding correct terminology. I should have said Aiguillette instead of Lanyard when describing the braided cording on the right shoulder.  I was reading through "A Dictionary of Military Uniform" to clarify it for myself, as Alix the design co-ordinator called it by the proper name. Aiguilette "is a plaited cord ending with needles, points or aglets." 
According to the dictionary, in the description of lanyard, it says" the cord around the arm and under the shoulder -strap may be single, double, or plaited".
Since this is plaited with needles, it should rightly be be called an Aiguillette.


Next up in our uniform making this season is a uniform of a different colour so to speak. More about this later.....

Saturday, April 14, 2012

Striped fabric and shoulder darts

One of the most difficult figure issues to deal with is the stooped figure. In a recent situation, I had made a toile jacket for an actor and I knew that his pattern required some modification for a stooped back and rounded sloping shoulders.
I hadn't made anything for this person for a number of years, and I was surprised to have to open up the back another inch to get the jacket to fit properly. That is a full 1 and 3/4 inches additional length in the CB!

This is also supposed to be Edwardian so I cannot mask it with extra large shoulder pads either. Now, in a plain fabric such as his black cutaway jacket, I can just lay the pattern out as is, but when there is a stripe, that must be dealt with differently.

The CB neck must be in the middle of the stripe pattern, and if I laid the pattern out as is, I would have quite a bulls eye effect in the upper middle part of his back. That isn't a suitable option. If I straightened the CB by opening up more ease into the shoulder, I would end up with too much for the fabric to handle and if I opened it into the armhole, I can't ease enough in to make enough of a difference, so the other option is a shoulder dart.
Shoulder darts are quite common in women's wear but I have to say that I personally have never seen one in a man's jacket. I was so happy to see a reference to darting the back shoulder in a post on The Cutter and Tailor forum a couple of years ago, and ever since then I feel like I have some back up when I am required to do it for difficult figures. Especially difficult figures and striped fabrics.
The trick as far as I can tell is to not interrupt the main stripes in the dart. The dart end on this one needs to be moved just a tidge to the left, to follow the stripe edge exactly, but overall you can see the effect. The dart really isn't that noticeable when all is said and done, and the benefits outweigh any negatives as far as I am concerned.

You would not know this just from looking, but I will tell you, the other issue I had to deal with here, is the fabric. It actually is a one way design. As woven, the white stripes are on the one side of the stripe right across the width of the fabric. I had to make a choice. Either the stripes would travel around the body, always to the left for instance, or I could fold the fabric end to end and make it symmetrical, which is what I did. Great, so far so good, except when it comes to the collar. The collar is one piece, no seam at the CB. So the stripes travel one way only. Merde!
So unless I seam the top collar CB that is what will happen, and I have to decide soon.
Any thoughts?
............
We are probably the only ones who will notice or know. The stripe is subtle, and if the audience is that engrossed in the stripes on a jacket, then the play needs some help. I won't be putting a seam in the top collar.

I'll post the pattern modifications in a future post.

Thursday, April 12, 2012

DB uniform tunic


We are so close to being finished with this uniform, I couldn't resist taking a photo.
What is left to do?
I need to make sure the lanyard can be worn like this, I have a lot of reference for SB uniforms with lanyards that attach to a CF button, but I'm not sure of the DB protocol. Of course these are not specific copies of any particular uniform or regiment so we have a bit of freedom in what the designer wants to do. (People do write in on occasion to correct us in certain circumstances).
The "medals" need to be sewn in place. We usually thread mark the placement so they can be removed for cleaning and restitched later.
The epaulettes screw down, and the fittings come with a screw that needs a button or something like that to be epoxied or soldered to the top of the screw head. Normally the posts would be inserted through a hole in the shoulder, but we stitch them on the shoulder instead, so that in another season they can have different epaulettes and we don't have random holes. The same with the belt hooks. They are often poked through a hole so that the main part of the hardware is inside the jacket, but again, we need to have future flexibility of use.
I still need some kind of insignia for the collar, and I think that is it.
Made of heavy navy barathea, for an actor who is 6'4" tall, with a 10" drop (chest to waist size), worn with a leather belt and sword as well. Maybe a sash too. I'll have to confirm it with our designer.
Now, just another few days and a few more pieces to finish (like the cutaway behind the uniform) before Tuesday when the show will tech onstage.

Sunday, February 12, 2012

military tunic underway


We've been really busy over the past couple of weeks, getting people in for fittings so we can determine if we need to build new uniforms, or fit them into the ones we had already made.
As of Friday, I believe we are now making three new uniforms. Two will be single breasted and one in a double breasted style.
We are using a heavy barathea wool from Whaleys in a midnight blue colour.
You can see that we are using a pre-made suit fronts/chest canvas in these uniforms instead of building our own. The cost factor is the influence here- the pre-made suit fronts run anywhere from $15.00 to $30.00 each so that is a huge savings over making them from scratch.
We have sourced the gold trim for the sleeves and it is being made to order for us, so hopefully that will come in within the next month. The trouser braid is another issue, we have enough in stock for what we need to do, but we bought the last of it from our supplier, so more sourcing is needed in case there is another pair to be made in the future.

While this is going on, I have turned my attention to the 1930's and have made up some trousers and one suit so far. These have been fit, so I'll be marking alterations on Monday and taking some photos to show you.
I also need to get on with drafting some cutaway coats for some rather full figured gentlemen, and I need some time to think them through before cutting into the fabric.

Tuesday, January 31, 2012

déjà vu all over again

Well, it has been a very busy start to a new season of work. I have some nice 1880's Victorian work to do, some 1930's, and some Edwardian as well, so I am looking forward to it!

There has been a lot of concern with the economy as we are a business to a large degree dependent on our patron's disposable income.
We are often asked whether we reuse costumes, and the answer is yes, we do. Most shows use at least some pieces from previous productions and because they are made well, they last, and are able to be refurbished, and reused.
This year, one of the things that are being reused are uniforms that we built in 2008.

We refit some of these already, and found to our shock that someone had removed the trim from the sleeves of one of the uniforms! Arggh! These were not supposed to be rented out so it is a mystery why it was done and for what reason. Luckily we had some of the trim left in stock, and since the sleeves were too long for the actor who is now going to wear it, we can shorten the sleeves and retrim them.
I did spend a frantic few minutes searching through boxes of patterns that I kept, hoping that I kept a copy of the sleeve decoration pattern so I didn't have to rethink and redraw it.
Luck was with me and I did have it stashed away. Whew!
I can't keep everything, so I throw lots of patterns out, and you know, everytime I throw them away, I have that nagging feeling that as soon as they hit the recycling bin, I will need them within the next 24 hours. I don't think I am alone in this feeling.

So, then it turns out that we are going to be making a couple more of these uniforms to add to the collection, so now we are on the hunt for more trim. If the trim had not been removed from these sleeves we might have had enough to trim for the two new uniforms, but not now.
And so it goes.......