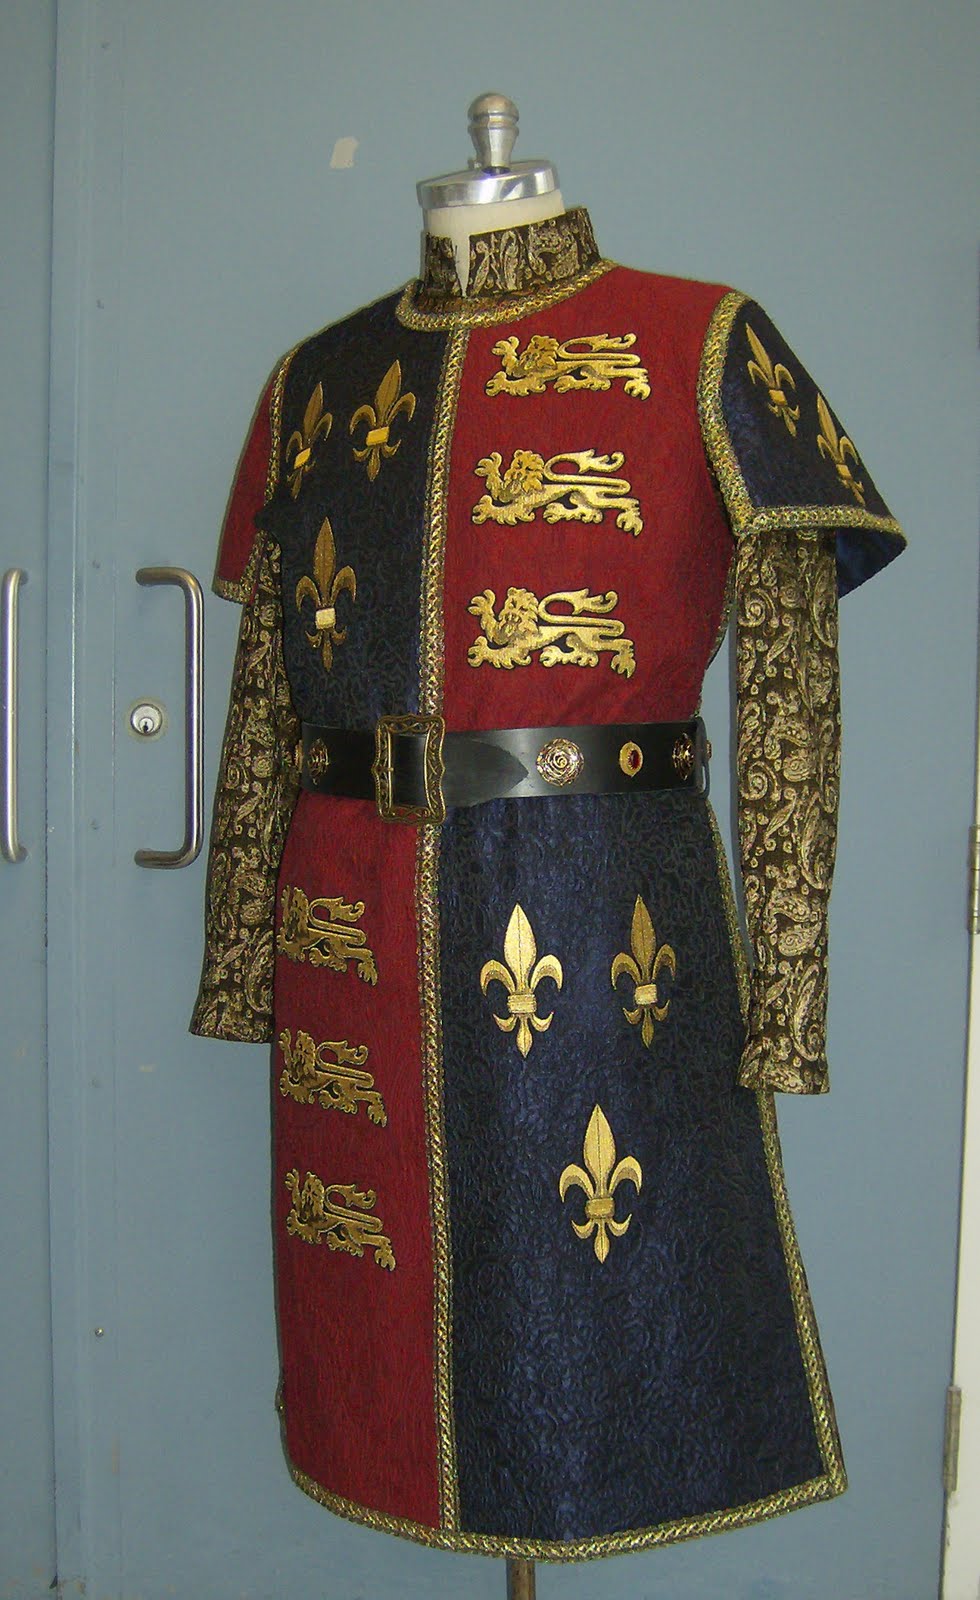
Sunday, April 24, 2011

Top collar manipulation

One issue that comes up with these large 19th century coat collars is how to apply the top collar fabric.
"What are the issues?", you ask- well, first an explanation of the standard jacket collar and how the top fabric is traditionally applied.

The traditional suit undercollar is a one piece pattern in which one edge joins to the neckline of the coat and folds along a predetermined roll line, to form the fall of the collar. These have a stand that usually ranges from 2.5cm to 3.5cm deep. The fall of the collar is slightly deeper than the stand. The undercollar is cut on the bias so it can be folded and stretched a little to travel smoothly around the neckline of the jacket. The roll line of the collar is the transition between the stand and the fall, and it is usually stitched so that it will not stretch out, while both the edge of the stand and fall are stitched and pressed to allow some controlled amount of stretching to occur. If the outer edge of the collar is too tight the collar will tend to roll above the intended roll line and if it is too long it will do the opposite and want to lie flatter on the garment than intended.

The fabric that is applied to cover the collar is cut in one piece on the straight grain.
Traditionally, tailors would then stretch the top collar fabric along the outer edge, and shrink the fabric that lay along the roll line in order to make that straight grain fabric bend smoothly around the outer edge of the collar, sit along the roll line without rippling, and finish to the inside neckline in a smooth way.
You need wool (and preferably not that papery wool) in order to be most successful at doing this.
If you look at a modern suit jacket, you will see that the top collar fabric is now cut in two pieces with a separate stand and fall section to allow the collars to sit clean.
Now to the issues.................

In the case of the 19th century coats, the stand and fall are much deeper. The fall especially is quite a bit deeper than the stand and therefore the outer edge of the collar needs to splay a great deal to sit properly.

Historically you will often see the top collar fabric cut with a seam at the centre back, or on the bias like a shawl collar, or with both bias and seam.
We didn't want this on our coats, the wools are not easily manipulated and I've been given both suede for one top collar and velvet for another, so I needed to make a top collar pattern with a seamed stand.

The first step was to make the undercollar pattern in canvas and melton, cut on the bias.
The undercollar needed to stretch along the neck edge just a little to fit, the roll line was held from stretching by stitching it by machine, and the outer edge needed to be stretched a lot to sit well on the coat and not push the roll line higher than intended.

Once the collar was prepared, it was pinned to the coat and checked to see if it was sitting properly and stretched a bit more if it needed it. When I was happy with it, I measured the outer stretched edge and compared it to the original pattern. This one was 4cm longer on the outer edge.

I marked a seam line inside the roll line, added two matching points and cut the pattern apart.
I then slashed from the outer edge just to the original roll line, and made small clips from the new seam to the roll line. Open out the slashes the amount required, taking care to spread the collar most in the area of the side of the neck, and allowing the pattern to overlap itself along the small clips you have made in the new seam line. This keeps the area at the roll line from growing. It does shorten the seam a tidge but continue on.
The stand of the collar also needs a little bit of slashing and spreading along the neck edge to fit the stretched shape of the undercollar.
Retrace your pattern and smooth out the new lines/shapes.
The seam line of the fall will be slightly shorter than the seam line of the stand and most of that discrepancy will be in the side neck area, which happens to now be on the bias (remember the top collar fabric is cut on the straight). When stitching the seam, you will stretch that area to fit the seam of the stand.
Press it open, keep that seam allowance quite small -1/4" maybe. Clip only if needed to get it to lay flat, and then you can apply your top collar without having to manipulate the fabric to get it to fit.
I hope you can see the details in my hand drawn diagram- it is a little faintly drawn, I will have to clean it up and draw it properly sometime..... but not tonight.

Thursday, April 21, 2011

19th century dresses too

We used to share our space with Carol who cut ladies wear, but she's been sent over to another building, so I had not seen any of the women's costumes for the 19th century designed show we are working on.
Today I ventured over after work and took a few random pictures of some ladies dresses on the stands- cut by Margaret.
The colour is totally off in this picture, sorry! I really liked the little "sleeve cap" of pleated self fabric on this bodice. The colour is better in the shot below.
I can never get over the size of the sleeves for these dresses, and I love the variations of using the fabrics on different grains as well as using the fabrics to make the trim details- pleats, ruffles, bindings, to emphasize and delineate the shapes.
The white at the waist of the green dress is the waistband of the skirt- they still need to be joined together.

We'll be seeing this show on stage in about a week and a half and we have a fair bit of work to accomplish between now and then. I spent the majority of the afternoon putting buttonholes in waistcoats, tomorrow I'm going to be doing some sewing too, just to get us a little further ahead.


Monday, April 18, 2011

binding edges

We're up to our eyeballs at the moment with the first show up on stage, but we are still tweaking things both large and small.
Unfortunately the red leather doublet has been cut as the director didn't like it really, so the designer redesigned and now we have something completely different that we are building, and hopefully we will have a fitting tomorrow and get it finished this week as we have another deadline looming.
Enough of my woes!
It will make its way to the warehouse now and perhaps have a life some other day in some other show......

I took a few pictures mid process to illustrate how we were binding the leather doublet tabs in self leather. Please ignore the black stitching as this was a thinking it out sample.

The skirt tabs are made on a base of 12 0z black cotton duck that has been washed and preshrunk in the dryer. The base is cut out and then a piece of leather is cut to cover it. I put the base on the tailor's egg then laid the leather on top, holding it in place with a little sobo glue. Why on the tailor's egg? Well, everything needs to have some shape and doing it this way makes it slightly convex rather than flat. This makes sure that they won't curl up or be tight when put on the costume. It isn't much shape but it makes a difference.

The edges need to be finished and instead of bagging them out as you might be tempted to do with fabric, an easier technique is to bind the edges with the same leather. Bagging them out (sewing with a regular seam allowance then turning ) with leather would make them thick and unmanageable.

I wanted 1cm of leather binding to show, so I cut a strip of leather about 3cm wide for the binding. One centimetre (10mm) to show on the front side, allow a few mm's for "turn of the cloth" another 12-14mm to cover the backside and extend far enough to be caught in the final stitching and then trimmed away if needed.

I then drew a guideline on the front side of the tabs in silver pen.
Since I was just quickly putting this together I stitched the strip in place, stopping the stitching just at the intersecting pen lines.
What we actually did on the real thing was to "glue" the strip in place with double sided rubber cement tape, stopping at the intersecting line. Then pinch up a fold of leather to get the strip to turn the corner, glue that edge down and do the same with the next corner.


Once everything is held securely, you can then tuck the fold in to make a mitred corner on the right side, flip the piece over and make a mitred corner folding the bulk in the opposite direction on the backside.
Tack the back areas of the strip in place with a little glue to hold them, give them a bit of a tap with a rubber mallet and then go to the machine and stitch from the top through all the layers. If you cut the strips a little too wide you can always go back and trim away any excess on the back.
This makes a nice thin finished edge and also give you a bit of decoration by outlining the shape.

Friday, April 8, 2011

19th century waistcoat continued

I love making waistcoats- I don't know what it is about them that I enjoy so much, but I really like cutting and making them. I guess they are so less complicated than jackets but that doesn't mean they are all simple, or simplistic in their cutting.

I thought you might like to see the waistcoat that I showed you earlier, now made up.

It has been in to a fitting, and there are a couple of very minor tweaks to do and then it can be finished.
Monique who is new to my team this year made this one- her first waistcoat for me- she has been on a dressmaking team for the past few years and wanted to move into tailoring so she has and I think she did a good job.
So details for those interested:
If you look at the photo under the lapel, you will see that I cut the underlapel and collar in one piece but I seamed the "collar " to the lapel on the topside- I barely had enough fabric to cut this waistcoat out, let alone try to match the patterns, so I treated the undercollar like a large shawl collar (which it really is, just a different shape), but from the outside it looks like a separate seamed on collar.
It has the full accentuated chest shape of the period which I like but doesn't stand too far away from the actor wearing it.
The extra bulk of the waistcoat collar does take up some room under the coat, especially through the neckline.

The coat collar can be tricky in these coats because the bulk of the waistcoat naturally pushes the coat collar away from the neck, but we want it to come toward the body not away, so it requires a bit of control on the roll line of the coat collar to keep it short and a fair bit of stretching on the outside edge to get it to splay on the shoulders.
This one gets a velvet top collar which will probably require a two piece collar pattern as we don't want a seam at the CB as many period coats did.
So I'll be back to the drafting table.......

Wednesday, April 6, 2011

update

As I mentioned earlier, we've been really busy and just in case you were wondering, we have finished some things! Yeah!
Not only finished them but made adjustments so the actor could make a 46 second quick change into this costume. Oh there's a cape too, but I forgot to get it on the stand for a photo. So this one at least is ready for Friday.
How does it open? The right shoulder, the right back sleeve, and the side seam zips from waist to underarm. We had snaps on the sleeve but had to change it to velcro, because there was no time. The actor comes offstage, takes off the previous costume, then he steps into the undergown, which is set in place on the floor, lifts the garment and zips up the front. The surcoat is placed on him, snapped in place, the belt is done up and the cape is placed on him, done up at the front chest and then he's walking out on stage. It really is amazing to see it happen backstage- they are pros at it.


This overcoat, on the other hand, I was cutting out today, and I had delusions that we would be able to get it together and ready for a fitting on this coming Monday or Tuesday, but it isn't looking promising.

The coat it is worn over is in process, and the waistcoat needs alterations and finishing and the trousers need an hour or two of work, so I was really delusional.
There are only six pairs of hands and we still need to get another tailcoat and trousers ready, and those hands are just finishing tying up the loose ends for Friday, and tomorrow is Thursday after all.

It is still snowing.

Tuesday, March 29, 2011

Busy days

Wow, today felt like a Monday, but it is already Tuesday!

Mondays are usually hectic since I've left it all behind on Friday only to come back in and find the same amount of work still waiting for me-no wardrobe fairies doing the work while we are away!

This is a very hectic time of year too, coming up to our deadlines- we have a quick change rehearsal on Tuesday next , then tech on Friday and the designer for the other show is in house beginning tomorrow and leaves next week, so he'll be expecting to have fittings and I think there will be designer/cutter meetings for another show next week too.

The balancing act is in full swing.
We've been waiting for some knitted "chain mail" to arrive so we can make a leather gambeson that is worn over the chain mail and under the armour. This garment is involved in the quick change rehearsal in a week and it finally arrived yesterday afternoon, just in time for a quick bit of begging to stage management to schedule a fitting for this morning.
The day went like this:
in at 8:20, answered questions, looked at the breeches that I didn't get altered on Friday, made a "to do" list, requested fittings, met a potential donor for the theatre who was being introduced to Lela, and basically checked with all the team members to see how things were going.
9:15 am : actor into tights and boots then the chain mail, which I needed to fit (and needs alterations), then the base of the gambeson that I had prepared, fit that, then props in with full armour, body arms legs, chain mail hood , a bit of discussion for them about a few more changes, then out of it all and back at my table by 10.

Had a cup of tea, answered questions about finishing another leather doublet and how I'd like the sleeves of a tailcoat prepped for fitting, discussed a collar for a frock coat, and made a list of priorities, met with Lela, estimated how long it would take to finish each outstanding garment for the upcoming deadline to figure out if we needed to do overtime, since we also need to get two of our 1830's costumes ready to fit in fabric for the other show, plus some stock fittings and Lela's toile for a child in the show.
I filled out a performance review for a new seamstress, met with her, dropped off the paperwork to my boss and briefly discussed the sewer's progress.
Altered the gambeson pattern and marked the changes, then had a technical fitting on the velveteen tailcoat I was posting about, as well as the shell for an overcoat just before lunch.

Ate lunch, cut all the leather pieces for the gambeson, discussed the options for closing it with the designer as the design shows it being laced up the back but they won't have time to do that so it will have to be faked- either with a zipper or hooks. I made a sample of how I thought the skirt tabs should be finished. I thought about how we would attach the embroidery pieces to the leather, but gave up on that for now.

Denise finished the baste up for the frock coat, so I handed her the gambeson, and discussed briefly how I thought it would need to go together as it will be quilted.
Needed to cut a gusset for another costume, so I cut that, remarked the armhole for a robe, and checked on the progress of the waistcoat that goes with the frock coat.
Got my call from my daughter telling me she was home from school, had fencing tonight, and was going to a friends house.
Had a laugh as Susy tried to bag out the neck and armholes of her costume but wasn't able to turn it no matter how hard she tried.
Cut all the strips of leather for the gambeson, put the scraps in a bag, hung up the pile of tights on my table, and at 4:55 pm got a phone call from someone who wanted to have a War of 1812 uniform made (but didn't really have a budget to do so).
Grabbed my things, packed my bag, helped Silvia with a trouser fitting for a client of hers and got home around 6.
Did I say it was busy?
Tomorrow we'll do it all again, and I just remembered I have to talk with Susan in bijoux about the chain of office for the quick change, and I now have to make a pair of leggings that no-one told me about, and they will be needed for Tuesday too. I hope they buy some fabric, and lets not even start talking about the codpieces that need support.

These are just the things I can remember off the top of my head from the day.

No wonder I feel tired tonight.
And there is still snow on the ground.

Friday, March 25, 2011

random pics


The weeks are flying by! Why is it that a week in February takes its time, but a week at the end of March when deadlines are beginning to approach flies by and you feel you cannot get enough done in a day?
Anyway, all I can show you right now are some random photos I took while wandering out on my way home.
All departments are in full swing and the first show will be in tech by April 8.

Today was Sitzprobe for the upcoming musical in the rehearsal hall next door to our wardrobe, so we had the pleasure of listening to the the whole orchestra going through the show music with the singers for the first time, while we worked.
Images from the top down: armour hanging in props, a suit jacket in a very napped, very slinky lightweight velvet in progress by Mr. S and team, a tray of "medals" in Bijoux, a patent leather corset by Miss B and team, and a fibreglass (I think it is fibreglass - not vacuform) casting of a head in props.