


These breeches, like most of their era are styled with fall fronts. This means that instead of a centre front opening or "fly front", these have a "flap/fall" front as seen here.
Fall fronts come in a couple of configurations- whole/broad falls in which the flap is the complete front of the trouser, from side seam to side seam, and split falls in which the "fall" is a portion of the front of the trouser.
As I am writing this, it makes me wonder what the origins of "fly front" are. I mean, fall fronts are pretty self explanatory really- if unbuttoned, the flap will fall down- that's my own reasoning- nothing scientific.
Historically speaking, both centered and fall fronts appear and disappear throughout fashion history for various reasons- one the most popular reasons in this era for fall fronts was supposed Victorian prudery. A fly front was too obvious. I don't know if I really believe that, but it was the fashion of the day and continues to be the fashion for official "court dress" when one is required to wear breeches.
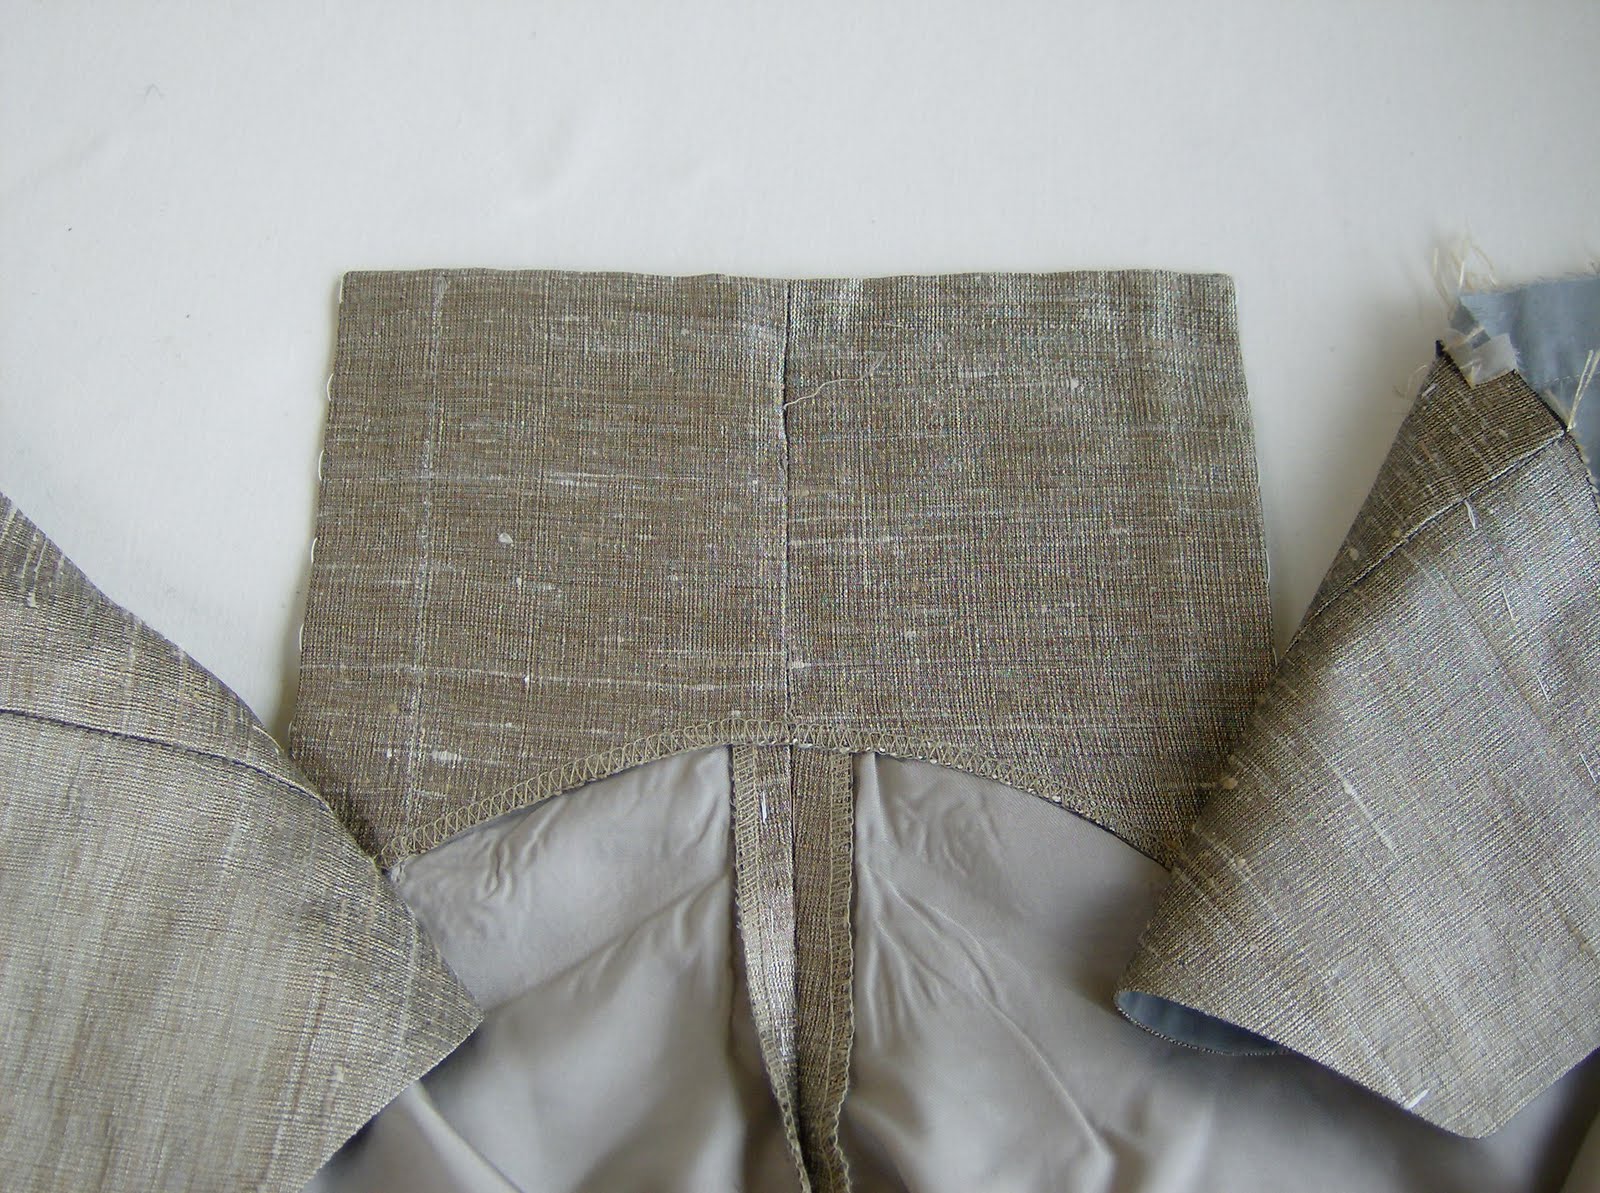

The basic technique is to sew the centre fronts up and then make cuts/slashes into the fronts to create the flap. The slash can be made into a dart or into a rectangular area and have a flap that is either "clean fronted" or with a placket - which is how these were done. I think the dart technique is quite unstable so I rarely use that method.
The flap needs to be faced to the inside to finish the top edge. These were made by using a single piece of fabric to create the placket, finish or "bag-out" the top edge and become the inside facing. I think it is important to minimize bulk when making these and to also keep the opening from tearing out with repeated wear.
While constructing the flap, you also need to make an underlap so that you have something to sew the waistband to and for the breeches to be closed properly. I like to cut the underlap pieces so the top placket is stitched through the layers of the underlap.
I have not sewn the waistband on yet in these photos, but the waistband is sewn to top edge of the underlap, across the remaining front that is not part of the flap and continues along the waistline to the centre back.
The breeches are put on, the underlap is buttoned first and then the flap is brought up and buttoned to the waistband.
I like to leave a section of the centre front seam undone to create a buttonhole in the flap rather than making a machine or hand sewn buttonhole through all of the layers.
It is a technique that is really quite easy to master although it can be a bit difficult to wrap your head around at first- it is really like a men's shirt sleeve placket in many ways. You can see the finished placket above and the "buttonhole" in the flap below.


No comments:
Post a Comment