Tuesday, January 12, 2021

Keeping busy?

      In March of 2020, when everything shut down,  I was up to my eyeballs in work. It was quite astonishing how in the previous year and a half we had gone from worry about not having enough work being available, to way too much work, and then absolutely no work at all.

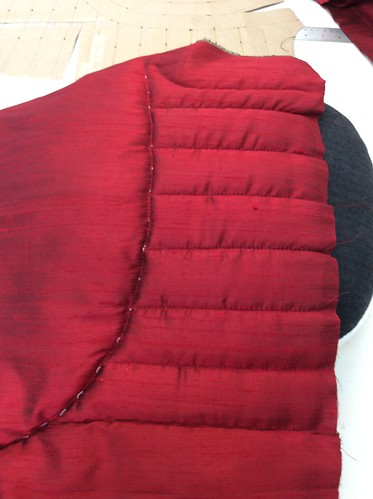
At the time of shut down, I had a large ongoing project for the new Swan Lake for the National Ballet of Canada, I had a project for a suit and overcoat for a tv show, and I had started back at the Festival. (once those projects get onstage or onscreen I will share, but for now I cannot)

On paper, and in our most positive outlook, it was all scheduled to pan out properly but of course it didn't. Unexpected delays, fabrics or fittings unavailable pushed all these projects upon each other. It is exactly the kind of situation that I try to avoid.  

When we were sent home from the theatre two weeks before the tech dress, I frantically used the strange gift of time we had been given to get everything back in order. Ballet costumes done as far as possible, check! Overcoat and three piece suit finished?Check!

Then what? If you work in this business you get used to deadlines and gearing up to the finish line, but the finish line became a distance blur.

We made masks, yes, many masks. When the call came from the local hospice, we were a well oiled machine of co-operation, organizers, cutters and sewers.

then what?

Well, we (myself and Lela- with whom I share the studio space) started creating projects with deadlines for ourselves! Honestly! Old habits die hard.

The first project was stretch wear- specifically bathing suit drafting and construction. Luckily for us, Pattern School Online run by the amazing Stuart Anderson had resurfaced from the depths of neglect on the internet, and it proved to be a valuable learning experience.

I made three bathing suits, and not only did I finish them, but I am very happy with them. The first was the trial run and mock up of a basic rather modest pattern. Cheap and cheery too. 


I went on a shopping expedition. I found this basic floral print fabric and I found something to use as lining- not marked as bathing suit lining per se, but something I felt would perform well as a lining. Since I was making a trial garment that I hoped would be wearable, I went old school and hand basted in the lining, and left a fair bit of seam allowance for alteration purposes. It was zigged together and tried on, then serged using a domestic four thread serger for the main seams and an industrial three thread serger and domestic zig for elastic application. I think I found patience to be a virtue in this endeavour especially with the elastic and how the machines handles the fabrics.

I think the calculation for elastic was the most challenging and most interesting part of the process. I really appreciated delving into the why and how of it all. Stuart does an excellent job of examining and explaining how stretch works (or doesn't). 

By the time I was ready to hit the beach, there were shutdowns at the lake due to overcrowding, so this piece had its debut at a friend's pool! My daughter thinks it is matronly looking but I don't care. The next one has a lot more flair!

That will be next.


Sunday, January 3, 2021

Books and references


Since I cleared out all my books from the theatre workspace, I had to find a shelf and space at the studio for them. Its rough but but at least I can see them. It was quite a job moving 30 years of stuff out of there and finding room for what I wanted to keep; patterns, tools, books, memorabilia, thank you cards,,,, you know the kind of things I am talking about.

I still have a box of vintage catalogues and the like which I am not sure how to store, so for now in a box they shall remain. I still have a box of vintage catalogues and the like which I am not sure how to store, so for now in a box they remain. 

I have not purchased many new books recently, trying to cut down on all that as I am more at the end of my career than the beginning, but I do love books. 

I try to keep track of them on Librarything .  If you are a member there, I am TTailor if you want to have a peek at my modest list. I think I say modest because there are some people there with vastly large collections! where do they keep them all?


Have you purchased any new costuming or tailoring books recently? Do you have any worthwhile books to recommend? Tell me about them, old or new books, no matter! do you want to see more of any of my books? Let me know.


Friday, January 1, 2021

Well, shall we get back to it?

 Good Question. Shall I get back to it? What is it I want to get back to? Not to make this tailoring blog  a confessional, but these are questions that I am asking myself.


Where do I go from here may be a more pointed question. The past three years (that is shocking!) since I last posted seem have flown by in a mishmash of illness and stress and just carrying on as best as I could. The past year has hit our industry particularly hard and I have friends and colleagues around the country reeling from the blow. Almost all avenues of making a living as a theatre professional have disappeared, although film and tv work is continuing on, not all of us are able to, or desire to tap into that side of the business in a full time manner.

So, standing at the edge of 2021, looking over the edge, I think that I need to come up with a plan, and I hope that I can come back to the blog and perhaps with a few adjustments, move forward with learning some new things and bringing you along on the journey.

I wish you all the best in the year to come, stay safe, be kind.

Cheers.

Art installation  Entre Les Rangs  by Kanva architecture at Place des Arts/Quartier des Spectacles Montreal


Saturday, January 6, 2018

Quilted silk jerkin

Almost finished! Yay!
I padded up a stand earlier in the fall, using a combination of measurements, and a former costume and some internet photos I found.
I thought I should double check everything by trying the jerkin on the padded stand.
I think it is pretty good.
I have made it as alterable as possible. I basically made front and back components which were finished separately before being sewn together into a garment.


The sides of the garment are open and can be adjusted with lacing.
If the adjustment is minimal the lacing will suffice.
If the adjustment needs to be greater, the lacing panels can be unstitched from the fronts and backs and restitched in another position. They could increase the size by four inches or reduce it by the same amount by moving the lacing strips.

Now it needs the buttonholes and buttons sewn on.

Then I can move forward with the sleeves which will be quilted as well, but they will be attached to an separate under bodice.

Once all that is complete, then I can work on the garment that is worn over top of it all.


Happy New Year to everyone. I wish you all the best in 2018.

We are in a bit of a deep freeze here, this morning it was -26C  and with the wind chill feeling like -35C ! We have lots of snow and more to come tomorrow so in an effort to embrace what we have, I am out the door shortly for a xc ski. It has warmed up to -22C Woohoo!

Cheers!

Tuesday, December 19, 2017

Quilted jerkin

I am off and running on the next project which is a quilted jerkin.
this is for a gentleman with a size 56 chest, and I will not have a chance to fit him.
I made my pattern block, then padded up a stand at work to his shape using a variety of photos as reference.
Once I corrected the pattern, I marked it onto the base fabric. I also drew out all the quilting lines and sewed the darts.


On the outside of the base, I basted the batting in place over a ham to keep the shape from being flattened. I then cut away one of the batting layers to reduce bulk in the seam allowance.


I transferred the vertical dart I used in the base to a new horizontal position that will align with a quilting line.
Sew the dart closed than baste the silk fabric to the base matching the dart with my quilt line position.


Then I sewed the first quilt line along my dart by machine from the inside.
Once that was complete, I basted the vertical curved quilting line and then sewed it by machine as well.


The next step was to quilt upwards from the first line. Then downwards towards the waisr, and then the remaining vertical quilt lines around the armhole.


Do the same process to the other half of the back. Bind off the armholes and bottom edges. The CB seam allowances had a hong kong bias finish, then I joined the centre back seam.
Then I will bind the neckline with bias so it looks like the armhole finish.
Then I am onto the fronts.

Its a very nice red, quite seasonal in fact!


Wednesday, December 13, 2017

paned breeches updated and finished

Home again home again jiggity jig.
That month away felt so long, yet went by so quickly if you know what I mean.

It is refreshing to go to Montreal. There were so many wonderful cultural experiences to see and do. Here are some of the things I did while there.
AURA amazingly breathtaking! watch the video!
Leonard Cohen exhibit at MAC , Centaur Theatre,  Boys with Cars , McGill music concert , Redpath Museum , Souk à SAT , Cité Mémoire , Salon des Artisans Récupérateurs, Beautys, wandering the old town of Montreal and Griffintown, watching the Grey Cup with friends down in Lasalle, shopping, restaurants, Loving Vincent and The Other Side of Hope

I did work too. Really! No wonder I am a little tired!

so a few work photo updates
the paned trunk hose.
This is what I did with the tulle/net to create the shape under the "paned" layer. I forgot to take photos of this.

After applying the netting, sew the base layer up. 
I had already created a zip fly in the base layer before I applied the netting, so my fronts were actually joined together as I applied the net. Sew the inseams, then sew the centre front/centre back seam.
Sew the CB seam completely up before applying the waistband. The next steps can be modified, but this is how I did it, as I needed to have a fitting before finishing. I am also trying to think ahead as to how alterations could be easily made after the fitting, or in the future.
I interfaced and applied the base waistband (just a single layer), sewing it on so the seam allowances are facing outwards. This will make sense, I assure you. I turned the top edge of the waistband and pressed it.

Next, sew up the paned layer, inseams first, then cf/cb leaving the fly area open. Sew the waistband(single layer of fabric) on as usual. You now have two pairs of "shorts"
Slide the paned layer over the base layer. Baste the CF fly opening to the base layer.
Finger press the waistline seam allowance open, pushing the seam allowance of the panes downwards and baste the waistband seam allowance of the pane layer to the waistband seam allowance of the base layer. Machine these together close to the seam.
Slip stitch the centre front fly of the paned layer to the base with a permanent stitch. 
Baste the leg openings together flat.


Fit
make any alterations- I had to take a few small tucks in the back under the seat towards the inseam. I put the tucks in the base layer and gathered the paned layer to the new size.
Finish them!


I used premade bias tape to finish the leg opening. I sewed it on, cut my seam allowances down, wrapped the bias to the inside as a facing, and slip stitched the bias to the base fabric.
joined the waistband layers together on the top and front edges.
Sew on hooks and bars.
Voilà. 

Production photo credit Maxime Cote

Friday, December 1, 2017

More from Montreal

First, a little photo from this evening as I was walking home after work!
I love the light installations here in Montreal and especially these illuminated teeter totters at Place des Arts. They also make sounds as they are played on.
It is so much fun to see so many people enjoying them.
There was a Christmas craft show at the maison Durable, vendors there were selling crafts made from recyclable materials, a Christmas Market at Place des Arts, with outdoor vendors of crafts and food, and the souk à SAT across the street from us with local craft and food and artisans showing their work. It is all very festive.


I am going back from the last post to show you the base pattern for the short trunk hose. I need to take out some fabric below the seat in the back, either by gathering or darting ( I am already into the fabric so I have to make it work from where I am at now)


This is the base, with some netting applied and the paned pleated fabric draped over top, and put together for a fitting. 
I basically constructed an inner trouser base, and an outer trouser, and melded them together. I slip stitched the paned layer to the base at the fly front (yes I put a zip fly into these) I made sure the waist seam allowances of the outer layer turned down at the waist so the waistband itself is nice and flat. The two layers are then caught together at the leg opening. I need to make an alteration, reducing extra fabric at the hem/leg line so I will probably gather that edge on both layers.
Then I think I will face the leg opening back with bias as a finishing technique.

I am struggling with posting using my ipad, so forgive the short posts and any horrible spelling mistakes.
I will post a fitting photo soon.
Cheers!