Showing posts with label breeches. Show all posts

Thursday, June 25, 2015

Trunk hose: the outer fabric layer

It is very difficult to stop and get photos of the process!
I have a lot of cutting to do and it is beginning to feel like not enough time to get it all done!
This is a very familiar and unwelcome bit of stress. Sigh.

Well, the under structure for the large trunk hose was discussed in the last post, and, to recap, I am building an under trouser base, onto which is attached the structure that will give the finished garment some shape. Then we will construct the outer fabric which will go over the structure and then marry the layers together.

These trunk hose need to be very large, and one of the challenges is to reduce a large amount of fabric to fit the leg, just above the knee. My pattern is approximately 100 inches from front to back fork.
I need to reduce it down to 18 1/2 inches or so. One way to reduce volumes of fabric is to cartridge pleat it. This technique is very similar to how we make our figure eight neck ruffs.

I calculated 3/4 inch pleats to be stitched at every 1/4 inch so that means every inch of finished pleating uses up 6 inches of fabric. If I made it 1inch pleats, stitched at every 1/4 inch then that would use up 8 inches of fabric.

I set up the pattern to have 84 inches of fabric to be pleated into 14 inches, and the remaining fabric to be gathered to fit the leg.

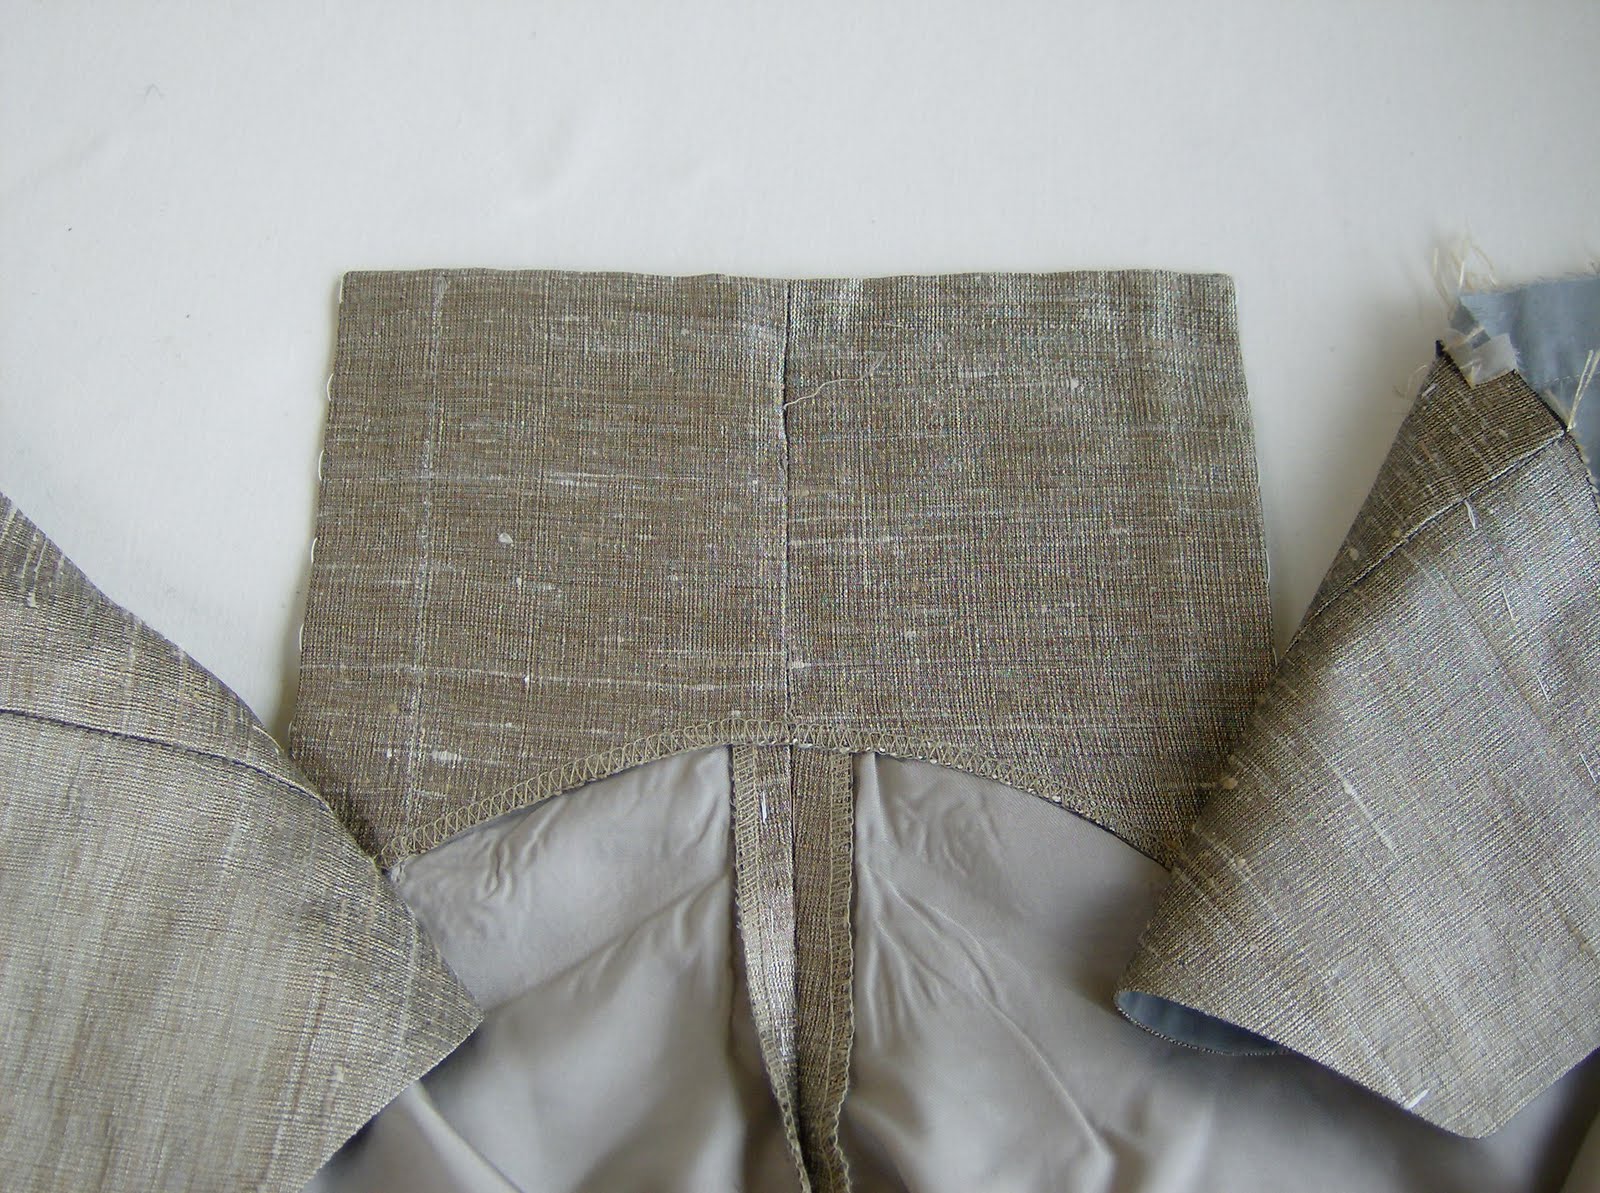
Here is the pattern being laid out.

You can see a dart here that marks a transition point between the cartridge pleated area which must be a straight line, and the area that will be just gathered.

I am using double faced silk satin here, and it will also be "pinked" or cut full of holes to show another colour of silk through the cuts.

I will leave a 3 1/2 inch fold over for cartridge pleating. The fold will be stabilized with a bit of lightweight bias wigan. This fills out the silk and also gives a sturdy edge when stitching the pleats down.
This 3 1/2 inch fold over also gives us a seam allowance to attach the coloured silk to.


I can't fit the whole leg into the picture frame!
In this photo you can see the silk attached and the 2 parallel rows of stitches for the cartridge pleats.


You must use strong thread here, and mark your stitching points accurately. you stitch down on one point and then come up through the fabric at the depth of your pleating, so ours is spaced at 3/4 inch.
We got this far in preparation before we were able to get an answer regarding the pinked cuts to be made in the black outer layer. Once we had our answer, we peeled back the yellow silk and marked out the grid of cuts to be made.
Here you can see the leg from the right side, with the pinked cuts (cuts on the bias), as well as the effect of the dart which helps the fabric turn the corner toward the inside of the leg.


After this the two fabrics are joined together as one in along the seam lines. we then serged them together to keep everything from fraying.

Next up is the pleating, and making them into a wearable garment.

Just a note of thanks to Shona for her hard work and willingness to think through the process with me!

Sunday, June 14, 2015

Trunkhose part 1

I think I am bored with the weekly pictures of my table, are you?
We will just continue on with some other items then shall we?

Trunkhose.
 I leave it to you to look through the Internet to your heart's content for images. 
a disclaimer: I am not in the business of pedantic historical reproduction. I am interpreting a designers vision in modern fabrics for a specific theatrical purpose.

Not my favourite garment to make.
You may think it is strange for someone who works in this milieu but there you have it- I confess to not enjoying making them. I think it is because I have never had the luxury of time to dissect what I am doing and why. They have turned out well enough in the past, but now I have to make some more and I am determined to document what I am doing and why, and maybe learn to love accept them.

First thing first- there are many ways of approaching and constructing them and I have made them in a number of different ways over the years. Luckily for me, I also have access to the past. I mean a costume warehouse of 60 years of costumes, so I can and sometimes have a critical look at what cutters did in the near and not so near past at work.


So the first thing I have been doing is to draft up a pair of breeches that will provide the base of support to build the trunkhose on.
Trunkhose for the theatre need support structures (most of the time) to maintain their shape and silhouette. The shape varies from shorty short Elizabethan trunkhose to round "pumpkin pants" to teardrop shaped fully padded versions, or just enormous unpaned slop styles.
The support they need is both vertical and horizontal. Vertical control keep the length of the outer layer in place. If you just made longer breeches and pushed them higher on the leg, you create a shape but what keeps it from slipping down to its former position?
Horizontal control of the silhouette is often needed to maintain the shape after the vertical length is controlled. What will help them hold their shape over the long term? If there is no support, over time and wearing and dry cleaning they tend to collapse and droop, and that may not be what you want to happen.


This is a rough start to the process in these photos. 
In a perfect world, I would have a separate fitting for the under breech, but time is precious, so I generally mock up only one leg of the truck hose, allowing me to fit the under breech and give the designer a look at a rough silhouette of the trunkhose on the other leg. 

I have a very large "comedy" pair of breeches to make as well as this paned version, so I will try to be diligent and document the process for each of them over the next few weeks. 
Stay tuned.


Saturday, March 28, 2015

A fall front variation

We make a lot of period clothing, so that means quite a few fall front style trousers and breeches.

For those who may be unfamiliar with the term, a fall front is an alternative to a fly closure for trousers or breeches.
The front of the trousers can open close to or right along both of the side seams in which case they  would be "broad falls"or "whole falls" or you can make a narrower front panel that would be called  split falls. There is an under lap which includes the waistband, and then the trouser front is closed by lifting up the fall and buttoning it onto the waistband.

We most often make split falls as they were very common from the mid 18th century through to the Victorian age. They were certainly still used for "court" dress into the 20th century, and used for sailor trousers into the 1970's if I recall correctly, and still used on Lederhosen for instance.

Anyway, there are many ways of cutting and making split falls, the most commonly used technique has a visible placket and the placket is quite often plain and straight.
For one pair of our 19th century breeches I cut a split fall with a variation of the usual placket shape.


These have a curved placket that is cut on the bias.
I like to inset the seam for the under lap so when the fall flap is closed it is hidden, but these also would have worked if I had cut them so the end of the placket was more like the end of a welt pocket.


Here you can see what it looks like underneath the fall front. The waistband and under lap still need buttonholes and buttons. You would close them first, then the flap will have buttonholes and it will button up and close as in the first photo.

The placket itself was a plain bias piece which was fused with bias fusible, then shaped into a curve at the iron. Once that was done, the pattern piece drawn out on it, then sewn to the fronts. I cut a separate flap facing which was then used to finish the top and the edge of the curved placket. 
The under lap is composed of the fabric layer and finished on the inside/lined with silesia. 
I didn't take a photo of that, sorry! The under lap piece is deep enough that the placket is secured from the top through all the layers and the silesia extends right across to the side seam giving support for long term wear and tear.

Variations on the theme make work interesting! 


Thursday, June 27, 2013

Not only suits being made

 Well, things have been very busy at work and we are not just making suits, we have some period costumes to put together or refurbish from stock.
These are some of the costumes we've been working on.
A pair of suede trunk-hose. These are built on a fitted under base of twill. This year we are trying a few new techniques for putting these together. The lower leg or canion of suede is flat mounted onto the twill pieces before the legs are put together.   We constructed the fly completely into the under trouser, which allows us to construct the upper suede pouf separately. The pouf is attached to the thigh first, then brought up and attached to the waistline before the waist band is sewn on.
 The centre front opening in the suede is faced back to the fly notch with a cotton twill tape, and that will then be slip stitched to the fly opening of the under trouser at the end. We figured that by doing it this way, we can remove the pouf if required, make changes to its size, add under structure if needs be without too much trouble. So far so good.
We are also making a doublet that has suede sleeves. These are in cowhide and have decorative ridges sewn down the top and under sleeve. We were able to create a similar look on the seams themselves by stitching a regular seam , pushing all the seam allowance to one side then top stitching a quarter of an inch away- like flat felling- then opening up the original stitch line so creating a similar ridge effect. Luckily we have access to boots and shoemakers and their equipment, because the last seam had to be done on the post bed machine. It makes top stitching inside the tube of the sleeve possible.

Lastly, what is a season without a large robe? It seems I get one every year. Last year was the velvet robe completely lined in fur. This year we have a large scale silk damask, lined in silk duppioni. What isn't in the photos is the waist length capelet of the same fabric lined in....you guessed it, fur.

It is time consuming and sometimes stressful cutting out these large garments. Often I have made a pattern and done a toile fitting without knowing what the fabric will be. So without knowing the fabric width or the size of the repeat, I often have to alter the pattern to fit the yardage I get. 

Anyway, I guessed pretty close as I didn't have to modify the pattern, but it takes a good amount of time to lay out the pieces and make sure that the pattern placement overall is good and the pattern matches at the sides, and that you will have enough yardage overall. Garments like this have to be cut in a one way layout as there is a definite up and down to the pattern. This produces a lot of waste as you cannot top and tail the layout. I also lose a half vertical repeat when I cut the yardage so I can lay the fabric right sides together to cut. This fabric is meant for drapery so it is woven with a half of the pattern ending right at the selvedge edge. I prefer to not use the selvedge as my seam allowance, so I lose then lose a half repeat horizontally, as I lay the centre front and centre back in the middle of the next pattern repeat from the edge. Hope that makes sense.......


Under the cape is an under gown of red velvet brocade with a really nice hand. It is a little bit tricky sewing it together and trying to match the pattern as the velvet pile comes and goes along the seam. I think it is easier to sew plain velvet.
The trick according to Denise is triple rows of pinning. One row of pinning on the sewing line and a row either side to prevent shifting. Oh, and using the narrow velvet foot on the machine. Even then it can be a challenge!


This will be fit tomorrow, so I will try to get a photo of it all together next time.


Sunday, May 12, 2013

A few finished doublets

 Before I get going on this post, I have to say something about the weather. It snowed today.
Last week the temperatures were in the mid to high 20's (Celsius), and today was a high of 3, with flurries. I am not amused.
 
                                                        I have also been very busy at work, which has tired me out and  on top of that we had a vehicle fire and have lost our VW Westfalia, which has not helped in the staying positive department!
But enough of that talk.

I thought I would show you a few finished items today, two doublets and a variation of trunk hose that I am quite happy with.
The brown doublet is quite a large size, I think a 52 chest if I remember correctly. I wasn't expecting this trim as it was not indicated in the drawing I was working from, so it was a surprise when the designer wanted it.
I had already cut the body out when that happened and I was fortunate to be able to accommodate the trim placement in the existing body panels. The unfortunate part for the budget was that it had to all go on by hand, for a few reasons- One: the backing and structure under the fashion fabric was boned and the fabric had already been mounted to the backing, - Two: the trims were wobbly and needed to be basted in place over a ham so they wouldn't be too tight- Three: one trim was quite open and the other was velvet that crossed over the other, and machining looked like it was going to get tedious. The original though was double lines of trim, but that would have been almost 75- 80 metres of trim, so instead it has single lines and 35 -40 metres of hand sewing. Denise and Karen's fingers were very weary by the end of it all. The sleeves eventually got small ruffs as well- sometimes the opportunity to get a picture of anything totally completed eludes me!

The "trunk hose" that goes with the doublet is an interesting adaptation from an idea that another cutter had on a stand. Instead of building separate panes for the trunk hose, the paned look was created from the main fabric. I marked out the "pane" placement, and cut felt in the shape of each pane. The felt pieces were laid on the fabric and the edges were wrapped and top stitched. The fabric in between the pane area was then gathered and distributed behind the panes which creates the effect of depth. It was very lightweight and effective as well. They are built upon an under structure trouser of lightweight drill, that I fit first. The fabric on the canions was applied first, then the paned piece was stitched on at the lower level, along with some shape support (gathered crin), before being brought up to the waist, where the waistband was stitched on through all the layers. That was a very short description of a complicated process!

Next, we have a suede doublet with contrasting sleeves of striped silk. This was a fun project, marking in all the detailed slashing lines. The suede is a bit soft for this kind of project in my opinion, so it will be interesting to see what it looks like after being worn for six months. We opened up the slashes a bit by stretching one edge with our fingers, like fluting pie crust. The sleeves are bound off separately and then attached into the armhole which is finished with a clipped binding and a second clipped piccadil style wing.

This last doublet is the finished result of the muslin I posted about here. It was supposed to look like two garments, the front edge of the grey is loose and the two are sewn together along the piped seam. It also needed a pocket for a letter, which we found out as we were well into the finishing stages, so on the left side we opened the seam between the two "garments"and added a stay piece of cotton that connected with the side seam and also enabled us to create a pocket bag there, without compromising structural stability.

Whew!


So, what is next you ask?
I have a couple of doublets and breeches to make for understudies on a show I didn't work on in the first place, so that is well underway, and later on I should be starting some suits! Hurray! some regular (1930's-40's) tailoring, and I am looking forward to it.
There may be a doublet or two thrown in for good measure, but I can't wait to make some suits.

Tuesday, January 3, 2012

getting your money's worth

Well Happy New Year to everyone. I hope you had a nice holiday!

Now today I thought I should start to get back to work and I headed over to the studio to look at a pair of "breeches" that I was asked to reproduce.

A number of years ago Carol and I built costumes for this client. I built a cutaway coat, waistcoat and trousers and Carol built a lovely 1880's dress. These were well made and not cheaply done and I think the client had a bit of sticker shock initially, but they have used them for 7 years, and not even on the people they were built for. They have stood up to repeated wear and cleaning. So, I think they have had their moneys worth, as only the waistcoat has needed replacing after 7 years.
It turns out they had purchased other costumes which the "breeches" were a part of. Not sure when they were purchased, but it had something to do with a Napoleon costume.

I wasn't expecting what I saw when I opened the bag.


Ok you can call me a costume snob or whatever you like, but really, what a piece of crap.

This is Hallowe'en type costuming, and it pains me greatly to think that as a costumer, I may be lumped in with this kind of stuff.


My list of what's wrong:
1. They are made of cheap, see through polyester knit. I hope he had a coat that covered most of him.

2. They are badly sewn.

3. They are badly sewn even for what they are.

There is no stabilization in the front "fall" to prevent excess stretching at the waist.
The placket "points" haven't been turned at the point, they are just smushed. The placket points aren't even stitched down, no I lied, there is a handstitch on one placket holding only the inner layer of the placket to the front.
Look at the "waistband". The end hasn't been turned properly then the inner elastic has been twisted and caught when the button was stitched in place.
They were put together by serging and obviously the waistband and body didn't quite end up the same size.
There is no stabilization behind the buttons.

Even if you bash something out to make money, how can you send product out like this? It wouldn't take take much more to make them a whole lot better.

If you are getting costumes for your business, this is not getting your moneys worth, or wait, perhaps you do get what you pay for.

What a way to start the New Year!


Wednesday, September 29, 2010

breeches pattern

The thought for this post started when I went back to look at a pattern I made for "18th century" breeches earlier this summer. I kept the toile pattern and laid it out to compare with my final pattern, then tried to work backwards to quantify what I did and turn it into a draft that I could keep and use again in the future.
Interpreting a design and making patterns for that design is not always a straightforward process. Many people assume that to make 18th century style breeches we would just try to reproduce an historical garment by looking at the few pattern references available such as this one from The Cut of Men's Clothes by Norah Waugh.
The reality is in fact quite different. In the case of our design requirements, we didn't want that kind of period look. We wanted a more modern take on them-a bit more of the seducer rather than the equestrian. That requires a differently shaped pattern. In addition, while looking at the diagram gives you an idea of the period pattern shapes, a cutter needs to have a drafting system or formula to make a pattern.

So what is that period look? What would the breeches in the book look like on the body? If you wanted to make a scaled up pattern directly from it and make a toile you could, but if you look closely at the pattern shapes in the book and look at someone or a photo of someone you can begin to imagine what it will look like on the body.
A little visualization technique.......
First, the side seam is quite straight, and hollowed out. The legs are narrow and you can see that the inseam is quite long - look at the CF line and the front fork. Think about how that will sit on a body. In your mind's eye anchor the pattern at the outseam at the hip, down to the knee. Above that line the fabric will follow the body which has a convex curve not a concave one. Align the front waist line of the pattern along the body's waist and get that CF line sitting vertically in your mind. Remember you would join the two fronts together so that may help your thinking. Look at the leg below the hip and imagine the outseam following the outer leg of the body. Remember, these breeches fit the leg closely. What happens along the inseam at the fork? Align the back waist line on the body- look at the shape of the CB seam. What look will result over the seat of the person now?

I was looking for a good photo to illustrate this but if you've seen some of the BBC's historical movies or TV series, or the truer to period Jane Austen movies you'll see what I mean.

In a nutshell, the excess length in the inseam is great for riding horses, the length and breadth provided by the shape of the back and the CB seam allow for the expansion of the buttocks and thighs while on horseback. When standing though, that excess length sits in the front fork and the excess breadth in back drapes over the seat area.

That is what we wanted to avoid but still have a "period" interpretation. Fall fronts, buttoned leg closures, narrow fitting legs, clean fitting fork and some - but not a lot of - extra fabric over the seat. Tight, but with enough ease that the actor could sit, kneel, lunge, squat, and fence in without problems.

Back to the drafting board!


Monday, July 12, 2010

split fall front breeches

Along with the eighteenth century coats we are making, there are waistcoats and breeches to be made as well.
These breeches, like most of their era are styled with fall fronts. This means that instead of a centre front opening or "fly front", these have a "flap/fall" front as seen here.

Fall fronts come in a couple of configurations- whole/broad falls in which the flap is the complete front of the trouser, from side seam to side seam, and split falls in which the "fall" is a portion of the front of the trouser.

As I am writing this, it makes me wonder what the origins of "fly front" are. I mean, fall fronts are pretty self explanatory really- if unbuttoned, the flap will fall down- that's my own reasoning- nothing scientific.
Historically speaking, both centered and fall fronts appear and disappear throughout fashion history for various reasons- one the most popular reasons in this era for fall fronts was supposed Victorian prudery. A fly front was too obvious. I don't know if I really believe that, but it was the fashion of the day and continues to be the fashion for official "court dress" when one is required to wear breeches.

This is another view of the inside of the fall on the breeches I am working on.
The basic technique is to sew the centre fronts up and then make cuts/slashes into the fronts to create the flap. The slash can be made into a dart or into a rectangular area and have a flap that is either "clean fronted" or with a placket - which is how these were done. I think the dart technique is quite unstable so I rarely use that method.
The flap needs to be faced to the inside to finish the top edge. These were made by using a single piece of fabric to create the placket, finish or "bag-out" the top edge and become the inside facing. I think it is important to minimize bulk when making these and to also keep the opening from tearing out with repeated wear.
While constructing the flap, you also need to make an underlap so that you have something to sew the waistband to and for the breeches to be closed properly. I like to cut the underlap pieces so the top placket is stitched through the layers of the underlap.

I have not sewn the waistband on yet in these photos, but the waistband is sewn to top edge of the underlap, across the remaining front that is not part of the flap and continues along the waistline to the centre back.

The breeches are put on, the underlap is buttoned first and then the flap is brought up and buttoned to the waistband.
I like to leave a section of the centre front seam undone to create a buttonhole in the flap rather than making a machine or hand sewn buttonhole through all of the layers.


It is a technique that is really quite easy to master although it can be a bit difficult to wrap your head around at first- it is really like a men's shirt sleeve placket in many ways. You can see the finished placket above and the "buttonhole" in the flap below.


Sunday, July 12, 2009

riding breeches


We are making two pairs of riding breeches for this show and I am always happy to find vintage examples of garments to look at and to compare to.
This pair dates from 1941 according to the label inside at the back.
The wool is incredibly dense and heavy-I'd guess it is at least 17oz to 20 oz weight, and it could be blended with some synthetic fibre since the label recommends washing in warm, NOT HOT water with "Lux".


This is a detail of the inside of the leg opening, it has handmade buttonholes and very small buttons, the bottom is bound with silesia , creating a facing to the inside, where it has a little jog around the bottom buttonhole. The inside knee suede pieces are stitched on by hand both on the outer edge as well as about 1cm in from the raw edge.


The fabric is so dense that instead of bagging out edges such as on the fly extension, the wool is pinked and silesia is stitched behind, or in the case of the fly facing, the silesia binds the edge.
They have cut the fronts to make the pockets and then left all the excess fabric inside the breeches, where it sits in between the pocket bag and the front of the garment. You can just see a corner of it here in the lower right.

These breeches are cut in the way that you see in the period drafts of the time. There is ample seat room for sitting on a horse, the seams and darting near the inside knee are cut raw and whipped together to reduce friction between your knee and the saddle. The fabric is heavier than most overcoats are these days.
All of these characteristics are beautiful and functional , but not quite what is needed onstage, which is one of many reasons that I while I collect and study and dissect the period drafts, I can rarely use them verbatim for my work.