Tuesday, September 6, 2011

Trouser pattern shapes

As I mentioned in my last post, I though it might be interesting to walk you through the process of drafting a pair of men's trousers from a published draft.

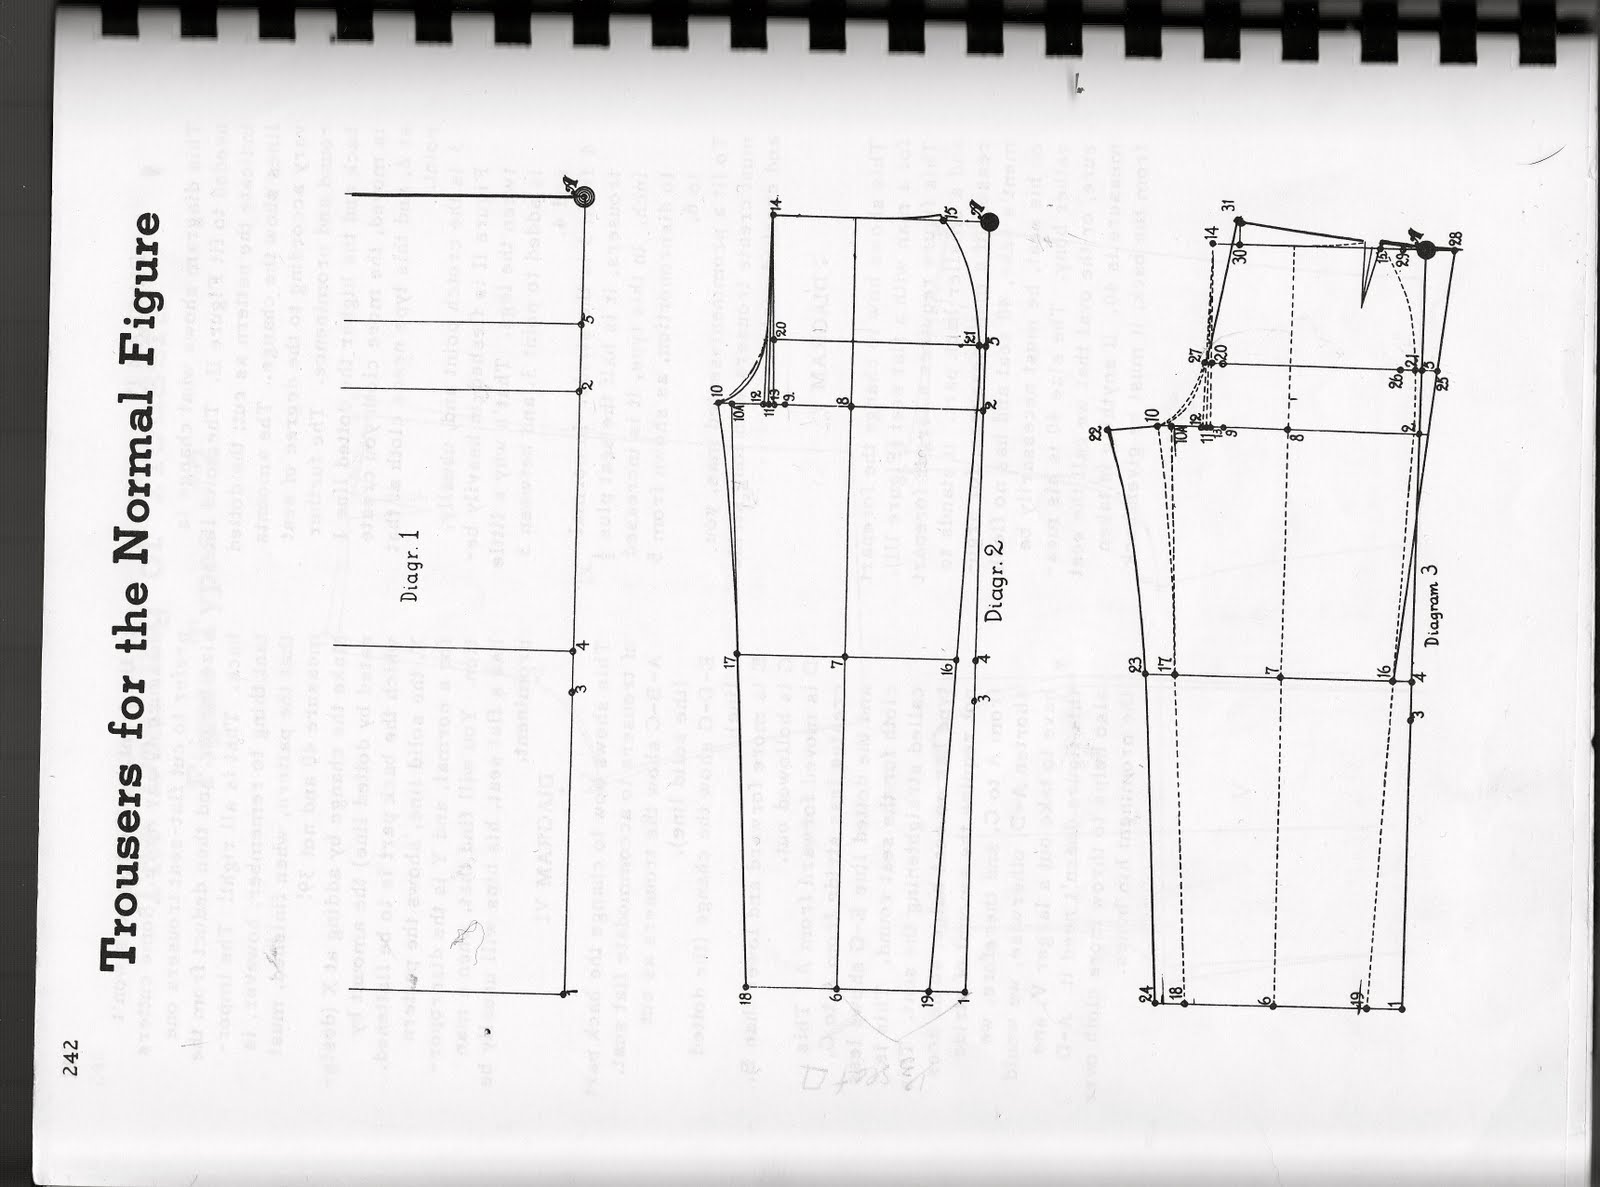
In preparation for this, and in my previous teaching, I like to point out that trouser pattern shapes have changed quite a lot over the years, as I hope you can see from this selection of patterns I have scanned. All of them will produce a pair of trousers but with different silhouettes.
One of the things I have done with the apprentices I have trained is draft these old patterns and make them up so you can really see the differences in the final shape. We won't be doing that here, but in order to recreate the silhouette of the period, you need to understand how the patterns work.
For most theatrical tailors, once you understand the mechanics, you put them to use by developing your own drafts rather than trying to use the 1980's Metric Pattern Cutting draft to make mid Victorian trousers.
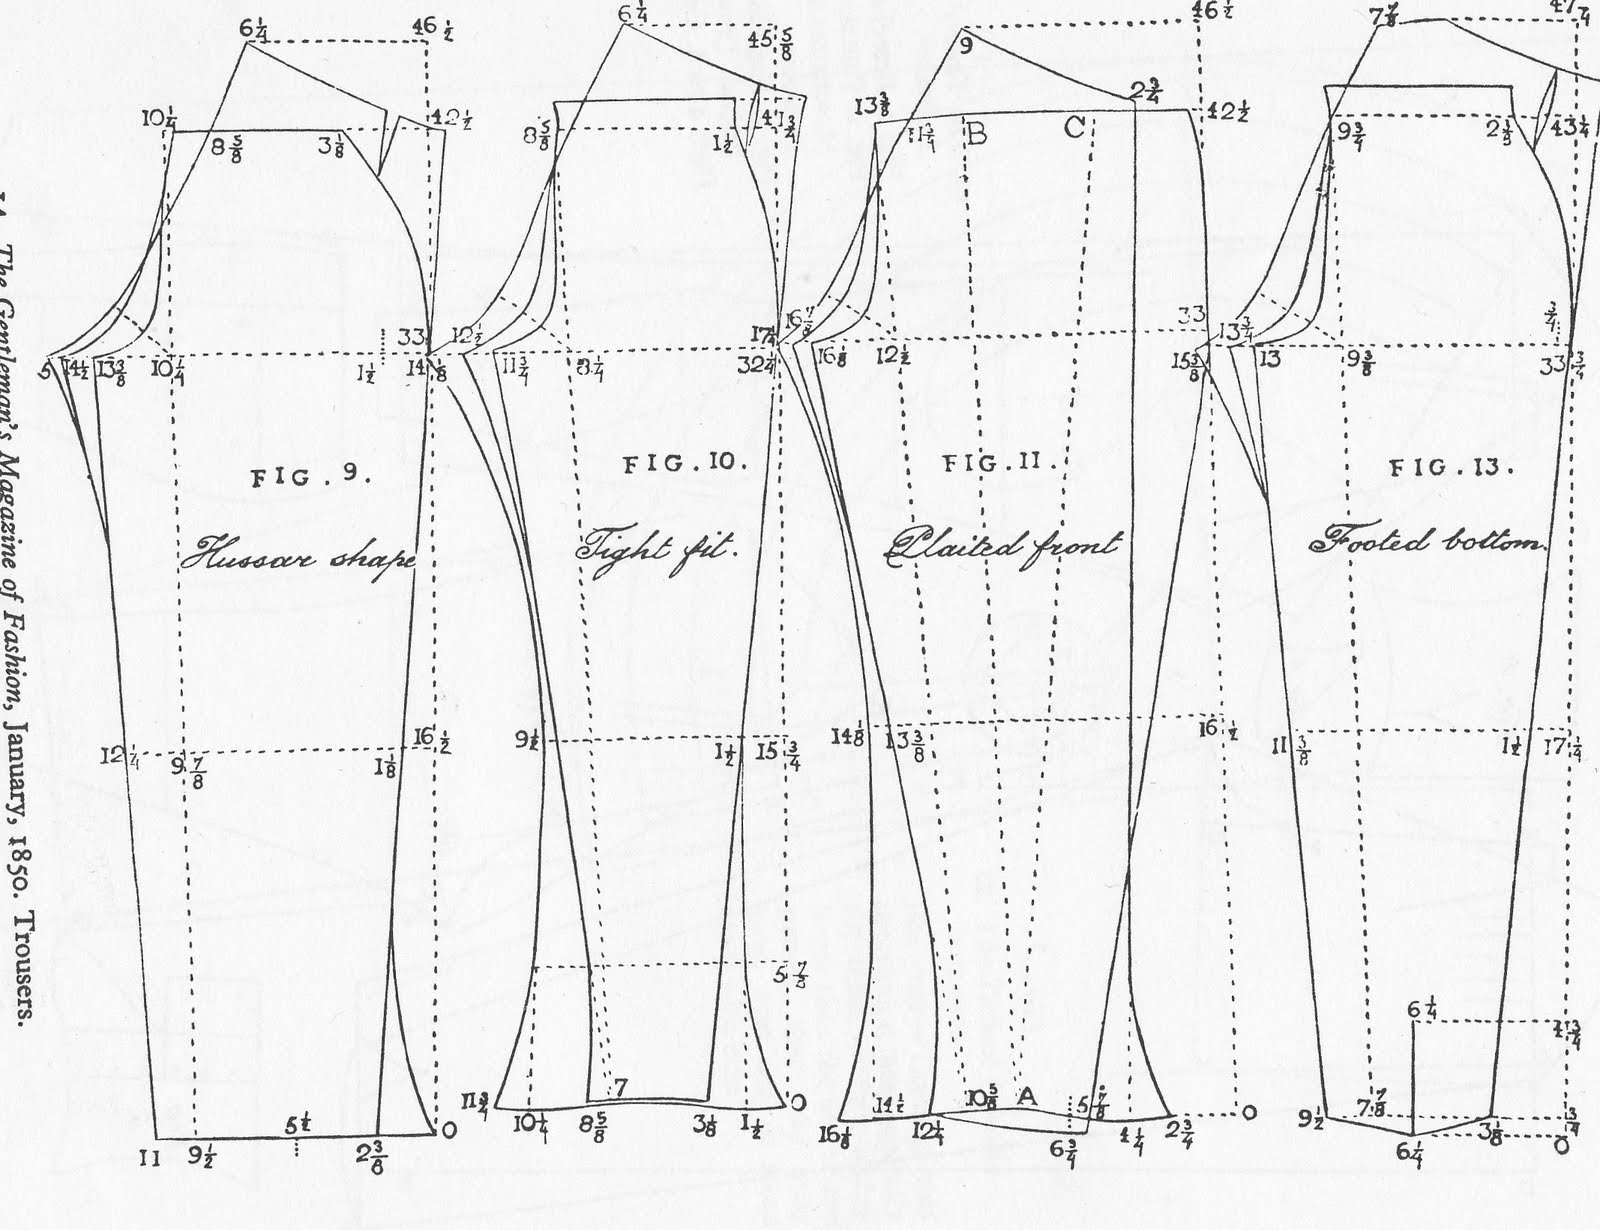
These are c.1850 from The Cut of Men's Clothes by Norah Waugh

This is c. 1920 from The Climax System for cutting gentlemen's garments.

The Modern Tailor Outfitter and Clothier c.1940
The Modern Mitchell System c.1950's
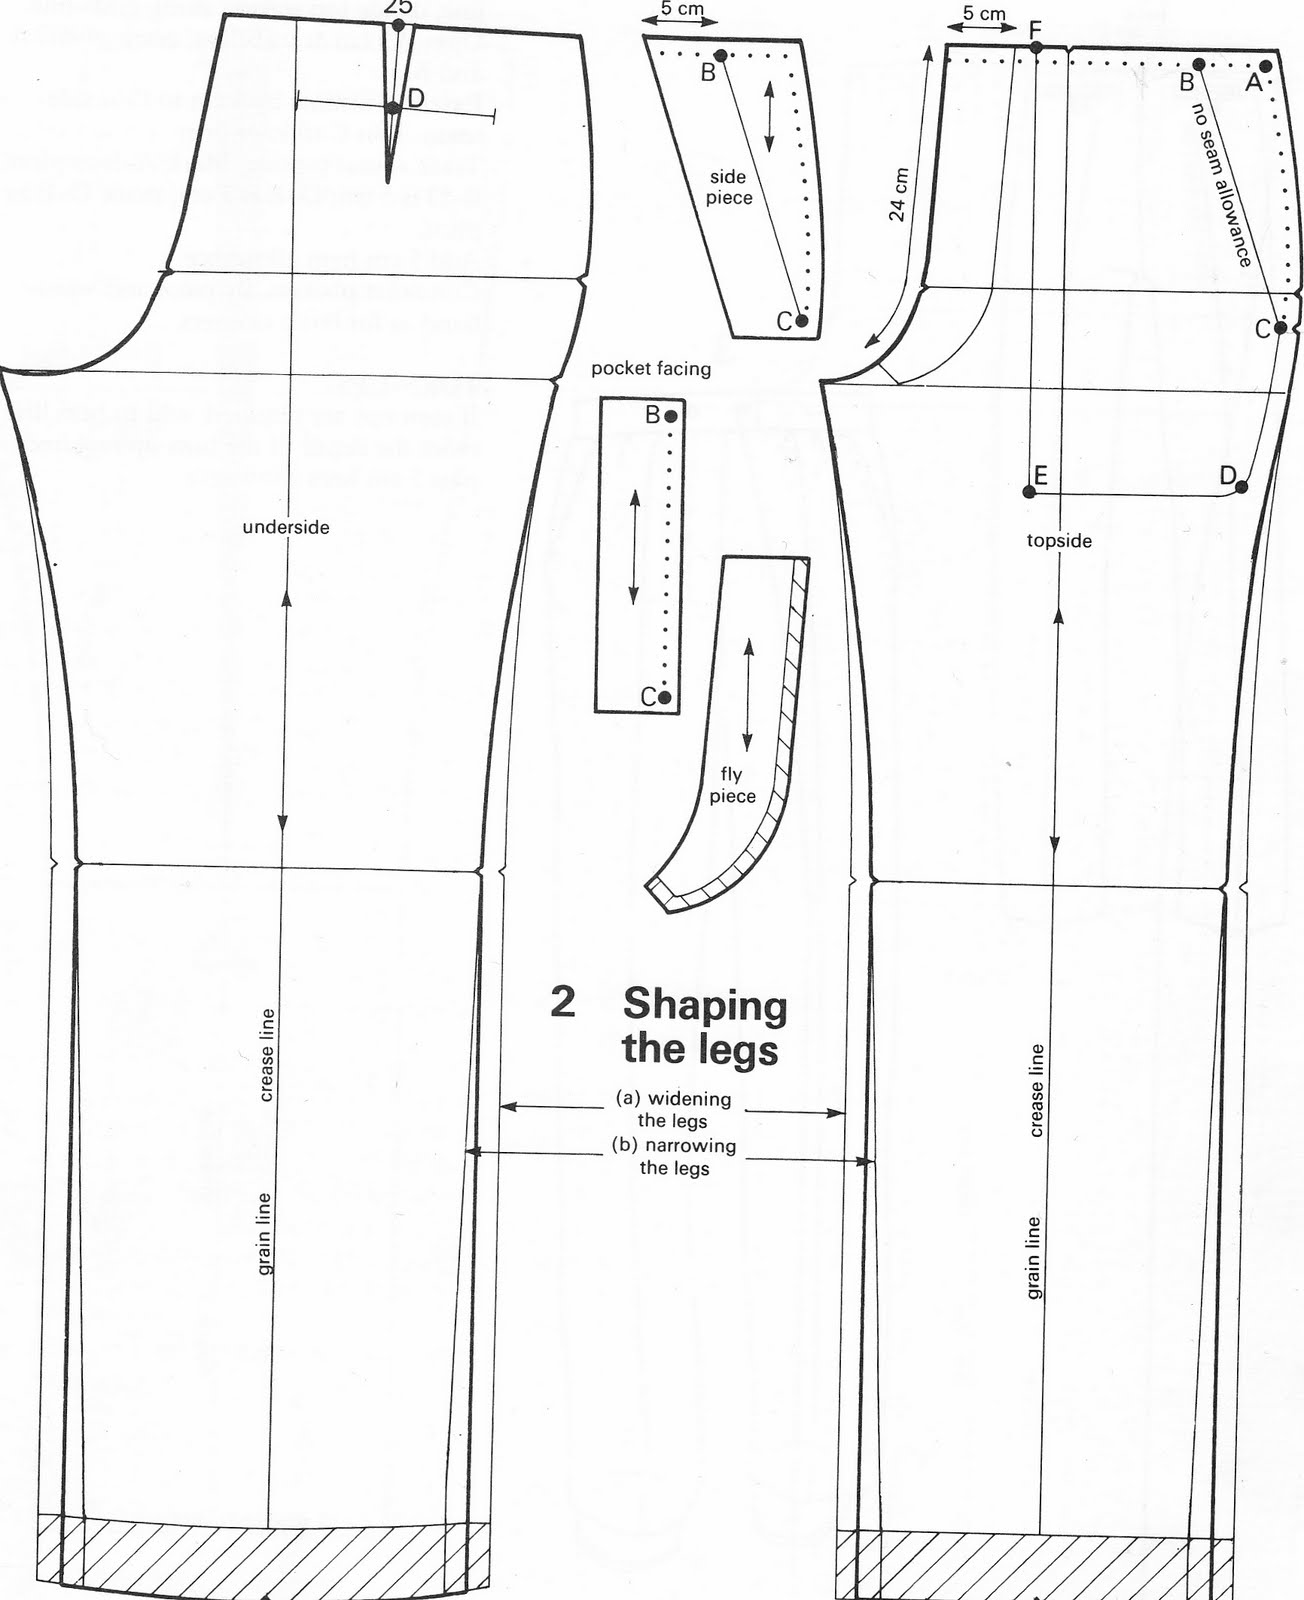
Metric Pattern Cutting for Menswear by Winnifred Aldrich 4th ed c.1997 but I think the draft is the same as it was in the 1980 version.

So, if you are deciding which draft to use keep in mind what you want the finished product to look like. Don't use a 1940's draft if you want low-rise modern fitting trousers. You will just make youself frustrated.

Next, I'll give you a list of tools needed to draft a pattern and the draft I have chosen to use. Feel free to draft along and ask questions. I've done it so often that it is easy to forget that others have not, so I hope this will make sense.

I'll probably draft in both full and 1/4 scale because it is easier to scan a page than take good pictures of a fullsize pattern.


Saturday, August 27, 2011

Teaching

Over the past decade, I have been involved in teaching individuals and groups about tailoring and cutting (patternmaking).
I've been aware for some time that training is limited to non-existent in the theatrical field and to some degree in the fashion world of menswear.

There are sites such as the Cutter and Tailor where drafts and drafting instruction, and to some degree construction techniques have been posted online, but for the inexperienced, following the instructions can feel like learning a foreign language, interesting, but more often than not, frustrating.

Many people attempt to draft patterns because they want to make patterns for their own particular body, and that can produce more frustration because the patterns are for the proportionate person, and if you do not have that figure, you end up struggling even more to understand how to make it all work. Not to mention, many of the same people have never sewn in their life so they are trying to master two rather difficult subjects at the same time.

The construction methods available are often dated and limited. Tailoring is also something that is difficult to learn well or professionally, without someone by your side to demonstrate, to physically show you what to do: how to hold the fabric, use a thimble, make a welt pocket, etc...
Additionally, many people want to learn but are not interested in becoming professional tailors. Many people also cannot afford to go back to school full time even if there were course being offered. So we have a dilemma.


I am working on developing some of what I teach as a series of online courses, and I'd like to pick your brain about whether that would be something you would be interested in paying for.

Have you taken any online courses? What do you think worked or didn't in terms of that learning experience? Was there time alloted to chat with the instructor? Did the course use Skype or Facetime? Was the subject something that required a hands on approach like painting rather than a cerebral only approach like analysing the popular novel?

In the spirit of it all, I thought I'd walk through drafting a basic trouser pattern. This won't be set up as a course but just a testing of the water for me and maybe fun and informative for you.
What do you say?

I'll be absent here for a week or so for personal reasons, but I'll be back after Labour Day to hear what you think of this.

Enjoy the last week of official "summer", lets enjoy it while it is here. Good luck if you are heading to school or sending someone off to school, and if you are in the path of hurricane Irene, be safe!

Wednesday, August 17, 2011

back from holiday


Well,
I am back in the land of internet access, had a lovely time away.

I confess though, that I am experiencing the sudden drop that you feel when you've been working flat out under pressure for many weeks only to suddenly be finished and hit the wall of inactivity.
On the one hand it is delicious, and on the other, I am driving my family crazy as I pace around feeling like I should be doing something more constructive.

So, I am networking and hoping to hear back regarding a project or two that I've been pursuing, catching up on some reading (on holiday I read The Thousand Autumns of Jacob De Zoet- fabulous!) getting one lovely teenager ready for band camp and another year of high school, and thinking about tailoring and the lack of available learning opportunities.
I'm also thinking about painting or printmaking again, so maybe I'll take some supplies to the studio in case inspiration hits me.
As you can see I need a focus.

This is what happens with excess brain energy while on holiday!

Wednesday, August 10, 2011

18th century dress details


While I am away I thought you'd like to see some of the beautiful dress details on the ladies costumes for our last show.
Sorry, the colours are a bit off as I was taking photos in the hallway with flourescent lighting.

WE had a lot of trim and details on the menswear but again the womens costumes out trim us.

They are even more beautiful when you see them worn- the fit is so good and what more can I say, they evoke the period perfectly.

Monday, August 8, 2011

finished coats


Here's a final look at a few coats and waistcoats that we have finished.
You've seen the process for the grey coat all along, the green coat is the made of the wrong side of the same fabric as our footmen coats. The cream coat is a very thin silk that needed a fair bit of supporting structure inside it. I love the mauve lining.

I'll be back to regular posting soon.


Saturday, August 6, 2011

vacation


Our work season is finished, everything is set and ready on stage for opening night and I am taking a well deserved vacation for the next week. I've prepared a couple of short posts to appear while I am gone. Swimming, books, wine, music, friends and family.
Cheers!

Friday, July 29, 2011

trim details


When I start making patterns for the costumes, I usually don't have any idea of the trims that may be used or the button size that may be chosen but those things make a huge difference in the final pattern and in the making up process of the costume.
With our footmen costumes, the shape of the wide trim and the placement of the trims dictated the amount of button stand and the spacing of the buttons as well as the construction technique to a degree.
I first fit the waistcoat by pinning it together along the CF line so I have a true line to go by once the trim is decided.
After the designer pins the trim in place, I have to work everything out for the stitchers.

(I also need to make sure that there is adequate support behind the trim so if I haven't cut enough support at the beginning I have to add more later. Luckily I had cut it in the first place.)

So I need a map of sorts.
I made a small sample of the front, and went to the buttonhole machine to put in some holes so I could determine the smallest hole size I could use. I wanted the wide trim to cover the tail end of the buttonholes, and I also wanted the button spacing to work out so that there was a buttonhole at every curve of the wide trim.
I needed to allow just enough space in front of the buttonhole to accomodate the narrow trim.
Once I had all of that figured out, I could mark the garment properly for sewing.

Armed with the map, the seamstress did a preliminary lay-out of the trim, so we could make sure it worked for button placement and also to figure out how the best way and place to turn the corner with the trim as it travels around the skirt and neckline of the waistcoat. This preliminary work allows us to sew most of the trim on by machine which is usually the most efficient way of applying it.
The right front is not a problem in that the trim could go on by machine before the facing and lining were installed. The difficulty with trims and functional buttonholes is that the buttonhole machine does not take kindly to trim, so we had to be clever and put the trim on around the skirt of the waistcoat by machine and then stop just below the bottom buttonhole. The buttonholes have to go through the facing, so the facing was put on and basted to the inside, then I put in the buttonholes. After that, the trim was basted in place, covering the buttonhole ends and then handsewn to the fronts. The facing and lining seam was then joined by machine and the waistcoat front was finished as usual.

It is interesting how many details need to be thought out in order to finish a garment. More than most people would realize, don't you think?