Showing posts with label 18th century. Show all posts

Thursday, October 14, 2021

Collar structure and the importance of ease

     In some areas of a garment we may want substantial support and we need to figure out a way to create that structure with interfacing. We want that structure to not compress, squish down or lose its shape over time.   We don't want that interfacing in the seam allowances though because that will make them thick and bulky.  

The choice of structure in a collar for instance, could be something as heavy as buckram or multiple layers of collar canvas ( sized linen ) put together with or without a "glue" to hold the layers together. 

Here I have made a rough sample of one layer of linen collar canvas fused (with stitch wichery), to one layer of hair canvas. This may or may not be enough for your purposes,  you need to sample different materials to get the right combination.

If you use multiple layers laminated together with a fusible you should stitch through the layers to ensure they will not de-laminate over time.


Cut the laminate to the finished shape and size required - no seam allowances.


Laminate and cotton ready.


Stitch through the layers to hold the laminate together permanently.


Cut a piece of thin cotton larger than the laminate  

stitch the laminate to the cotton, stitching through all the layers again. 


Trim the cotton leaving a seam allowance beyond the edges of the laminate.


Cut your fashion fabric leaving ample seam allowances 


Baste the fashion fabric onto the laminate/cotton. *


* This is important- Baste the fashion fabric to the laminate/cotton over your hand, or a ham or tailor's egg to give it shape. A collar is going to go around the neck, so think of it as a partial circle. The outside of the circle is larger than the inside of the circle so the fashion fabric needs to be slightly bigger. If you just apply it flat on the table, it will resist being forced into a curve and will spend the rest of its days trying to lay flat again, and it will be trying to do that while attached to your jacket! 

The fabric thickness should be accounted for as well. Don't forget about turn of cloth! It takes a bit extra ease and seam allowance to wrap a thick fabric around the interfacing to the inside than a thin fabric. 

join the laminate to the fashion fabric by stitching about 1/8 inch away from the edge of the laminate through the layers.

Lay it flat on the table- see the slight ripples? You need this ease in the fabric to make a successful collar.


The same technique is used for the cuffs which are actually joined into a circle. Once you sew the cuff seam creating a cylinder you do not want to see any buckling of the structure.


Friday, October 8, 2021

18th century costume structure and support

Once I have fused all the fabric and it is cut out, the pieces need to be marked. The style lines need to be seen from the right side of the fabric and some areas need to be stayed to prevent stretching out. Since we are in the fashion fabric, that means most of the marking is done by hand. This coat will come apart after the fitting, so it is essential to have everything marked beforehand.

Here is a partial half scale pattern of the body of the coat I made for you. I made this pattern with a side body panel, not true to period but it gives a bit more shape through the torso and a bit more flare to the skirt at the sides of the body.


Next, I have to think about structure. Which areas need support and what materials are available to give the support needed.


I need a chest canvas- and for this I purchased an overcoat length canvas. Like this one but longer.  I need to make some modifications to it. I want the chest area to remain in its normal position, but I don't have a lapel, so I want to add in a piece of hymo so there is a double layer across the front. 


I cut the coat with the straight grain parallel to the front edge of the skirt as shown here.


I have found that this reduces the issue of excessive  bias stretch along the front edge. it also looks better in striped fabric, as the stripes don't run off the edge!


The chest canvas, from approximately the waist down, is modified by darting it out and slightly shifting the lower area in sections so the grain of the canvas is the same as the coat. The darts are cut out, then joined edge to edge with a strip of fusible interfacing and zigged to hold.  


I also need to give the skirt areas support so they don't collapse. We want the skirts to have some oomph to them. Support inside the skirts is also useful because we will be sewing trim on the skirts and the support will stabilize those areas.

I used a product called Sew Sure firm. This is a narrow sew in interfacing that I have used many times in the past. It used to be available in a number of weights/stiffness from soft to extra firm, but I think now is only available in firm and soft. I use this crosswise so it naturally resists folding flat in the folds/pleats of the skirt. 

I draw out my pattern on the sew sure, and it is then flat mounted to the skirts by hand, down the pleat lines as well as around the perimeter. The Sew Sure that we put in the skirts also benefits us when it is time to hem the coat- there is something to cross stitch the hem allowance to!


Other areas needing support are the cuffs. here I will use a piece of the sew sure, and a piece of fusible canvas/hymo to give me the required stiffness. Pictures and details later!

The collar also needs a support, and for this I use a laminated piece of hymo and collar linen. The collar is cut nett (no seam allowances). This is mounted onto a piece of thin cotton which will act as a seam allowance. Pictures and details to come!

Similarly to the coat, the waistcoat fronts are cut out, a piece of hymo is cut for the fronts and basted in for the fitting. The waistcoat back is just a piece of muslin for the fitting. A collar is cut and mounted to cotton, then basted in place.

Lining- I generally cut  the lining for the sleeves for a fitting- it helps slide them on and off, and I cut the back body lining, again so the garment slides a bit more easily over the waistcoat and sits on the body without friction.

I cut the rest of the linings as well as the waistcoat back after the first fitting.

Tuesday, October 5, 2021

18th Century costume getting to the fitting stage

 Getting to the fitting stage.

I was going to get one fitting for this costume. 

Seven years ago I made mock ups for the first fitting because a lot of decisions get made at that stage, ones I could not anticipate, and it is much easier to correct for fit and allow for design decisions when you aren't cutting into expensive fabric. 

Mock ups save time- mostly in sewing time, because putting together a mock up in a cheap muslin means you can prepare it faster.  If you cut something in the real fabric for a first fitting, you need to mark everything carefully, allow inlays in areas where you may anticipate changes for fit, and sew it together so that you can take it apart after the fitting.  All of the interior structure needs to go into the garment right away as well. For instance, in a mock up I might just apply some fusible to the fronts of the coat, but for this coat, the chest canvas was basted in as well as all the interfacing to support the full skirts of the period. In the fitting, you also need to know where and how to adjust for fit, and mark changes with chalk and pins (rather than sharpie on muslin). In a mock up I might feel more free to clip into certain areas or keep seam allowances narrow, but in the real fabric, you have to be much more careful.

What mock ups don't do is allow the designer or director a chance to see the real fabric in action early on. With only one fitting, cutting into the fabric was going to give the director a better idea of what the final costume would look like.  

So, one other thing to consider in saving sewing prep time with a mock up - you can get to the fitting stage faster - but you do then have to allow time as the cutter to alter your patterns and cut everything in the fashion fabric after the fitting. 

With two weeks from fitting to delivery, I didn't feel there wasn't enough time to make that happen.  

So I cut right into the real fabric for all of the pieces. Shirt, waistcoat, coat and breeches/tights. I passed off the shirt to a colleague to prepare, I sewed the waistcoat shell and breeches/tights and another colleague put the coat together for the fitting. It did help that I had a handle on the design, and from what I could tell, the measurements didn't indicate any big challenges, but still, it felt a little daunting to go out on that limb. 

All that being said, the first thing I looked at was the fabric itself. The coat fabric was a pretty brocade lamé without much substance. The waistcoat fabric had a bit more heft but it was unstable, the shirting was a somewhat sheer poly chiffon type fabric. The fabric for the breeches was a stretch velvet.

The coat and waistcoat fabrics both needed support, and the best thing I could do was to block fuse both of them. The coat was block fused with a product I know as "wool fuse" which gave the fabric a bit more body, and the waistcoat fronts were fused with a product called "sewer's dream" which is a very light almost sheer fusible.


"Sewer's dream" on the left and "wool fuse" on the right just to give you an idea of the differences in the two interfacings


The iron and table set up I use. This is an older Sheldon steam boiler and iron. It will give me 30 psi of steam when it heats up fully. I should know what the temp of the iron head is at but I don't so I  will put that on my to do list!


The coat fabric had a paisley woven design and to block fuse this meant I had to set myself up at my iron with a metre stick and square so I could keep the fabric squared up while fusing. My iron table is 24 inches by 62 inches, minus space for the boiler so I could only fuse just over half the width of the fabric as I went. 

First, press the coat fabric - all 8.5 metres of it and test for shrinkage. Then assess how much you need to fuse; I fused 6.5 metres. Cut the fusible, making sure it is on grain.  Set up at the iron table, with the fabric at your feet, the fusible carefully folded and ready to be laid on top. Bring the fabric it up onto the table,  square up the pattern in the fabric up with the metre stick and square, lay the fusible in place and fuse a section. Shift the fabric forward, do it all again, aligning the grain as you go. I tried to be thorough, but I knew that I just needed to stabilize it as best as I could and if there were areas that needed a bit more attention with the iron I could do that after the pieces were cut out.

Hours pass......

But finally the fabric is ready to be cut!


Monday, October 4, 2021

18th century costume and wow how time flies!

Isn't it funny how when you are busy you can find more time to do things than when you are not busy?  

Four months flash by.....I was working, but boy things feel strange theses days. 

I need to get back to my posts about making my coat and my thoughts on pattern drafting for women. but I am ignoring that right now and talking about something new.

Anyway, onwards and upwards.

I received a call mid summer by the designer asking me if I could reproduce an 18th century costume I had cut way back in 2014. It was to be for a filmed version of a new Opera piece. The AD loved the costumes we had made and wanted a new version for another singer. 

Of course I could! (confident that I still had the patterns handy, because I keep a lot of my old patterns.)  In the cold light of the next day, I went looking for those patterns only to find out that during my covid cleanup at the studio, I had thrown out those seven year old patterns, because I figured I wasn't going to need them again.

Isn't that always the way?

Merde!

Nevermind....

I proceeded to redraft, to the new singer's measurements: luckily they provided me with the originals to look at so I could jog my memory, and meanwhile the designer went shopping.


It was like Christmas unpacking all the bags of lovely fabric and trim and buttons. He had made me a bit of a map as well, which was essential as we were not going to be able to work in person on this. 
I was in one place and he was going to be eight hours away working on another project. 

The other complicating factor was time, as rehearsals didn't start until September 7 and delivery needed to be by the 22nd. 
This only left a two week window after the fitting to get it all done. I know that sounds like a lot of time, but for an 18th century costume, it is not a lot of time. Luckily I had a couple people on board with me to help out. 

first step- drafting patterns
second step- prepping fabrics and getting everything cut out ( right into the real fabric!) 
third step - putting it all together for the first and only fitting.

More to come..... 


Sunday, May 14, 2017

Cutting cloth with one way design

Well, first I need to say that I am just crawling out from under one of the most trying times at work.
I shall not go into it here but suffice to say that management errors have left our department with crippling amounts of overtime.

Hence the lapse in my best laid blogging plans.

Back to the topic at hand though.
The designer makes 99% of our fabric decisions, and although the cutters are sometimes asked their opinion on whether it is suitable or not, usually it arrives on our table and we work with it.
Many fabrics don't pose much of an issue. The easiest are plain fabrics without a nap or one direction design- think a good plain woolen cloth. You can top and tail the layout of your pattern pieces (this means you can turn a pattern piece upside down/top to bottom in the layout) taking advantage of every square inch of the cloth and being quite frugal in its use.

Up the ladder from the basic could be a cloth with a woven pattern in it- a symmetrical or balanced check or stripe. The challenge is to place your pattern on the cloth keeping in mind the centering of the garment on the woven pattern in the cloth, and matching the pattern where needed at centre front and back and sleeves to body. You can still top and tail the layout.

Another rung up the ladder might be velvet (or corduroy), a definite one way fabric. I remember as a teenager, cutting myself a pair of overalls in corduroy, and being completely stymied by the fact that one side of the body looked dark and the other side light. I knew nothing about "nap" and I don't think I ever finished them as I was so confused.
We often cut velvet "nap- up" for the stage because it usually reads as  a richer colour than when cut nap down. You must cut your pieces all in one direction- you cannot turn a piece upside down to fit better on the layout because it will end up a different colour than the rest of the garment. You can turn a pattern piece over, only as long as up remains up. These fabrics often have a fair bit of wastage depending on the garment type.

Next up could be asymmetrical/unbalanced or one way printed or woven designs. These could be plaids, florals, uneven checks or uneven stripe combinations. These fabric designs cannot be "book matched" at the centre front or back.  When they are folded in half, right sides together for cutting, the design in the fabric does not lay matched atop each other.

I have run into uneven or unbalanced cloth a couple of times this year. Twice with suitings and once with a velvet floral. I had no problem making the decision of how to cut the velvet but I started wondering about the options for the stripes.
Here is one of the striped fabrics:


It made me wonder about whether I should cut the jacket as a one way design or not. I could conceivably cut the yardage in half lengthwise, and turn one layer of the fabric to make it symmetrical. Hmmm....I didn't do that in the end, but it did make me wonder if doing so was a "thing" or a no- no.


Here is a visual of what I mean. Imagine that you are looking at the centre front of a jacket- does it look better as a one way pattern or symmetrical? Chime in by all means!


Here is an example of an 18th Century style waistcoat in the floral velvet where you see the one way fabric in the cloth and how I have laid it out so the pattern continues uninterrupted at mid centre front. It requires enough fabric to do this and there are a lot of offcuts, which I used for the facings and such so as not to waste fabric.


Of course, it also takes a bit more time when cutting out cloth like this as you have to be quite careful to make sure that all your pattern pieces are oriented the same direction. The tricky bit is with pattern pieces like trouser backs and undersleeves. These pattern pieces are developed from the trouser front and top sleeve respectively. They "face the same way" when they are drafted.
In laying them out on the cloth you must make sure you flip the trouser underside pattern and the undersleeve to maintain the directional patterning at the side seam in trousers and of the sleeve.
that sounds complicated so here is a quick sketch of what I mean.


Okay, I think that is all I can muster up in the bad drawing department this evening!

It is certainly a lot to keep in mind while cutting things out!

Saturday, March 19, 2016

Carry on!

I thought that I should follow up on the thoughts about structure. This won't be that post as I am finding myself with no spare time these days.

I have been trying to get photos of this dress and all its underpinnings, and I keep missing the time when it is on the dress form in its most basic form, but I will get them!

My colleague Carol, is making three dresses in this style- talk about needing underpinnings to support a shape- I think it is one of the most extreme shapes of women's fashion don't you?
Here's a link to the V&A museum which describes a dress of this type they have in their collection.

For my part, last week, among other things, I made a pair of trousers for a tree.
Yes. I am still working out the structure to support the form, and the actor, designer, and choreographers and coaches are working out whether the stilts will be set at a maximum of 48 inches from the ground or whether that is too tall!
It made me a bit nervous at the fitting watching the actor work at 28 inches up so I cannot imagine walking around four feet off the ground. We will see.

I have not had any luck so far finding another studio space but I am trying to be hopeful but also to plan for the possibility of putting my equipment in storage for a time.
There just are not enough hours in the day or week to work 40 hours, eat sleep and track down landlords and property owners and set up times to view locations.

Anyway, carry on! as they say.


Friday, May 1, 2015

week 16 with trim!


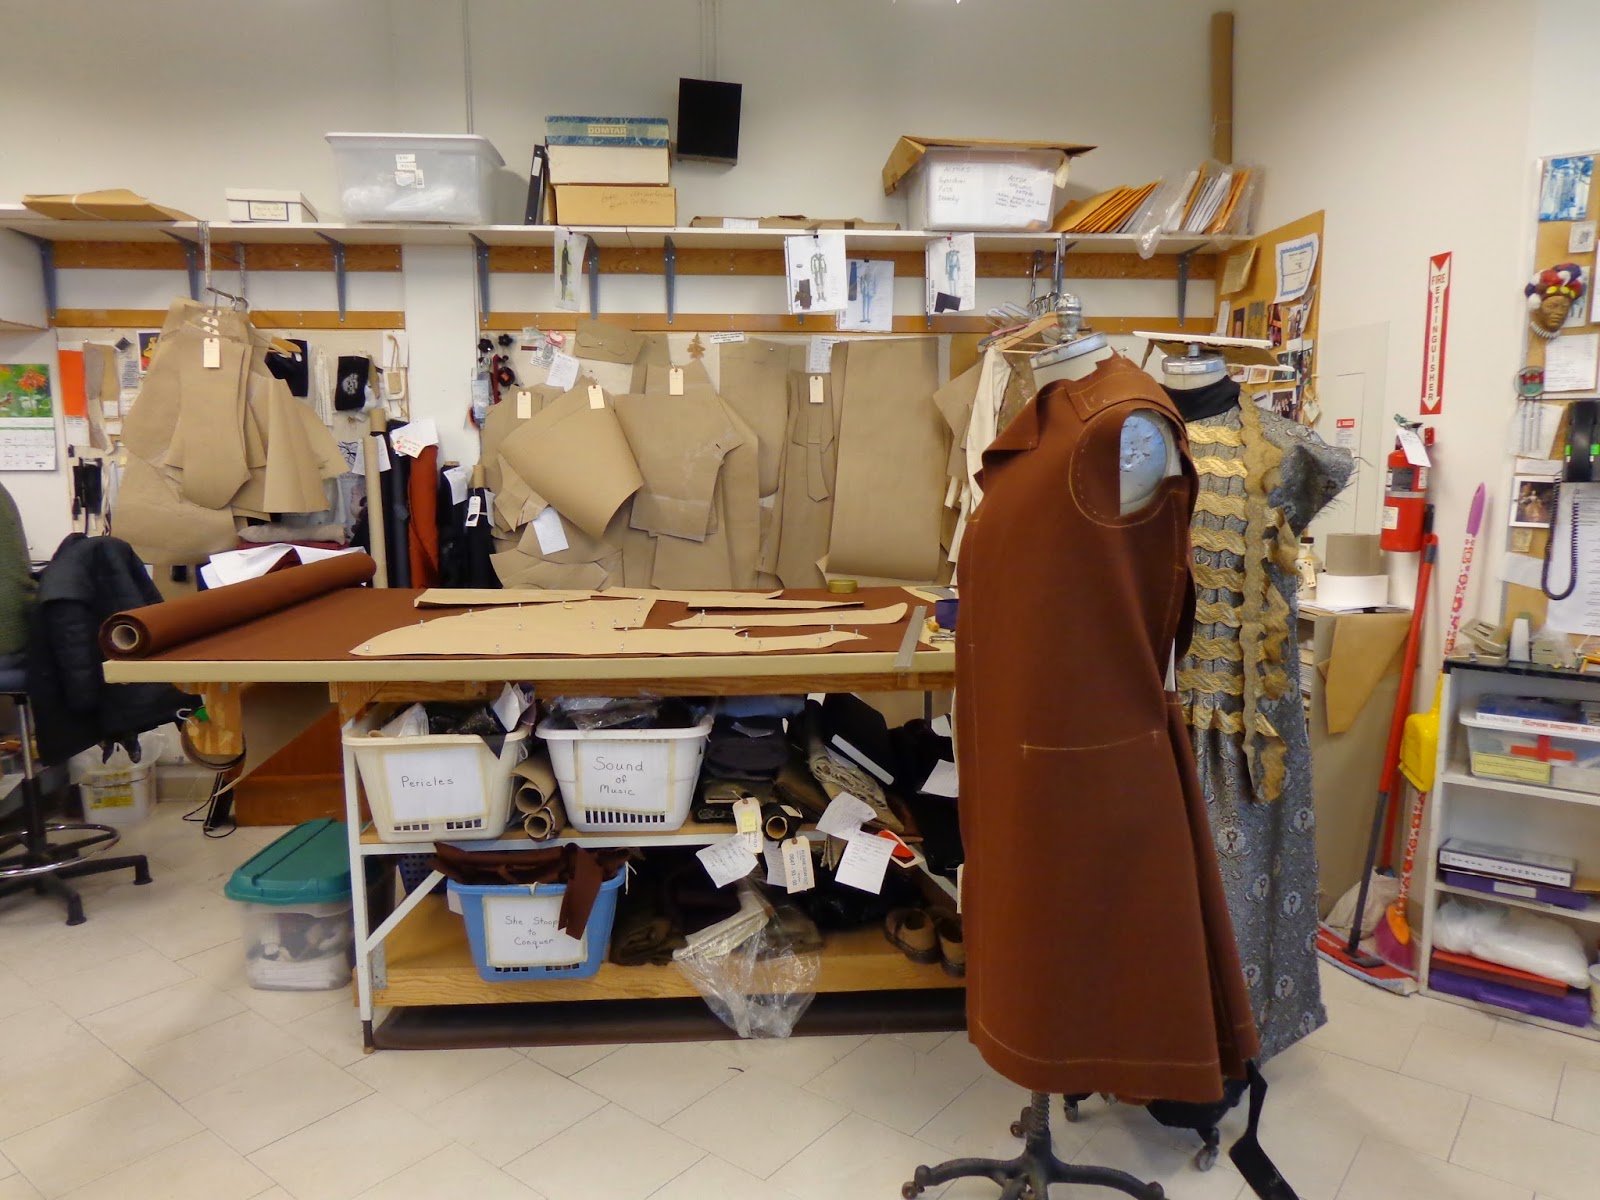
This was the view on Monday at the front of my table. Three of the five coats for the 18th century show are prepped after the fittings with their respective trim and buttons. That pesky cape is still there, and honestly, it was still in the same position on Friday. This show is on stage a week from today so I have to get someone to work on it next week- it has just come down to the wire.
Now the view from the front looks in control but the view of my table is not.
Bags of trim and buttons for all five coats, waistcoats and breeches were in the process of being dumped out, pinned on, discarded, confirmed, mixed up, reassigned, organized and kept track of all through the day. I did finally get some space cleared to actually cut something- it took a concerted effort to make sense of it all, go to other fittings, answer questions, and get out 19th century show on the racks for Wednesday. 

Do you ever get to the information overload point? I sure did this week. At the end of the day I just felt the I couldn't make another decision- I was just out of answers. On that note, I am taking the week end off, and recharging because this coming week will be very busy. More on that later.


Saturday, April 11, 2015

week 13 going on 14

The weeks are starting to feel as though they are running together!

We made it to our first deadline easily, which for the first show, is the quick change rehearsal.

We were able to get our actors changed from one costume to the next in a matter of 90 seconds at the rehearsal, and it usually gets faster as the season progresses. Yay!

Sometimes though, at QC rehearsal, it can feel like bedlam backstage- especially when you have many actors changing at the same time. I have seen traffic jams of chorus girls, who all entered a dressing room to change, only to get stuck getting out because their costumes and headdresses took up so much room.

The next deadline after quick change is rack check, and for this show I believe there were 10 or 11,  8 foot long rolling racks of costumes. The dresser sheets contain every actors track, detailing their costumes and the changes they make through the show. Two people from the running crew come in and check off every item of clothing for every actor and every costume change.
A sheet for an actor would read something like this:
white t-shirt, nude dance belt or underwear, black dress socks, formal wing collar shirt with quick change front, black wool trousers, white pique waistcoat, black wool tailcoat, white pique bow tie, gold wedding band, onyx cuff links, black patent lace up dance oxfords.
They would change into:
white singlet, underwear as in #1, navy blue argyle socks, blue and white striped dress shirt, blue wool trousers, blue wool waistcoat, blue wool SB jacket, navy and red striped tie, grey overcoat, gold wedding band as in #1, silver cuff links, watch with leather strap, oxblood lace up brogues, dark grey fedora, chamois gloves, grey woolen scarf.

So it takes two people four hours to get through the rack check. Then there is always the list of what is missing and when it will be ready and after all is accounted for, we get to watch our work onstage at the tech dress rehearsal. This is the first time the actors will run their show with all the technical elements together, so there is a lot going on.

Back to the table though. I have a new show to discuss with a designer on Tuesday and although we are in pretty good shape with the next show up, I feel very behind for the third show. That is our 18 century show, and you can see that I am cutting one of the coats in the top photo and after a long day yesterday with the tech dress, I was in this morning cutting another coat out for that show, and piling up the work in baskets on my table.
I like to feel that I am ahead, but it worries me when costumes sit there in pieces for more than a day or so.
Monday then, I think we will make a group effort to get at least one of these put together and that will give me a sense of relief.

Wednesday, March 11, 2015

work table weeks 8 and 9

Time is flying by.
Week 8 saw the delivery of a missing fabric.
This jacket was based a bit on this reference, below.
Menswear is interesting because there are many options to play with, but for many people the details elude them because, lets face it, they are subtle. The changes are more easily seen over the decades rather than the season or the year. If you delve into it though, you are rewarded with many interesting details, and I have fun with these details, encouraging designers to consider incorporating them into the suits they want me to make.
 Nowadays- everything looks the same, whereas say in 1938 as this catalogue page shows, there are more "sporty" or casual models available. Still a three piece suit but a different vibe than one for business wear. The one on the left offers a two button, notch lapel, patch pockets, the bottom ones with flaps, and the back view has an expansion gusset, as well as a bit of fullness pleated into a half belt at the waist. The one on the right is a 2 button, semi-peak lapel, three patch pockets with inverted pleats, lower pockets with flaps and the back pleated into a half belt. Both have top stitching detail. We are going to go with the one on the right but with the plainer pocket style of the one on the left.


I have been given a nice blue plaid flannel to work with. I had a devil of a time getting it all laid out nice and square on my cutting table, so in the end, I had to cut the yardage in sections then block it at the iron table, using my metre stick and a square to then press it properly just to get it in a better shape to cut out. It literally took me most of the day to cut that three piece suit. 
Here is the back, just ready in week 9 with a fitting yesterday. 


Yesterday, week 9 also looked like this (below). I managed to cut out the shell of a velvet coat, cut all the bits and pieces needed for a pair of breeches that I fit earlier in the week, I cut out my last 1840's waistcoat and trousers, and switched back to the eighteenth century today so I can call fittings next week when that designer is back in residence. I cut another cloak and made a coat pattern and cut it in muslin. The I will have to flip back to my 20th century things, have a few last fittings, and cut some of the final bits like top collars and mark alterations. 

Tomorrow is already Thursday! I have so much to get done and I really could use another pair of hands- not so I have four myself, but another set of sewing hands. We have a lot to get done.


Sunday, October 19, 2014

Woman's period waistcoat

A little while ago I posted about a waistcoat that I was cutting for a woman, and here it is all finished.
(Please forgive the dotty covering on the stand, it is a bit annoying to look at but I don't have time to change it.)


It is too bad that the detail seaming I put into the backs is lost with this fabric but hey, I know it is there.
If I was making another maybe for myself, I would either pipe the seams or make a detail of it with top stitching or something. Would look great in leather or suede.......don't you think. Not that I will ever get around to making it for myself. Sigh


Well, I guess it is not completely finished (what ever is?)  as I do not have a pretty ribbon or cording to lace the back up, but I am sure I will get something before this show goes in front of the audience.

It doesn't quite fit my stand as well as it does on the real person (what ever does?) but I am quite happy with the whole costume overall. Considering I don't do women's wear.....


Sunday, October 12, 2014

structure in period coats

When I am making period coats specifically the 18th century style with full skirts, there always is the question of what to put in them for structure and support.
The fabrics that we are given are what we have to work with and they can often be a challenge to work with.
I doubt that any of our modern fabrics have the body of some of those silks that were used then.
Most designers want the skirts of these coats to stand out and the trick is to find some kind of interfacing or interlining that will work. something with body that won't lose its oomph over time.

I have been using a sew in interfacing called "sew sure" for many years now. I find it fits the bill providing a lightweight and springy structure that lasts over time. It has a natural tendency to fold flat upon itself lengthwise (warp), but resists folding across the weft, so I cut it so the weft sits vertically at the front edge of the coat. It is also inexpensive, which helps because some of these coat skirts are quite large.

I have a woman's coat to make in a variation of the style of the men's 18th century coats. They are full skirted with pleats but ankle length. The skirts of the coat needed to be a kind of hybrid between the men's look and a woman's dress. The designer wanted the skirts to stand out but we didn't want the full structuring to come right up to the hip where the pleating and the flaring began.

So I modified the technique a bit, using the sew sure interfacing in the bottom 14 inches of the skirts panels. They couldn't just float inside, so I cut a layer of thin poly cotton and attached the sew sure to it and then flat mounted the inner structure to each panel of the coat.

Here is the back of the coat with the structure inside and the trim sewn on the back. I think it works to give the skirts body and make them stand out at the hem.
 I notice a bit of rippling going on on the right side but I think it is just sitting strangely on the stand. Will check it tomorrow.


please forgive the picture quality I am literally snapping photos as I am leaving the studio, since the deadlines are pressing!
 

Monday, October 6, 2014

trim layout

These period coats have scads of trim, and the placement of the trim needs to be worked out in detail according to the sketch and what the designer has chosen.
The construction of the coats would come to a standstill at some point if we don't have the trim decisions.
Luckily, the designer of this project is organized and has thought out which trim he wanted to purchase and where it would go. On top of that, the trim arrived with tags indicating what it was for and in individual bundles/bags, separated by character.
Budding designers take note! 
This is a way to impress your construction team.

The first thing I do is make a trim map on my pattern, and then lay out the trim flat on the table.
The trim choices can dictate changes to the design. For instance the design may have 12 horizontal lines between the neck and waist but the spacing change if the trim is narrow or wide.

Our designer M.G.  dropped by the studio and we tweaked the layout of the trim a bit, at which point I make a trim map for the tailor. This means a separate pattern piece that they can use as a guideline for chalking out the placement.

Here you can see the coat fronts in progress. The trim must go on by machine. No budget for handwork on that scale.
Another note for budding designers. Get to know how garments are constructed and why things need to be done in a certain order.

The coat does not sit on the body like it is pinned here. It will look even better once they sit at the correct cutaway angle.

Onwards, I have two more trim maps to complete.

Thursday, September 25, 2014

Back at it


Oh my gosh, time flies.
I feel as though I have lost a month somewhere.

So back to it.
It is usually feast or famine in this business, and it is shaping up to be a bit of a feast year so far. This is good because last year was a bit lean in the fall. This fall as soon as I started on the current project, another one came along. That one will be interesting as I get to go and work in Montreal for a month, and I am really looking forward to it.

But, right now, I am moving forward on making three 18th century inspired costumes for a production. One is for a woman dressed as a man, but we are not trying to hide her shape. I rarely get to do women's wear, as there are lots of people who have that background and training.

I did feel a bit out of my element at first. Just the scale of the patterns felt unfamiliar and so small.
Of course when the patterns for the other costumes are for men with 48" chests or who are 6'5" tall  it doesn't help.
I made mock ups anyway because I didn't get a chance to measure the woman myself, and we were using the period as inspiration. The coat for the woman is ankle length and has almost 2/3 circle in fullness. It is going to take a lot of fabric, and I didn't want to mess up!

Here is my waistcoat toile after the fitting. I decided to offset the princess seam from the bust point so it was less obvious (in my mind anyway) but in the back, I used inspiration from the dresses and corsets of the period for my seam placement. The designer wanted lacing up the back which gave me that idea.


My judy is just a bit bigger and certainly less squishy than the real person, so the fit doesn't look optimal, but it was good.

I did have to pin up some extra length in the back and reshape the armhole a bit and move the collar to account for the bulk of the shirt and stock/cravat that she will wear.

I think I may give the hem a bit better shape, it looks a bit blah, and it needs a pocket placement.

I like the back so much it reminded me of an idea I had years ago to make myself a similar waistcoat. never got around to it then and probably won't now either, but hey you never know.


Now I have altered the pattern and just have to cut it out of this. 

Friday, July 11, 2014

Something old....

I have to tell you that the availability and affordability of trim for period garments seems to be getting worse with every passing year.
We still have a lot of trim in stock but it is old stock, purchased by the 50 m and 100 m rolls many years ago.

Within this cache is a stash of really old trim. I think it must have been a donation many moons ago. Probably 1920's vintage, and we have scads of it in both silver and gold. We have it in widths from 1/4" to over 2" wide, and it is so pretty with its label and the black paper that separates the layers.

I have always loved this trim, as have many designers over the years.
                                                                               

Sadly, the silver trim is a little less stable and we no longer use it on costumes as it doesn't withstand the wear and tear and cleaning, but the gold has been pulled out to be used on a costume we are making. 

It is a bit finicky to put on and doesn't bend around corners very well, but I think Susy has done a fabulous job with it.
Oh in case you were wondering- this is a view of the back hip area of an eighteenth century coat we are making.
Here's the coat in progress. I still have to do some alterations and correct the sleeves, and the collar is just a basted idea at this stage, but it is coming along.


Wednesday, January 11, 2012

finished trousers

I finished these up a few days ago and sent them off. In the picture on the left, you can see the new pair on the left and the old pair on the right. Better quality fabric makes a huge difference. In the picture on the right, you can see the finished product. They have an elastic inserted inside the waist to be adjustable for whoever will be wearing them, which explains the rippling of the waistband.

So, now that is out of the way, I have to spend the next few days getting ready for work next week and finishing up a couple of things left on my table- one being a pair of jeans I decided to draft for myself, and there's a coat alteration, and the shirt project I want to get going. I should be doing a bit of research on the 1930's and the 1880's but maybe I will wait to see the workload on my table before getting into that. I also have a sweater half knitted that needs the sleeve pattern altered and I have to finish a sock so I have a pair, and I wanted to look into glove making and try that too.
There's just too little time to do all these things, but I am going to try to be disciplined and get on with it!

Friday, January 6, 2012

new and improved

New and improved white trousers. I was told they were breeches, but really they were trousers so I am making them trousers. The new fabric is much better quality, and not see through which is very important in my opinion when it comes to men's trousers and white ones in particular. On the downside, it is a bit spongy and thick which will mean a bit of a challenge on the placket.

Apologies for the picture quality. Sigh :/
Here I go, made a pattern, got it cut out, and made up the front placket while I waited for Steve from pro Sewing to come by and service all my machines.

I wasn't going to change the overall styling, which is why I didn't make a traditional underlap for the fall front. That entails a set of closures under the fall and in this stretch fabric it would show. Anyway it is good to try new things. This is what it loooks like finished from the inside.
I sewed a regular seam on the fall facing and pressed and stitched the seam allowances open to keep the centre front flat. The main seams will be serged together.
Interfacing is the trick here. I used a lightweight tricot to stabilize the fronts at the top of the waist and down the stitching area for the placket including the area where the final placket would be stitched. I also interfaced the complete fall facing piece, and added a strip of interfacing on the underlap to support the button stitching area.
This is pretty much the same as making a shirt sleeve placket. If you wanted to, you could make the underlap pattern piece wide enough to come all the way to the centre front and then fold back all the way to the side seam. Then you could have a button closure on the underlap.

This is the finished placket from the outside. It was a bit of a pain to do because the fabric was spongy, and I didn't want to bag out the shape with self fabric (too bulky). If I did it again, I would bag out the shape with a very thin piece of cotton. As it was I marked the placement of the triangle on the fronts, and folded the edges in and then edge stitched them down.
I made sure that the underlap piece was long enough to support the topstitching of the triangle. So there is interfacing, and interfaced fabric behind that topstitching.

Now, I just need to sege them together. I am using my domestic serger with four threads for this. Attach a waistband with inner elastic, choose some buttons and make some button holes.
Then they will be finished.