Showing posts with label pattern. Show all posts

Wednesday, October 23, 2024

Looking at a trouser pattern shape problem


So, Hello! I am back after a very lengthy hiatus - its funny how we lose interest or motivation over time for some of the things we do. Other platforms pop up and it satisfies something different or us, and for me I think I needed a break and IG seemed useful, but it has issues too and I guess I found that my thoughts are less "Insta" so to speak.

but anyway......recently on Instagram....and her accompanying blog-

Handmade PHD was recently trying to dissect a pattern for trousers that were not working for her and I have a few thoughts as to whats going on there. She has been looking at various patterns and how they perform by virtually trying them on 3D avatars. 

So, instead of burdening her comment section,  I figure I could post some of my thoughts here instead.  


This is the digital pattern shape she is working with. She has drawn in grain lines from the centre point of the hem and knee on both pieces. That seems to be reasonable assumption on the front but not on the back as the perpendicular angle of the knee and crotch line don't make sense. 

I think there was a problem with the way the basic pattern has been developed, either at the block stage or during manipulations of the basic block.

Here is an example of a flat trouser draft from Metric Pattern Cutting for Menswear as an example - this would be the draft I would imagine would be used for this style of trouser. On the left they show a block developed with a straight side seam (which could be placed on the fold and cut as a one piece pattern) or, for a slightly better fit, a flat two piece trouser block.


Even in a flat block, the front and back of the pattern must directly relate to each other in the block development drafting stage.

From the basic block, one may then make modifications, like adding pleats to the front, without distorting the relationship between the front and back


Unfortunately the back pattern piece she has looks like it was from the straight side seam block and the front from the two piece. They just don't work together.

On the two piece block, you should be able to superimpose the front on top of the back, match the hem level, and centre the front piece over the back piece. The backs, which are drafted wider that the fronts at both the hem and knee, should have an equal amount showing beyond the fronts at the knee and the hem on both inseam and outseam. The centre leg/grain line should be right on top of each other.

Here is a little that exploration I did.


1. if side seams were straight, the centre front goes off grain and front hem at inseam drops 

2. the front is overlaid on the back, centered at the hem but the knee is not centred 

3. if the hems are on the same plane with the hip hip area touching, there is a big offset in the lower leg.


I also wonder why the back waist line has virtually no rise to it. You can see that the CB waist point is only marginally higher than the side seam at the waist. 
hmmmmmmm, I wonder if their back waist measure was too small, and to increase it,  they slashed and spread it? no, I tried that in a paper model and it didn't produce that kind of shape. 


I'm stumped there.....

But... I can imagine if the back waistline does not rise much above the horizontal construction line for the waist, then the centre back seam length must be made to intersect with the back inseam length somewhere out there in space. I can see how someone might make that make sense somehow.

I mean, there are patterns that don't have any rise in the back waist, which may look something something like this- of course that straight CF/CB line must be long enough to accommodate the full girth, so the crotch point will be quite a bit lower than a trouser with shaped CF/CB seam.   


There are some other issues that bear examining, like inseam length and side seam shape, but that will have to be discussed in the next post.

Do you have issues with the patterns you make up? 


Friday, April 2, 2021

lockdown project- a coat for myself

It seems that spring is here, and it is time to switch out the winter clothes for something slightly lighter. That makes me remember that I had another lockdown project I can tell you about. 

I made a coat for myself. 

I still have the first coat I ever made for myself, way back in the early 1980's. It was a Vogue pattern, I believe, I bought the fabric at Duthler's in London Ontario- they had nice fabric in the day! Sigh.

It was a classic cut, DB camel coloured tailored coat. I haven't worn it in decades, I did love it, but, it was time to make a new coat. 

First-design- I had to pick a style. Oh gosh, I had so many pins of women's overcoats on Pinterest that I liked but I couldn't decide on any of them. Then, I saw an online ad for a winter coat at the Bay, and I liked it enough that I thought I could use it as a jumping off point. 


I did a little drawing first. 


Then I got out my base/block pattern that I drafted and fit on myself last year.


I made a pattern, started a mock up and realized it had way too much ease allowance, so I started over,  made a new pattern and cut right into fabric. I figured I would baste it together and try it on as I went and make adjustments to the style and fit on the fly.

Maybe not the best decision, but in my defense, I had what I will call "Covid Brain",  very fuzzy thinking, and I had the time to spend. 

This project also provided something I had been lacking since the lockdowns, and that was a deadline! I planned to have it finished in time for my working gig in Montreal.

I muddled through. I am sure Lela thought I was crazy at times when we were working in the studio together but it all worked out in the end and I got a coat out of it.

I will show you some of the stages in the upcoming posts.


Sunday, March 26, 2017

fitting and pattern alterations part 2

I thought I would follow up a little on the fitting and pattern alteration post where I was dealing with pattern alterations for scoliosis.


I had to make three different garments for this particular person, all with different patterning requirements.
We made a suit, a bolero and a 1950's style casual jacket. (with a quick change (11 seconds) front panel held on with magnets but that is a whole other bit of business)

With the bolero, I have created a seamed panelled back as it gave me more control over the fit. This garment does not have shoulder padding, whereas the suit jacket does.

I have laid the left body pieces over the right sides to show the differences in the two sides of the body.
I did end up lowering the armhole on the left side of the body as compared to the right.
I think you can see how much lower the left is at the shoulder, as well as the difference in width that was required on his right side at the upper blade area.


I have found this to be both a challenge and an interesting learning process.
Tomorrow I will try to lay out the pieces for the 1950's casual jacket which has a yoke as well as panel seams.

In terms of the suit jacket back, here it is in a finished state.
I think the comment about adding a dart on the left shoulder to make it visually more symmetrical was spot on but I left it as is because I had no time to re cut and reconfigure. If I had time to do it over, I would have tried to transfer some of the left horizontal drop into a shoulder dart rather than take it up with a shoulder pad.
Of course this stand does not reflect his actual shape so there is an air space on the right blade.


One of the job challenges is letting some things go, because we have such time pressures.
He was very happy with all the pieces we made, the designer is happy, I have learned something so I am happy too.

No time in the fittings to take really good shots for a blog, I make do with photos taken for the designer's references. :)

Sunday, February 26, 2017

fitting and pattern alterations

One of the more challenging aspects of my job is drafting patterns to fit a variety of body shapes and fitting them to the individual.

Over the years you realize that almost no one is symmetrical, but some people are less symmetrical than others, sometimes from their occupation, sometimes from bad posture or habits (like carrying a heavy bag on one shoulder for years) some from injuries or occasionally a medical condition.

This week I fit a mock up suit on an actor/dancer who has scoliosis.

I had not measured him myself nor had I fit him before, so I drafted up a jacket and trousers to his basic measurements making no special pre-adjustments, figuring I would do that in the fitting.
Here is a photo of the my fitting adjustments.


I pinned out across his back as the left side is quite dropped, and on his right, I just cut the toile open over his blade.
(a good reason to make a muslin because you can cut it open rather than guess how much to add, and you can draw on it! )

Here is a look at it on a stand.

So, what to do?
First, I let it sit for a while, getting on with some other things which gave me a bit of time to think about it all. Then I made copies of the original pattern so I had individual pieces for his right and his left sides. Two back two side panels and two fronts.

I altered the left side of the pattern for a severely dropped shoulder/side. This entailed cutting from the mid back and mid front, angling down to the side back and front panel seam and closing out a good 1.5 cm there. the side panel piece was similarly reduced. (I will refit and see if this was enough of a modification.)

On the right side, I cut open the pattern down over the blade to the waist line. I cut horizontally at the waist line allowing the panel to spread apart the amount that I determined it needed in the fitting.
This opens up the back shoulder of course, and creates a large dart.

Now, this is going to be a striped suit. 
I laid the back patterns out on the fabric and had a look at what my options were.
The lower portion of backs need to be parallel, and could be, no problem. The CB at the neck needs to end up mid stripe or give that impression as well. I knew I might have to modify the dart placement to be as discreet as possible. 
I was not sure how this would look, but I chalked it out and pinned it up and I think it looks pretty good. At the neck, the left back ends up on a red stripe and the right back ends up with a full blue stripe! Win, win situation there! I did modify the dart placement slightly and I hope it becomes less noticeable once it is sewn
I am hoping that this does the trick, but I expect to have to tweak things a little bit more with some light padding here and there so I have my fingers crossed and onwards we go. The fronts need a bit of modification as well, but minor compared to the back so we will put the shell of this together and see what else needs to be done.


Saturday, February 13, 2016

Radio silence has ended! plus cool stuff

Hello one and all,

I realized today that I have not had much to say on the blog recently.
I am trying to figure out why that is.

I do have a lot of thoughts, but the topics are either so complicated that I give up trying to write about them or so fleeting in nature that they don't prod me to write.

For the moment though, you may may be interested in the fact that as a tailor- cutter in a theatre, I am called on to make all sorts of garments, and this year I do have some suits, yes, but I have a bit more of things like this.

yes, unitards or variations on the theme!

I often joke with people as I am taking their measurements, that I need to take some certain specific ones, in case we have to make them a unitard! Sometimes that happens.
We actually don't take the detailed type of measurements that a place like cirque will take for their costumes, so when unitards or other stretch wear arises, it can be a bit of hit or miss.
These types of garments and the patterns required for them depend greatly on the fabric chosen.

Can I put a public service announcement here for all designers? Please, please, buy good all way stretch. Spend the money for it. Fabric that stretches in both directions makes for easier pattern making and for wearing. 

In this case, I have basically a one way stretch fabric. I had to cut it with the stretch around the body and the non-stretch vertically. The upper body will not be seen, so I have worked around the lack of stretch in the crushed velvet legs by adding a very stretchy fabric above the waist. In this manner I hope to have given the actor some comfort in being able to sit down easily at least.

This was a first fit, all zigged together with somewhat incorrect (old) measurements, so I have some work to do, tweaking the pattern.

Oh, what is that thing he is attached to you ask?

It is a wire frame body of an animal. You will have to wait for a bit for more details, but it also is a first trial fit on the actor. Our prop maker Kenny (a mastermind of an artist, sculptor and maker of cool things)  has built these frames for the show we are working on. The bands around the actor's thighs are attached to wires that connect to the back legs of the sculpture, so when the actor walks, the animal legs walk as well. Very cool.

Strange co-incidence, Kenny and I trained in the same fine arts program but he graduated just before I started. We have been working together for 25+ years and only found this out last month! We had the same instructors and had a moment reminiscing about that time. Isn't it funny how these things happen?

I think this season will feature structure quite prominently as I look around the wardrobe these days, so I will endeavour to get some postings up about that and rekindle my blogging spirit.

Cheers

here's a little video link to a bit more of Kenny's work....please watch it, it gives me goosebumps.


Thursday, July 2, 2015

Prominent chest - pattern changes


While browsing through a sewing forum, I noticed over and over the plight of adjusting a pattern for a full bust. There are many solutions offered both online and in many of the sewing books, yet many people still struggle with making sense of it all.
Here's a little sample of what I did to deal with a garment that needed more room in the chest, but fit well in the front length, armhole, neck and waist.
Whereas in women's wear, darts are an accepted way of dealing with shape, the challenge with men's costuming is often how to hide the shaping in a garment, in order to keep the traditional construction format.


I recently fit a doublet and while pinning it up the centre front, I found that it closed on the line at the neck and at the waist, but at mid chest, it would not.
It went off the line there by 1.8 cm.
The person I was fitting had a prominent pec area, and that was the cause of the gap. What often happens with a full chest is that there is a lack of length and width.
I had enough length in my pattern for the full chest so I am only correcting for width.


You can see that the pattern CF line is not straight, but it is curved already from the mid chest to the neck. This is basically a dart, which is masquerading as the CF seam. I did not wish to increase this CF "dart" by just adding the extra at the CF line and tapering it off to the waist and neck. 
Now, I split the pattern vertically through the mid chest, and separate the pieces half the amount of the gap. I need this much more at the mid chest level but in splitting the pattern I have made the neckline  larger and have increased the length of the side front seam. I don't want that, and so I need to modify the pattern further. I need to close the gap!
So, here you can see that I have made two cuts in order to further modify the pattern. One is at the chest level, and the other one is cut diagonally from the side front seam to the mid chest. 
I can now bring the neck back to the way it was and also close the gap in the seam. What happens though is the CF opens up and gains some length, and the side front seam also had a small increase.
Depending on your fabric and method of construction, you may be able to ease in those small increases. 
Here is another option. This time only the horizontal cut at the chest level is allowed to open up as the neckline and seam line openings are closed. The increase in width at the chest is maintained, the neck and waist are kept as they were. 
I am making doublets backed on cotton duck so easing is not easily accomplished, so I opted for this method in the under structure of duck, and used the previous method for the fashion fabric layer. 
The horizontal dart is cut out completely and the raw edges are butted edge to edge and zigged closed with a strip of fusible tape to reinforce the join. The outer fashion fabric is applied over the shaped duck, carefully maintaining the shape you have created as you do so.

Sunday, May 10, 2015

week 17 = relative calm?

Well that was a crazy couple of weeks! Those coats that were lined up in front of the table have finally  gone to their place in the dressing rooms. Even the cape that was standing sentinel for weeks made it to the dress rehearsal. It had a bit of basting left in it and needs some finishing, but it was wearable. I even had time to clear up some of the mess and I have found my table top again!
Friday was particularly hectic as I had three fittings, a quick change rehearsal at another location, and a tech dress in the afternoon. After the rehearsal we went out for a well deserved beer and some food, then home where I immediately sat down and fell asleep.
I think everything went well apart from a pair of breeches in a horrible ultra/fake suede. I don't know if you have ever fought with a fabric but I sure did with that one. I think we will be making a replacement pair  this week!
in case you were wondering, this ultra/fake suede is likely upholstery quality- it has absolutely no give, it is extremely bouncy and resistant along the weft, so much that you cannot gather it- it just fights you- yet along the warp it will fold completely flat. If it is cut as you normally would, it looks like you are wearing a barrel, and cut the other way, well, lets just say that the seat of the breeches was odd looking! It also has horrible static cling, so the legs kind of clung to the actor in odd ways. Not good.
Note to self- just plead for real leather or suede!


Here was my table on Thursday- I was trying to organize some paperwork and also to draft up a pattern for that Naval frock coat you can see in the sketch.
It is a tale of woe, and a mistaken belief in Internet purchasing to solve budget crunches that leads me to be drafting again for our 19th century show.

Beware you who think that you can order quality costumes off the Internet to save money.
Give your head a shake too if you think that anyone will even look at the measurements you send even though you think you are getting a "custom-made" product.
The "thing" that arrived (on the day we were onstage) was so bizarre that I couldn't believe what I was seeing. It wasn't just the fact that it did not fit the actor, nor had any proper shaping, or proportions that related to the human body, and it was not a full skirted frock coat but a weird tailcoat like thing.  The skirt was a strange one piece apron of fabric, bagged out with coarse cotton duck as a lining with no centre back vent opening, no relation to anything that it should be.
We dubbed it the "manatee" perhaps because it reminded me somewhat of Tenniel's drawing of the walrus from Through the Looking Glass by Lewis Carroll.

Suffice to say that I am making one now.

That is for tomorrow though.

Thursday, April 23, 2015

Counting the weeks:14 and 15 with an overcoat update

It was getting kind of crazy around the work table over the last two weeks. I put in many more hours than I would have liked to, but the work has a deadline and we do strive to make it work!

That cape in front- will it ever get worked on, and will it ever get out of my line of vision? Soon, I hope someone will be free to work on it.


I included a shot of the wall behind my table just to give an indication of how many patterns I have churned out in the past 14 weeks. I don't make separate patterns for linings or facings so these are just the basic pattern pieces. 
For the 18th century show, I have to cover the builds and stock costumes for 8 different actors. I have 5 skirted frock coats, 6 pairs of breeches, 5 waistcoats, one shirt, 2 capes, one sleeved casaque style cape, and cut, make and finish 9 stocks/cravats. Repair and or renovate three coats, 3 pairs of breeches, 3 shirts, 2 new waist coat backs on old waistcoat fronts, reline a old cape and sundry other things like changing buttons, repairing linings, adding pockets...... washing and ironing 5 new shirts.....it does go on!
Anyway, it adds up in the pattern drafting department!    

Here is an overcoat update. I documented the toile version of it here along with the waistcoat, which has turned out quite nicely. The coat is going to get a removable capelet, and I still need to tweak the set of the sleeves but it is turning out very well- We have also constructed it slightly differently than usual, and I will get some more photos detailing how it was made this week.

That's it for today. 
I have to switch gears and get a pattern for a 1970's "ish" suit drafted up and to be honest I need a day to wrap my head around the change from 1760 to 1970! Maybe I will do that on Saturday when I will have fewer distractions at work.

Monday, October 27, 2014

Parka pattern and bonus beadwork!

So I have just been in a whirlwind of activity since finishing the opera. I am not sure if I am afraid that when I stop I will crash, but I have been getting a lot done. Except for the garden.....it still needs some TLC.

But following up to the previous post in which I am making a pattern for an amautik inspired parka, I made a toile for Yvette, and fit it on her on Saturday. It wasn't too bad, although the hood needed work, as I suspected.

Today I managed to alter the pattern and trace a copy of it out for her so she can order material. She is planning on making it out of melton with a separate wind resistant outer shell.

Here is what it looked like on my table. No sleeves in the photo.

Interesting don't you think? Can you see how it goes together? This is a simplified amautik inspired piece. The child's amautik that I took a pattern from is much more complicated!

Interesting things are the only "extra-curricular" projects I take on these days.

This was indeed "interesting", and I hope she gets her fabric soon, because now I am interested in seeing it as a finished garment. I will leave it to her to add her rickrack trim details and patch pockets. I wonder if she is going to put beading on it? She showed me some beautiful beaded pieces that she rescued from mukluks and other garments they wore in the north, that finally wore out.
Really beautiful work.

Oh, I have a pair of beaded gauntlet gloves.....just let me run and get them.


These were given to my father in law many years ago. He worked for the Indian Affairs Department of the Canadian government in Saskatchewan.


Smoked moose hide. They still smell. Even now.
Early 1960's I think.  Northern Saskatchewan.
Beautiful bead work.

Thanks to my DH who happened by and was willing to be a model.


Monday, May 19, 2014

prom dress: toile bodice fitting

Finally getting to the dress.
I am excited to be making some progress! Sometimes just doing something different kind of perks you up.


So I have fit the bodice I drafted, and was very pleased with the fit so far.

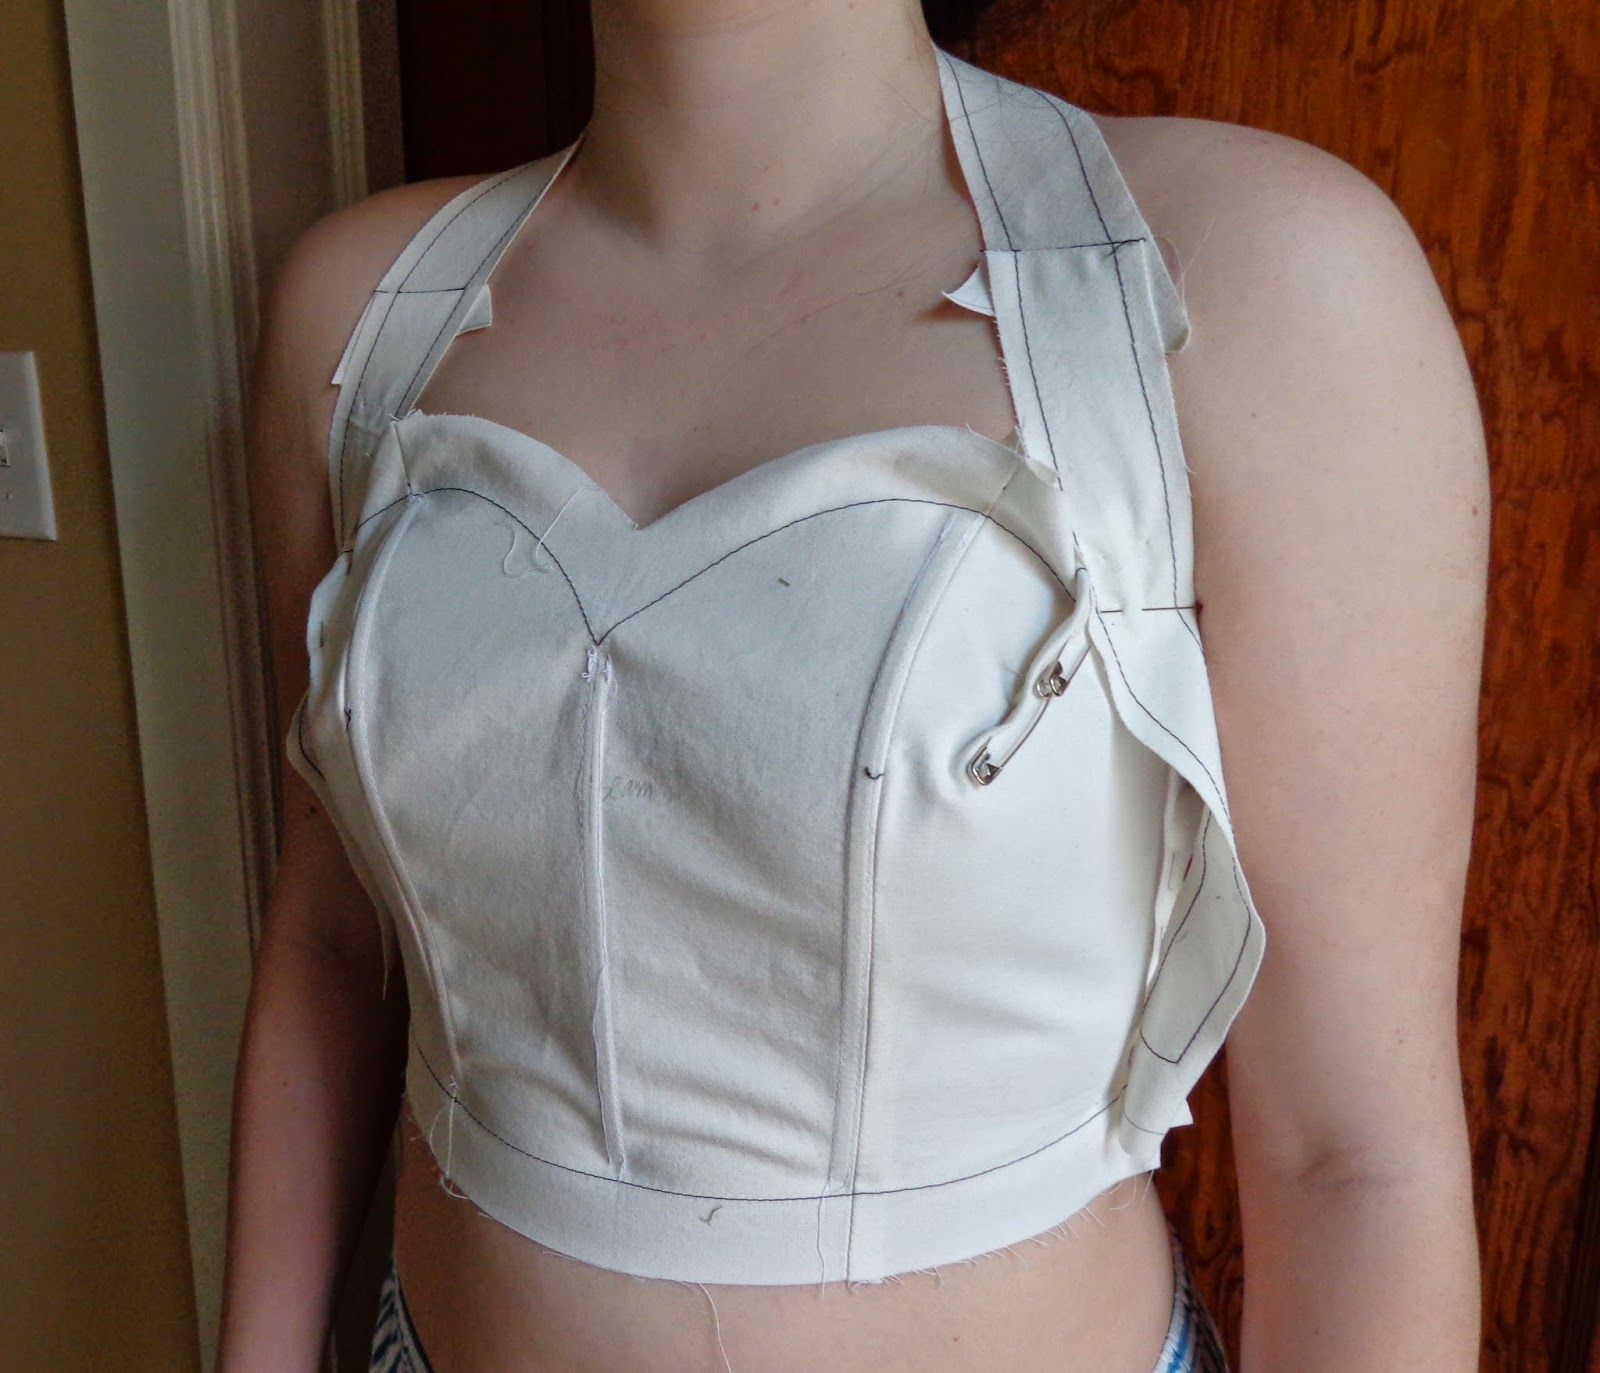
I pinned out about .5cm on the double on the side seams, as well as a dart in bodice side front panel as you can see here.


We were also playing around with turning the neckband around to see what a halter strap would look like. 

I might do a little shaping under the bust as well, and make the CF a seam instead of cutting it on the fold, but so far so good.
I used some rigilene boning in this mock-up because I had it on hand, but I do not like it.
The boning I will use is 1/4" German plastic boning that I will get from Farthingales. You do not have to worry about the ends poking through or capping the ends, it can be inserted into channels or stitched through.
The other type of boning that I would typically use is 1/4" wide spiral steels. They have the advantage of flexing around curves much better than anything else, so in this case, I may use one over the front curved seam or see if I can redistribute some of the shaping between the front and side front panels.
I will try to use the seam allowance on the inner layer to create casings for the bones, and may move the side seam forward to give a bit more support to the front of the bodice.


One note that applies to all sewing projects- start as you mean to go on. By that I mean you should include things like shoulder pads when making a jacket, boning if you are making a strapless bodice. I have also noted that people often choose fabric for a toile/mock-up that is totally unlike what they plan to use in the end. Pick something that has teh characteristics of the final garment, otherwise it just won't give you the true story.

Saturday, May 10, 2014

prom dress part four - drafting

 I feel like the month of May is trying to rush by, and I have been slogging it out doing overtime at work. This means that I feel quite behind on the prom dress project but I managed to squeeze a bodice draft into my week-end.
When I was first training as a cutter, I used Dress Pattern Designing by Natalie Bray as a text, so since I am familiar with it, it seemed the best choice to use for this block.
Some of my colleagues use it or use it as a jumping off point.  Just like the men's drafts, you cannot expect it to be 100% right off the page. With practice, of course, you begin to see the shapes being created on paper and can recognize areas that you can tweak or modify right away for a better fit, but a toile or mock-up is always a good idea.

One thing I did was to reduce the amount of ease in the basic block. There is usually 2 inches on the half in this draft, but I want a close fit, so I reduced it to 1 inch on the half.  This should be close to what I need.

I didn't take all the ease out beacause I wanted some ease in order to be able to fit it properly.
Too tight is always more difficult to deal with. It is so much easier to be able to pin the excess out, and see that your alterations are not causing other problems. If your garment is too tight, it can be difficult to determine how best to fix it. Too tight at the waist for instance can cause bodices to ride up, distorting the position of darts as well as affecting the armholes and even neckline and shoulders. You can end up in a guessing game that entails multiple changes when really all you may have needed is more fitting ease.


I marked out the style lines on the basic pattern, front and back, then I traced them to a clean sheet of paper using a needle point tracing wheel. I will keep the original block intact so that I can go back and manipulate it as needed. For instance,  even though I measured her myself, I think the bust point to bust point measurement seems narrow, so I could go back and easily make the front panel wider, and the side front panel narrower, without throwing anything off.


Once that was done, I trued up all the seam and style lines, and cut out my pattern.
Then I cut out a mock-up, leaving an inch of seam allowance both below the "waistline" as well as above the upper edge of the bodice. All the lines on this pattern are "nett" so I can choose how much seam allowance I want in specific areas.

Next will be the skirt and then a fitting. 

Sunday, May 4, 2014

prom dress part three-pattern sketch

When I am getting ready to make a pattern for  garment, I often find it helpful to sketch out the rough pattern shapes. This dress is not particularly complicated but it is a helpful process to go through nevertheless.
  You can then look for potential style, cutting or fitting issues. 

So, as I would if I was actually drafting, I would start with sketching out the basic block, and then drawing in the pattern lines.


The bodice front will be in two pieces to fit closely over the bust.
  Allow enough seam allowance on the top edge so if bodice needs pinching in along the top edge, you can still correct the line. Same goes for the waist seam allowance.

The back could be cut in two panels or the two sections could be made into one, and eliminate the seam.
  If cut as one piece, allow enough seam allowance to make changes without re cutting.

The collar/neck piece shape is made by closing the bust dart from the bust to the shoulder, closing the back shoulder dart and then putting the front and back shoulders together and drawing out the shape desired.
  It could be cut in one piece but if the CF is on the straight grain, it puts the majority of the neck piece on a bit of the bias which may stretch, so it may be more prudent to allow a shoulder seam in the neck piece, which would keep the back portion on a more stable grain. Not sure how much tension can be put on this piece without it buckling on either edge. It will be a more decorative rather than a structural part of the dress. 

The pleated overlay is created by initially closing the panel seam/dart from waist to bust, then opening/flaring out the top edge. You could calculate how many pleats you want at the neck, and how deep they might be first and then measure out how much more you need open the top edge.
  The amount to add depends on the fabric chosen and what looks good, so allow enough for changes to be made. The more flare, the more the side ends up on the bias, so that may be an issue with stretching.

The bodice will also need some kind of boning to keep the shape, and provide support. The boning will have to be attached to an inner structure.

The under skirt could be cut into panels which keeps the waist seam flat and allows for flare at the hem.
The over skirt has to be cut with the bottom edge straight, so figure out how much fabric is needed at the hem, then the length at the front, side and CB is marked, and the gathering lines are drawn in hitting those marks. 
  Remember that gathering an edge tends to hollow it out and therefore shorten in the other direction, so keep it in mind. Alterations to the hem have to happen at the waist.

Pick the shoes! they are needed to get the final skirt length.

Did I miss anything? Oh yes, figure out where the closure will be and how long it needs to be. I imagine CB. It may need a waist stay, so perhaps an inner grosgrain waistband that hooks closed first and takes tension off the zipper closure.......

Okay, onwards!

Sunday, April 6, 2014

a very large cape

Once upon a time I had occasion to make quite a few large garments and one of the things that makes handing large patterns and garments time consuming is that they do not fit on the cutting table.

My cutting table is four feet wide by eight feet long, and most of the time it is perfectly adequate for laying out fabrics that are folded in half lengthwise as most are. Sometimes though, it makes more sense to lay fabric out its full width, so if I have 60 inch/150 cm wide fabric, it is wider than the table and hangs over the edge. This is irritating because I cannot draw out the full pattern at once, and it takes much more time to align the fabric properly, draw out a portion of a pattern, then shift the whole piece of fabric over, so the other side hangs off, and then realign it all and draw out the remaining pattern.

I solved this problem first in my personal space by having a 12 inch wide extension made that hinges to the full length of my table, so when I need it, I prop it up and go to town. At work, I requested an extension and they made me a removable 12" x 8 foot long extension that sits on clever slide out supports.
So far so good. I have used them over and over and it is quite helpful.
This year though I have a pattern that doesn't fit even on the extended table.
I am making a very large cape.
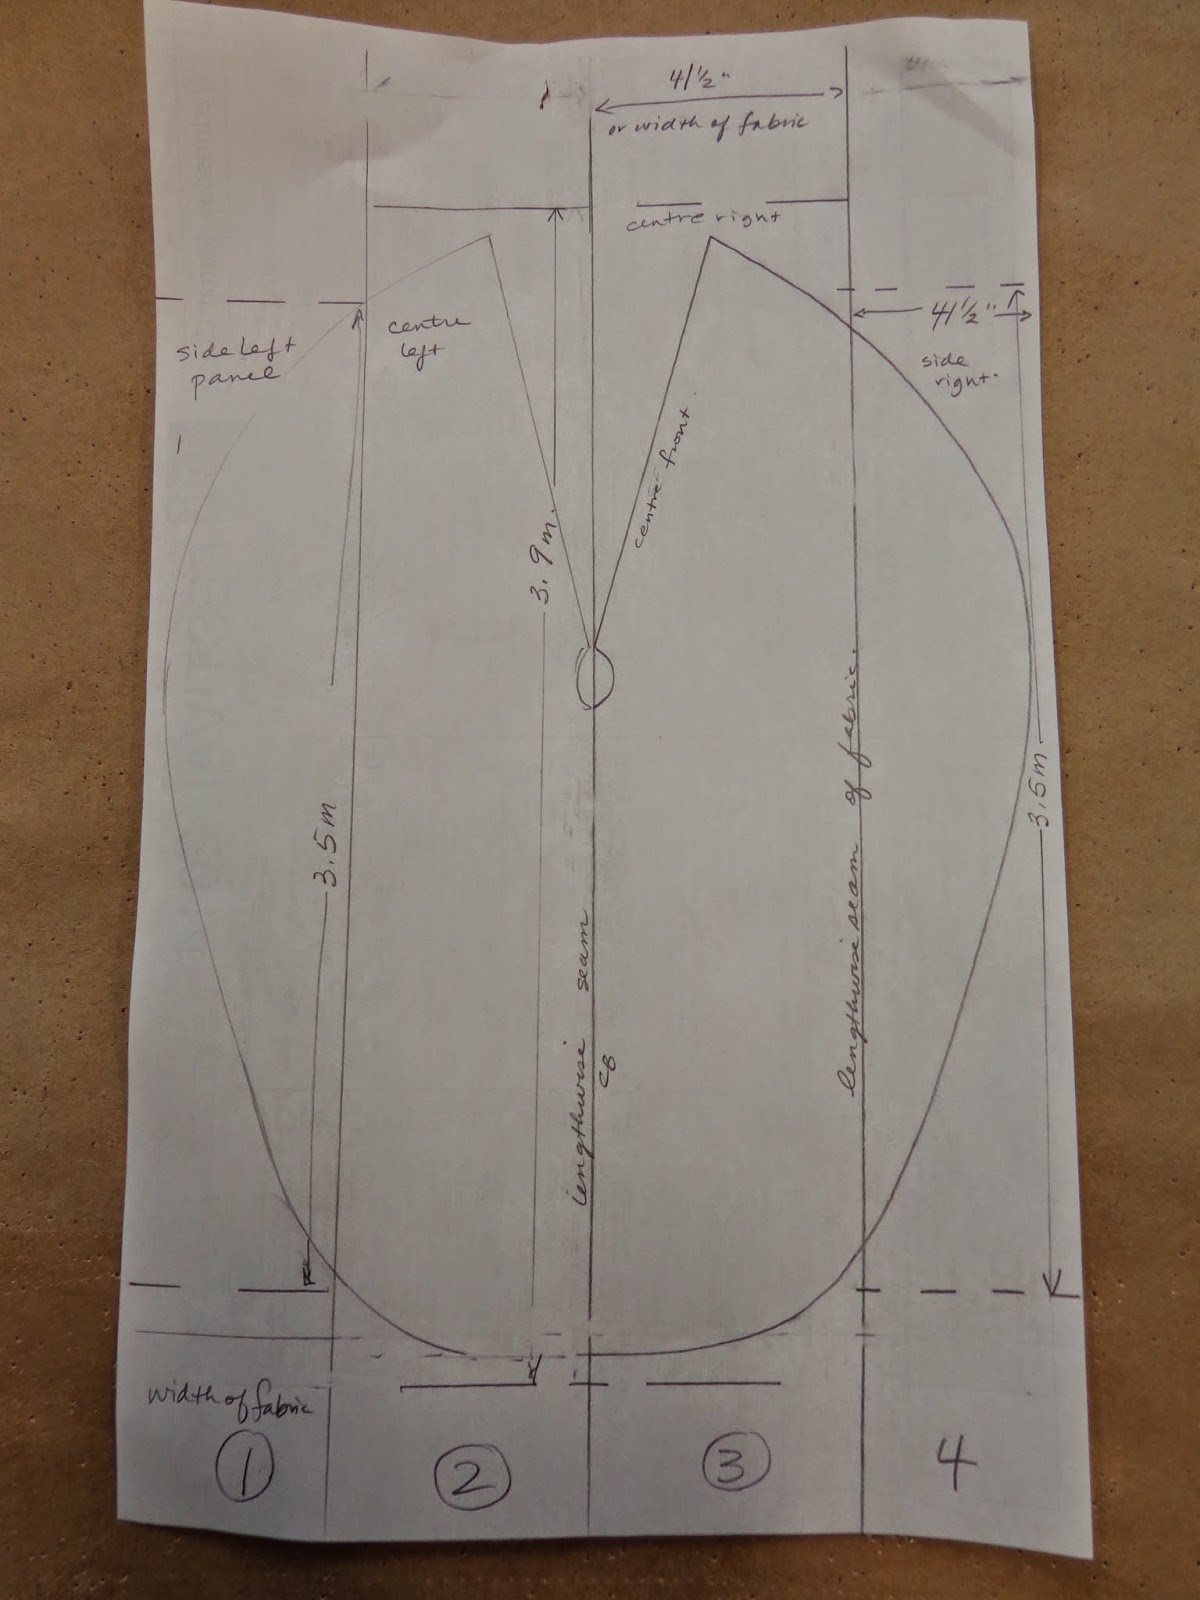
The centre panels are 3.9 metres long.
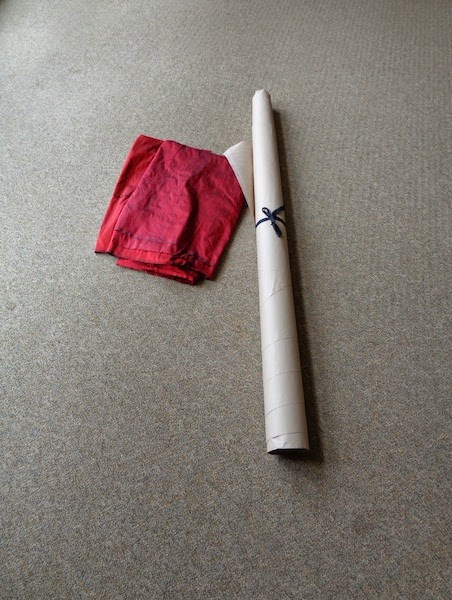
It is floor length and has a modest train of only 24 inches or so, but it is 7/8 of a circle and I had to find another place to work on it, from drawing out the paper pattern, to cutting a half muslin for the designer to look at and for decoration to be placed,  to laying out the pieced panels of velvet and the silk lining.

It doesn't even look big at this angle!
The lobby turned out to be the best place for the task, so this past week I have been up and down between the basement at one end of the building to the third floor level at the other end of the building more times than I care to think about.
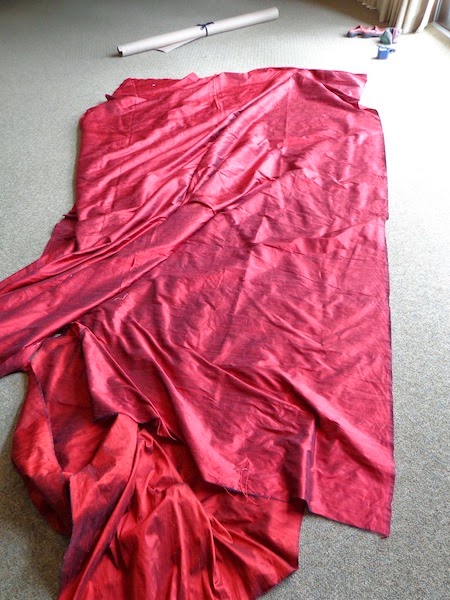
 Laying out the lining.

I think it is coming along now that the panels are sewn.
A heap of velvet, soon to be a cape!
Cotton basted into the front edge and around the neck to provide support.
Next step: cut away everything that isn't a cape!

Now we just have to baste the lining in, and the hem up for a fitting. I am hoping this will be able to be done on the spare tables in the wardrobe proper or else we are all going to be paid by the mile until it is finished! Thanks to Chris and Laurie for helping me on Saturday!

Sunday, February 16, 2014

Dart manipulation and doublets

 I am making a few doublets this year and this one  happens to have horizontal lines of trim which means I will want to move my dart shaping to accommodate the design.


I started with an understructure that is seamed vertically and you can see the shaping that is built into it.
These doublets fit the body quite closely and I often opt for a more modern approach in the understructure, accommodating the body with darts or seaming. It is easier to fit this way and allows us to manipulate the outer fabric over the shape more akin to the period.

Once I have fit the understructure, I correct the pattern and in this case, manipulate the darts into horizontal lines which is where the trim will be featured. You can see that the front dart turns into very minimal darts into the side seam, and this will be easy to ease in. The back shoulder dart and the blade dart/seam reveal the greater amount of shaping required to fit the back of the body. This results in two seams horizontally in the upper back area as they are too large to ease in nicely. The centre back here is on the fold which is how the over layer will also be cut.
After I drew in my lines and double checked that I liked the placement, I then had to mark in the positions of the slashing, and get some samples of the slashing made to see whether the  slashes could just be straight cuts, or should be shaped cuts allowing more of the under colour to show through. The original concept had a flat red silk under the slashes, but it looked a little uninspired, so the designer asked for something with a bit more oomph, so we are experimenting with it here.


As I was getting this prepared for waiting hands, I was reminded about how much time it takes to prepare all the elements of the patterning as well as decoration and to cut all the pieces out. The sleeves also have this treatment of lines of trim with slashing in between and the silk underneath!  
Luckily I have very experienced team members who love the challenge of sampling and trying out ways to get the result we are after and it lets me focus on drawing out all the details.
Maybe a bit too much of the under silk here but it is headed in the right direction.

Saturday, June 29, 2013

A morning's work drafting

 We had a late addition to my workload, so I headed in to work this morning to do some drafting.
I get so much done when I am alone in the room.
No interruptions!
I started the trouser pattern late yesterday afternoon, and finished it up before I started in on the waistcoat and jacket pattern.

I started with my basic grid set up, and draft to the measurements I have- then I modify where I think it is needed. In this case I am dealing with an eight inch chest to waist drop and a drop of five inches waist to hip. So a bigger broader chest and slim hip size. I made a little modification in the back   length as well splitting  the back and opening it up for a bit of a forward head/neck.

The jacket starts with my grid set up as well- and I made a mistake  in my set up, forgetting in a moment of thinking too fast that I had added seam allowance. So something looked odd.  I say it over and over to other cutter's apprentices and stitchers that if something looks wrong it probably is,  so stop and retrace your steps.
I was drafting in pen to try to make it visible in photos, so you get to see the mess I made!
A bit further into the process, I think on paper, at this stage I change my mind and the lines as I make adjustments on the fly.
I made a further adjustment after getting the pattern cut out, I needed to create a bit more breadth in the upper chest area only.
I had to leave at noon, so I left it to percolate around in my head for the rest of the week end. The fabric should arrive Tuesday morning and I need to put the scissors to it right away.

Sorry about the photo quality, had to be quick about it all and of course the camera battery chose today to run low!

More later.....