Showing posts with label shirts. Show all posts

Sunday, March 5, 2017

A draped shirt

While I wait and wait for a fitting to find out if my pattern changes for scoliosis were successful, I thought I would browse back to last season just to see if there was anything interesting that I didn't have time to show you.

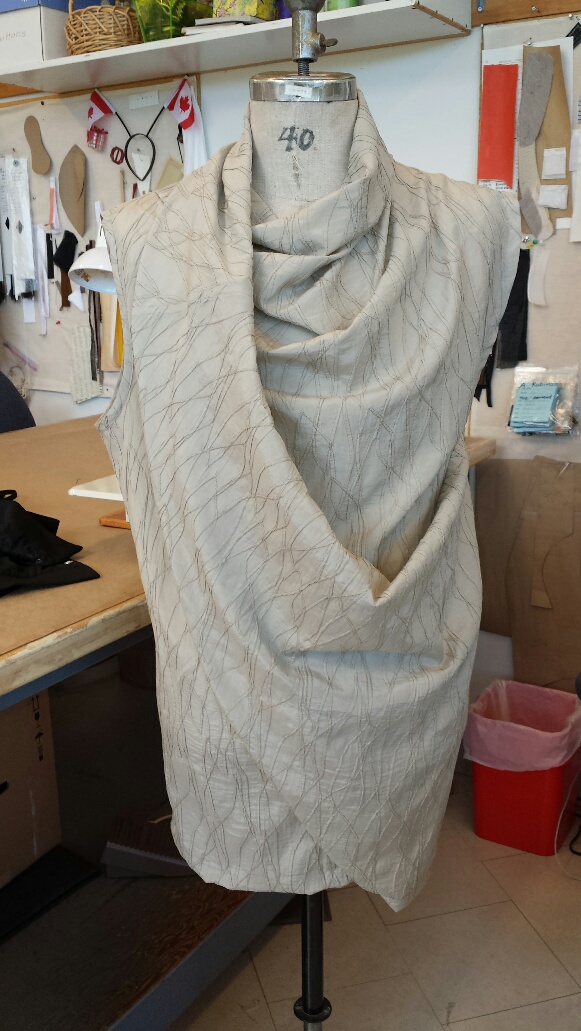
Ahh, I did find something- a draped shirt.
I don't often get draped garments in my work assignments, but I was delighted to see that one made its way to me last summer.
It is a nice challenge to make yourself think in slightly different ways and this certainly made me do that!

Here are some photos of the final shirt, the muslin toile  and the final pattern pieces

 The final shirt was made in a beautiful embroidered silk.
 It is sleeveless, and the back is quite plain. It also requires a centre  back seam.


 Not as nice in muslin, but I had to make sure it worked before cutting into expensive fabric.


Here you get a peek at what is going on around the neck. this is the area shown in the upper right area of the pattern pictured below.

The right shoulder (on the left side of the pattern below) is pleated to the back shoulder length. 
Even after making this, I kind of look at it with a bit of a head tilt, trying to make sense of the pattern. 

Below is the pattern piece for the left back of the shirt. 
The upper left area of this pattern piece (below) joins to the area in the upper right of the picture above and that ends up wrapping around the neck.The other half of the back is not shown. It was a basic shaped piece, with CB seam, side seam and a normal armhole shape.

Somewhere, we have some notes on the seaming techniques that we used to make this, which I should dig out and photograph as well, because once these costumes are done I mentally let them go- so the blog is a place for me to look back for reference!

Sunday, October 5, 2014

pint size

I have to say that making patterns for the woman's costume was a lesson in scale.
Having just made patterns for the men, the woman's pattern was unfamiliar in terms of what I usually see on my table.
It challenged me to some degree.
This week, I took on a project that challenged my sense of scale even more.

This is about half the chest size of the last men's shirt pattern I made! About half the hip size too for the trousers.

Since my daughter is now an adult, it has been a long time since I made something in this size.


I did find a child size hanger though.

This was a request made through a dance/skating connection, and although I am busy with the Opera project, I couldn't resist this.

I had a fitting yesterday, and all went very well. I will let you know what it was for after the event, as it is to be a bit of a surprise for the audience.


Monday, February 3, 2014

vintage shirt donation

I was walking by the office the other day and noticed a number of shirts, freshly laundered and just hanging on the back of the door.
It turns out that they were a donation.
These are old shirts.
I don't want to quite hazard a guess, without doing a bit of research, but I took some photos to show you. I want to say WWI era to 1920's but I am leaning towards earlier.
They are in very good to fair condition, the fabrics are still bright and crisp, and have been well taken care of.
They are French, as in from Paris, not Quebec.
The labels read David, 32 Ave de l'OPera, Paris. Each shirt has some kind of number hand embroidered in the side seam gusset, which I assume is for laundry services.
They are made with a combination of hand and machine stitching. The buttonholes are all hand made, the machine stitching is tiny tiny tiny- I bet more than 24 stitches per inch. I will have to get closer and count.
A variety of details:
Some of the shirts, such as this one, pull on over the head, some button up the front. One has a contrast bib front in a striped fabric. All have the small band collar made for wearing a detachable collar. This one has fullness gathered into the back yoke, and a small pieced section on the back of the sleeves. The cuffs are interfaced with something very stiff, I had to wet it and press with a hot iron to uncrumple them. I haven't taken any measurements but they are ample in the body, longer in the back and have small hand inserted gussets in the side seams. The seams in general are about .5mm wide, as is the hem.
The armholes are felled with quite a wide finish- 1.5cm or so by guessing.


Maybe someone out there has better sleuthing skills or more time to spend looking for information. I wonder when this business was  operating in this location?

More to come as I have them pressed up and measured.

Saturday, October 19, 2013

Velvet survival

 Well, it seems that I have survived the velvet  after all.
It did require a bit of careful basting, especially when dealing with the collar. I used a heavy shirt fusible in the collar stand, but only one layer of lightweight interfacing in the fall. The velvet is not overly heavy, but it has more thickness than a regular shirting. The fall of the collar therefore needed to be a bit deeper to account for the turn of fabric at the top edge.
In the top picture I still had the top collar edge  basted because I wasn't sure it would look alright with a top stitch, or would behave under the presser foot of the machine. It did in the end.


The design called for the shirt sleeves to be rolled up, but of course the backside of the velvet would show if I made a regular shirt sleeve. Instead, I made a separate tubular cuff
and attached it to the shortened sleeve of the shirt. The cuff then folds up onto itself a bit and it is tight enough not to slip down the arm.

To finish it all off, it is attached to a brief, which keeps it looking nice and tidy no matter what movement is happening in the upper body. It also prevents the shirt hem from bunching up when it is tucked into the trousers.

I didn't put buttons on it, just sewed snaps on to close it up to the mid chest line, so nothing distracts from the velvet, which is a really fabulous colour I must say. Very flattering look, deep colour, simple cut, and rich looking fabric, and not as bad to sew as I had thought.

Thursday, October 3, 2013

Forgive me if I cry

Oh please forgive me if you see me crying, for I am sewing velvet. Stretch velvet....
Denise the velvet queen will be laughing, I know it! She will be thinking finally the cutter gets to share in the challenging fabric department!
I'll post again after I emerge with a finished garment. Don't tell her- it is not as bad as I thought.

Wednesday, January 16, 2013

Almost finished or A rack of suits


Oh, we are almost finished the project!
I started bagging up the suits today. I tagged them and double checked everything.
It is very gratifying to have accomplished all this work.

We made five complete tail suits, which included altering the shirts, adding dance briefs and quick changing the bow ties by snapping them to the collars.
We also made 9 other suits, five of which were three piece suits, plus an extra pair of trousers.
We put period collars on the shirts, and quick changed some of them as well.

I put the last eight buttonholes in today as well, so that is done too.

I need to box up the remaining fabric, finish up my paperwork and arrange delivery. I am looking forward to seeing them worn when the show techs.

Next week I start back at my regular gig, and I will be working on three very different shows: Fiddler on the Roof, Mary Stuart, and Blithe Spirit. It should be interesting, and I will keep you posted.

Wednesday, March 28, 2012

sequined shirt fronts


The last minute panic has set in! Since I seemed to be finished with this show, when something the designer had hoped to purchase was delivered in the wrong colour, I got the assignment. Last week Friday.
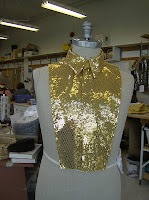
Help! we need eight faked shirt fronts made in a week. In sequined fabric, in four collar sizes, to be worn under costumes that were being made elsewhere.

The sequined fabric was ordered last Friday afternon and landed on my table this Monday afternoon. The backing fabric came yesterday, so we are up and running.

I have to say that making a faked shirt front is almost like making a whole shirt, it is just the sleeves and cuffs that are missing. Therefore they do take some time to put together.

Most people, including some designers, management and the general public really haven't thought about how many pieces need to be cut out for just one garment. Then it all has to go together, and be quick changed up the back just to complicate things a little.

Anyway, onward....
The backs won't be seen so I am not covering that area with sequined fabric. The same with the collar stand as the only visible area is at the front, and that is covered by a big bow tie. Besides there only so many layers of sequins that you can work with.

Here's the list of pieces that need to be cut for each one:
base fabric for fronts (2)
interfacing for CF of fronts (2)
sequin fronts (2)
base fabric backs (2)
interfacing for backs (2)
base fabric for collar stand (4)
interfacing for collar stand (4)
stiff interfacing for collar stand (2)
base fabric for collar fall (2)
interacing for collar fall (2)
stiff interfacing for collar fall (2)
sequined fabric for collar fall (2)
interfacing for sequined fabric collar fall (2)
velcro to close at CB as this is a very quick change costume, otherwise I would use snaps.
bias binding to finish the outer edges

Luckily I was offered a junior seamstress to do the sewing, so I cut two out, one for her and one for me and I spent part of the day today, taking her through the construction, step by step, working out all the details.

I find that I am much better with the fabric in my hands, showing the steps as we go rather than just verbally going through it- and by the end of the day, she/we had two complete and the third part way except for binding around the edges, which we will do when they are all done. I left her to do the finishing on mine while I went back to my regularly scheduled work which now feels like I am behind on.
Oh well.....I think she will be able to get them done by Friday, but I still have to cut them out for her!

Friday, March 2, 2012

sequined T-shirt


Here we are ready to fit our sequined T-shirt.
It has been flat mounted on a nude coloured lycra, then basted together with a zig zag stitch. I didn't cut it with too much ease, so I have seam allowances to let out if I need to make it bigger, but it doesn't look bad on the stand.
The front placket area has been stay stitched and Silvia found a bit of shiny fabric to simulate the collar fabric, so, just waiting now for the fitting to be scheduled. No control over that scheduling, and we didn't get it today, so I am crossing my fingers that it happens tomorrow.

I may have to attach it to a dance pant, I should have prepped one!! Maybe I can do that first thing in the morning.

FYI: a dance pant or pantie, is a stretch brief that is attached to a shirt. Usually the shirt hem is shortened so it is only hip length where the dance pant is attached, and it reduces the bulk of a tucked in shirt, and keeps the shirt from pulling up out of the waist of the trouser or at least limits the amount that can blouse above the waist. It also keeps the costume looking the same every time it is worn.

The trouble with attaching this t-shirt it to an inner pant is that this shirt is a pullover, which means that the pantie will have to be detachable at the front so he can put it on.
That doesn't make it better for a possible quick change.
Hmmm.......well we'll see how much time he has to change in and out of it and how bulky it is tucked into lycra trousers.

And you thought oh well, it is just a t-shirt, simple right?

Saturday, February 25, 2012

the sparkly part of the job


Today I received the sketch and some reference for something sparkly! yeah!
The sketch is lovely but I will just show you the reference here which is a look worn by Gene Kelly.
I have to make a pair of flat fronted period cuffed trousers in this lycra with vertical spakly stripes and a golf type T-shirt in a stretch net with broad bands of tiny sequins.
How much fun is this?
The pants are already cut out and in a basket ready for the next lucky stitcher who finishes what they are currently working on. (I can't tell if they are looking forward to it or not, hmmm...)
The shirt required a little sample in black and white drill for me to figure out the contrast placket, facing and collar which will be in a solid sequined fabric in silver. The body of the shirt will be flatted onto a flesh coloured base fabric so it will appear to be see through, but that will conceal the construction details of the placket and facing. The shirt fabric you can see at the neck of the stand where I pinned it before trying out my collar idea.
I think it is going to look great, and it is fun to do a little bit of the glittery bits amongst the wools.
This look should also be ready for a fitting next Friday when our designer is in house.

Tuesday, August 18, 2009

more detachable collars

Here is an example of the collar pattern made from one of the paper collars
in the last post. With it is a mock-up of a turn down collar and a stand collar.

The turn down collar might be called the "Marley" if I remember correctly.
All the collar styles had style names and they were embossed into the paper or stamped on the inside of the cotton starched collars.

This collar has a deep stand and fall. It also has an extended front on the left side, that tucks under the front portion of the right hand side of the collar when it is done up. The collars and shirt fronts lap left over right for men's wear.
I make the mock-ups out of a specific heavy interfacing, cut raw, with slits as the buttonholes for the collar studs to go through.
They would be tried on with a band collar shirt that has a buttonhole at the centre back of the neckband for the short stud to go through and two buttonholes at the centre front for the longer stud.
The stud goes through the shirt band holes first, then through the holes in the collar, so the front stud needs to be longer to pass through more layers of material. It usually has a pivoting head to help it go through the buttonhole, then you pivot it back to a flat position and voila. You now have a shirt with a collar.

Sunday, August 16, 2009

detachable paper collars

As I was packing things up the other day, I remembered that I had brought these paper collars out of the storage room for style options for one of the shows.

We have boxes and boxes of all styles of these detachable and disposable paper collars.
We also have boxes and boxes of vintage detachable starched cotton collars in sizes from 14 1/2 to 20.

Most of the styles that Arrow and other collar makers had to offer are in those boxes. I don't know who originally got them for the theatre, but they are valuable resource for us.

I remember when we used detachable collars more often then not (I mean in the theatre, I'm not quite that old!)
but with the labour costs as they are now, the wardrobe maintenance department can't afford to be boiling and starching collars. We will often, but not always end up making a new collar and sewing them right to the shirts instead.

So, I will retrieve some samples, make a pattern from the samples, grading up or down if I can't find the right size and make a mock-up for a fitting.